|
|
 Author Author |
 7012 Project thread (currently 18,338 views) 7012 Project thread (currently 18,338 views) |
| admin |
| Posted on: November 20th, 2011, 15:34:04 |
  |
|
 Administrator Administrator


Location: Maidenhead, UK
Posts: 2,377
Reputation: 1 (tot: 1) |
|
|
|
|
  |
Reply: 60 - 96 |
|
 |
| dalla |
| Posted on: November 20th, 2011, 16:51:43 |
|
|
Medium Member


Location: Aarhus Denmark
Posts: 112
|
|
Perfect, cheers mate. Think i will try if the Minilite ones fit first. I like the look of the alloy ones. |
Mini Marcos Mk.II 7012
Dennis Overgaard Nielsen
Denmark |
|
|
|
| |
Reply: 61 - 96 |
|
|
| dalla |
| Posted on: November 26th, 2011, 20:25:47 |
|
|
Medium Member
Location: Aarhus Denmark
Posts: 112
|
|
“ |
Quoted from Allan Brown, posted September 17th, 2011, 19:02:24 at here |
” |
The article about replacing the cross member is in club magazine 115.
I have some spare copies, if you join the club I will send a copy to you.
Allan
|
|
Hi Guys
Iam back home from Japan, and need to get started on the MM soon again. My new subframe is waiting for me at my parents place, so will have to go a pick that up soon. Unfortunately i got my daily car sold, while i was in Japan, so i need to get a new one sorted ASAP. I also need to do a few bit and bops on the Lotus soon. But it is the MM that i look most forward to work on.
One thing though, i have been looking in my new MMOC magazines. And i have discovered that issue 115 covers the cross member replacement on a mk IV. Any idea of which issue it is that has a story about a mk III? |
Mini Marcos Mk.II 7012
Dennis Overgaard Nielsen
Denmark |
|
|
|
| |
Reply: 62 - 96 |
|
|
| dalla |
| Posted on: December 13th, 2011, 22:42:56 |
|
|
Medium Member
Location: Aarhus Denmark
Posts: 112
|
|
Hi Guys
A little progress today. As mentioned above my fully equiped 200 hp Seat Altea FR sold while i was i Japan. I have been home for a good 2 weeks now, and have been searching for a cheap runaround, as i don't really drive that much. After a good deal of searching i ended up with this Fiat Punto.
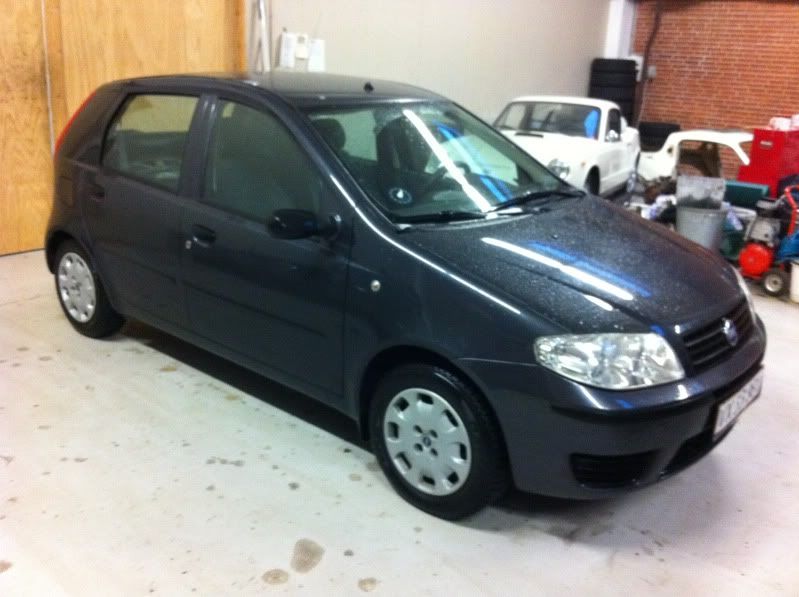
It is very basic (i better get used to it, for when the Marcos gets on the road), but it allows me to get to the garage.
So today is the first real progress since i came home. That is appart from collecting some parts at my parents place.
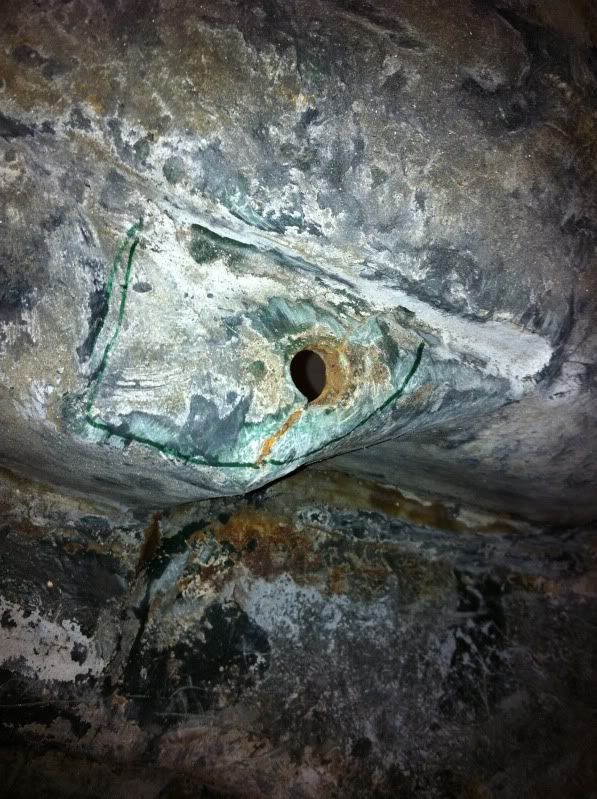
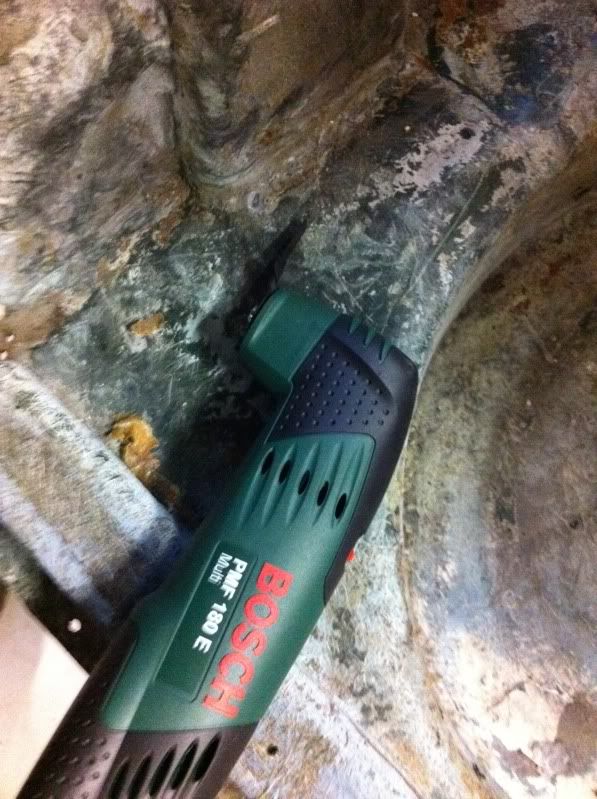
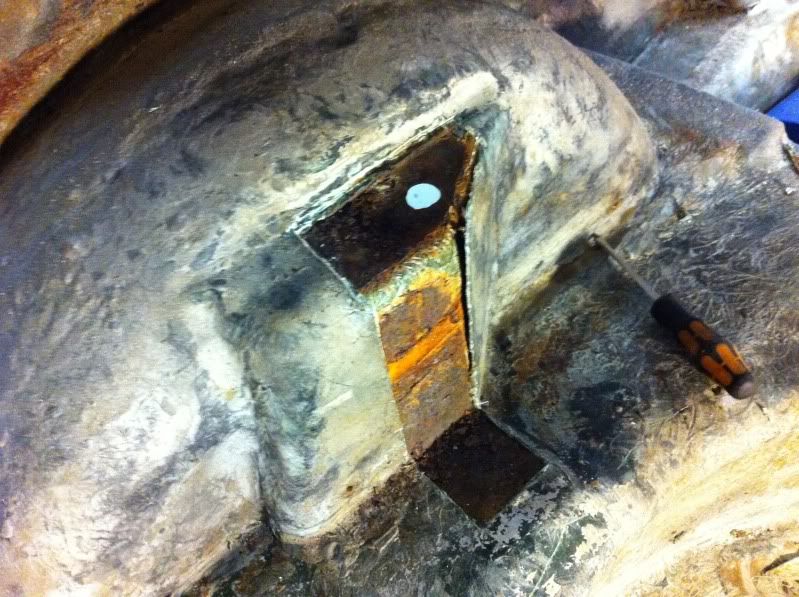
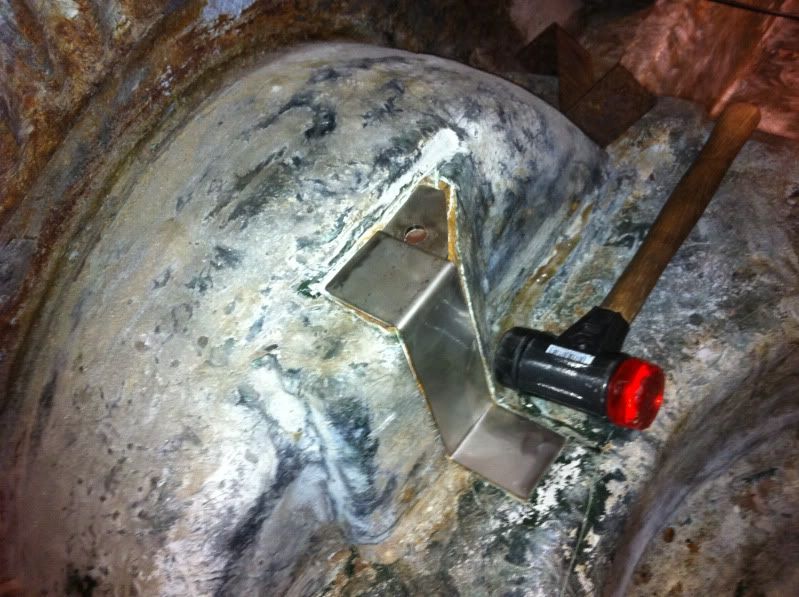
The plan for today was to try and cut out the metal in one of the rear schock towers, as it was very obivous that there was rust in there.
This also gave me a chance to test my new oscillating saw. This i genuinely the best tool i ever bought. Very effective.
This is how it looked when i got it "opened" up.
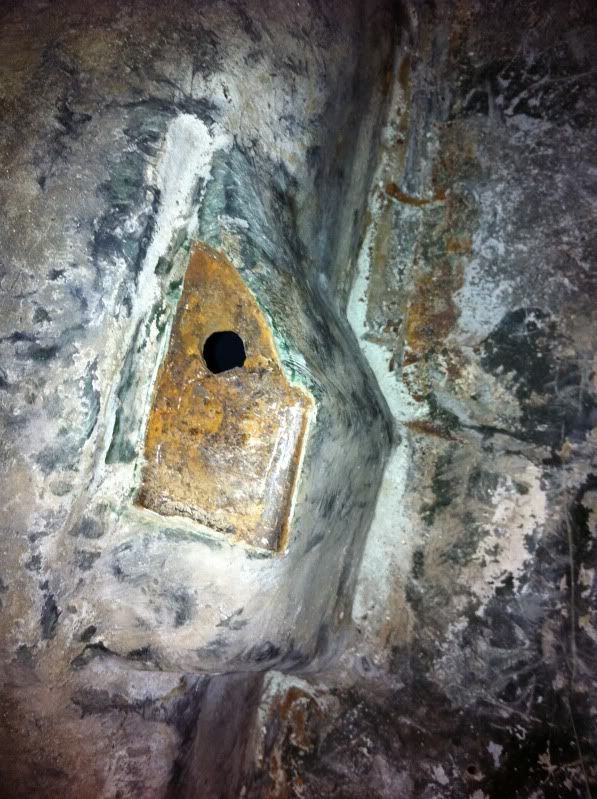
A bit more
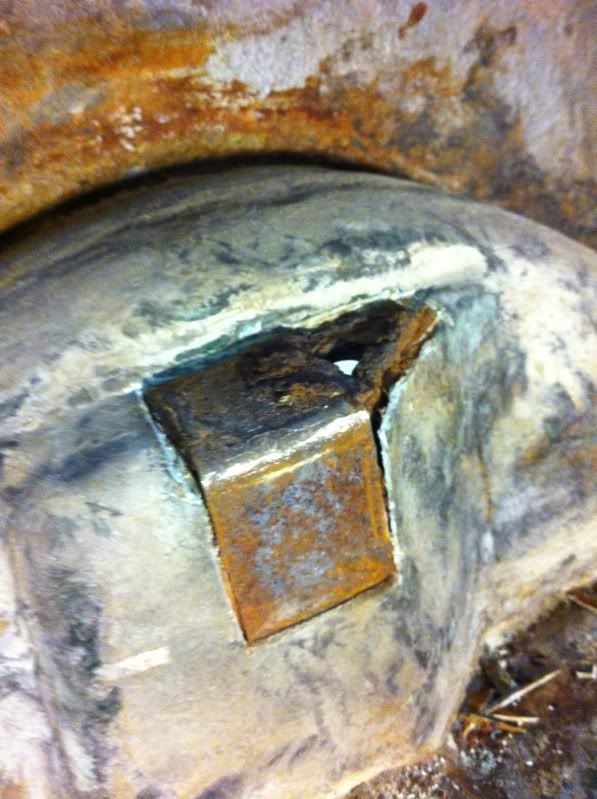
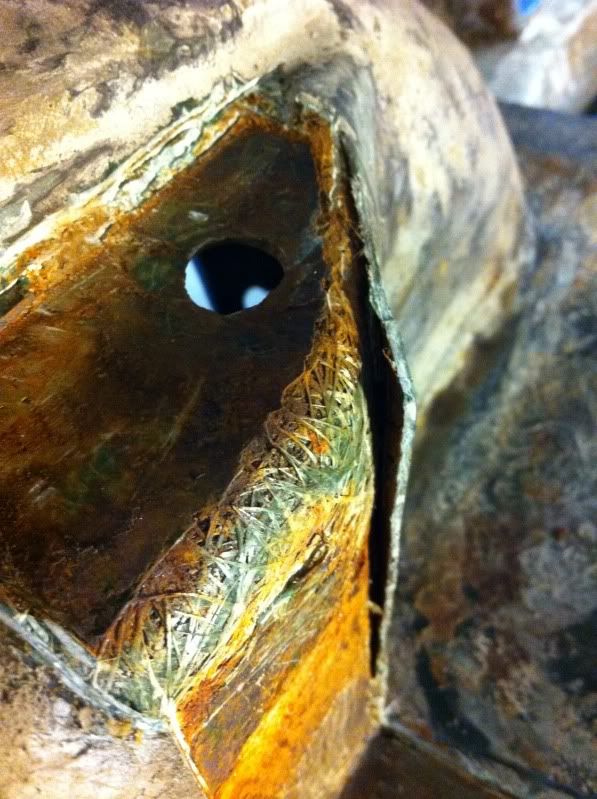
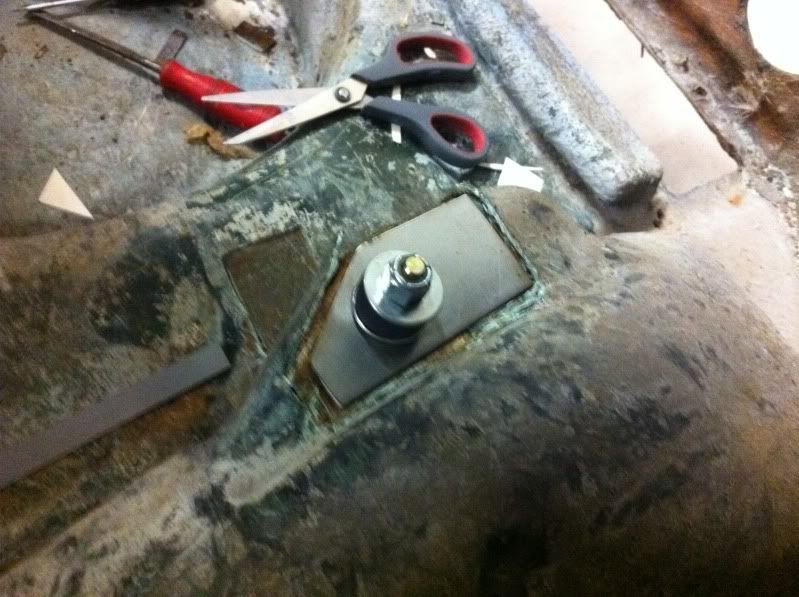
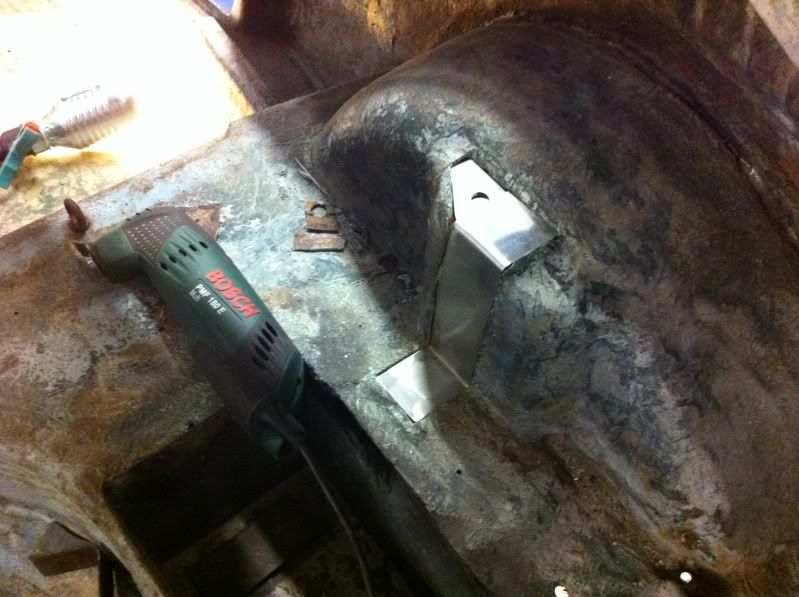
After more caerful cutting i finally got all of the metal exposed, and i could pull it out.
The new saw is really good for this, as i can cut very precise, so that the new piece will fit exactly where the old one was positioned.
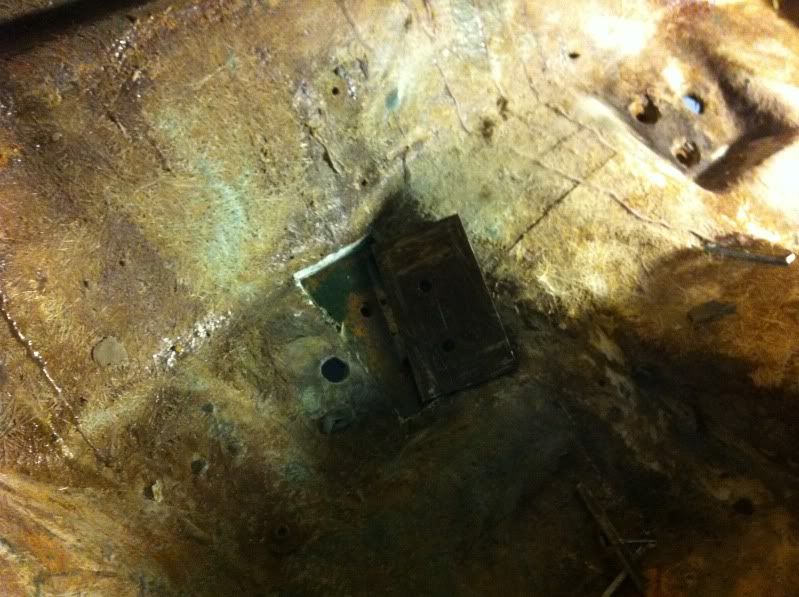
Top plate was in quite bad shape.
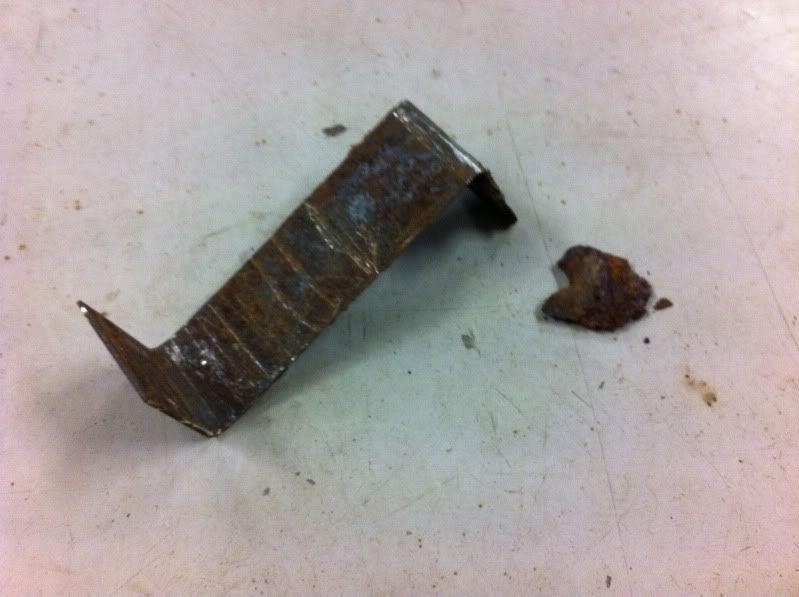
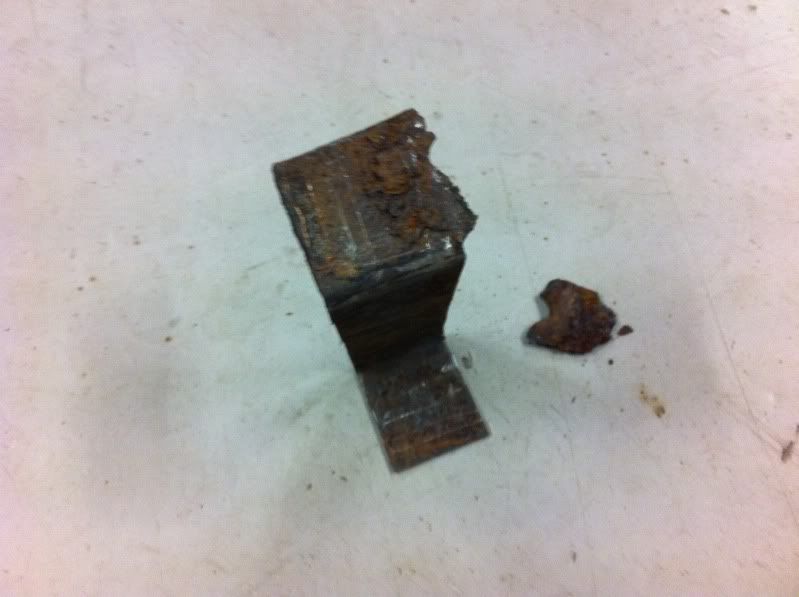
This is what it looked like underneath.
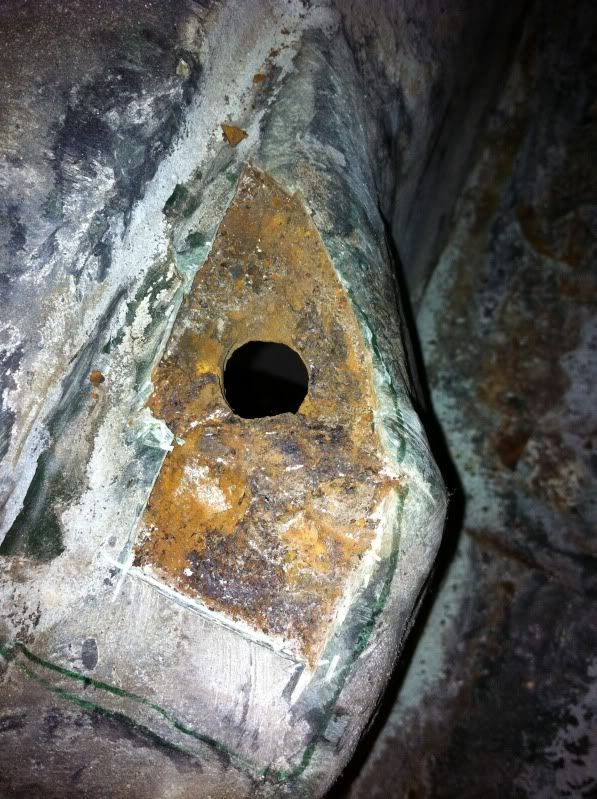
I then proceeded with making a template for the new topplate.
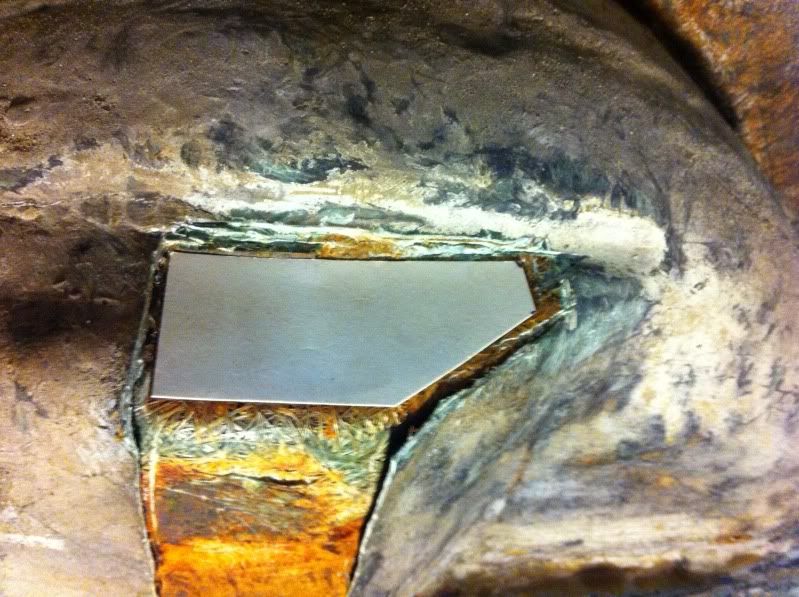
I had some stainless plate laying around, so i transfered the template to this.
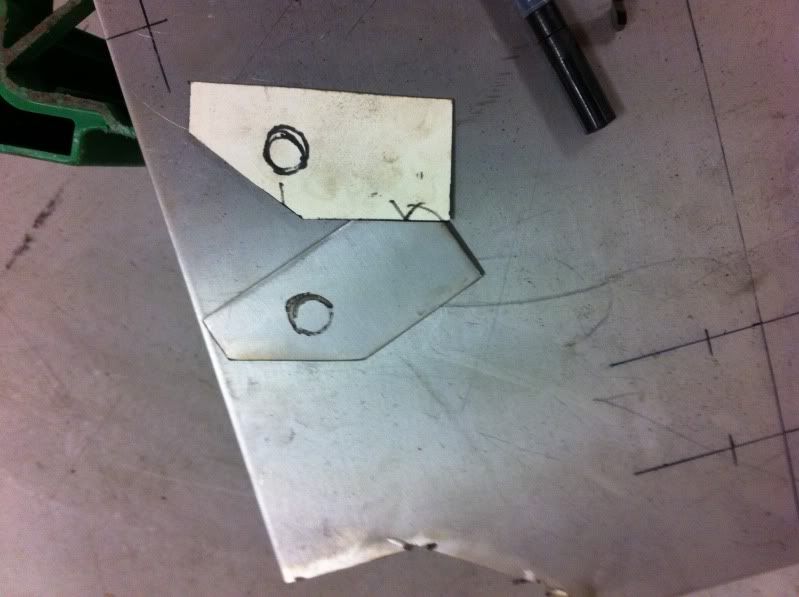
The rest of the metal structure will also be made in stainless, but it need to get some from work tomorrow, as i dont have the correct thickness.
I did a quick test with my new schock absorbers, just to check that it didn't hit the inner arches.
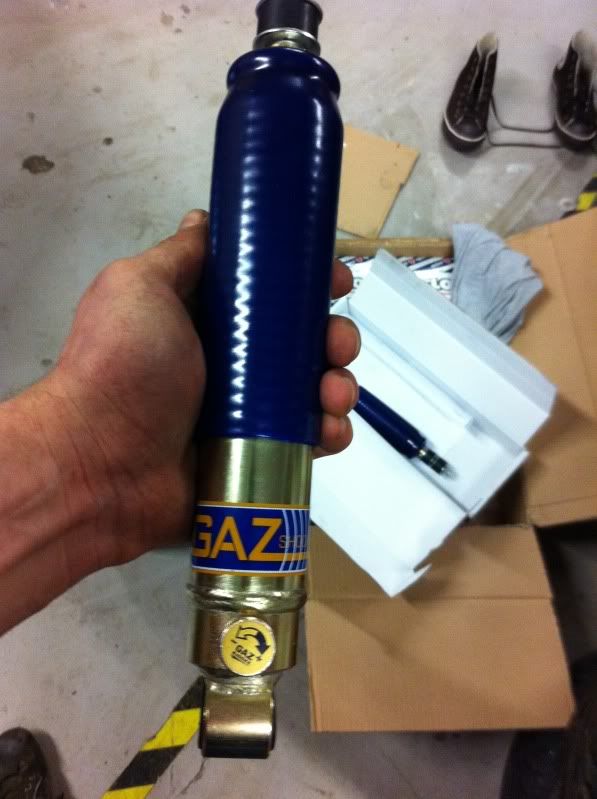
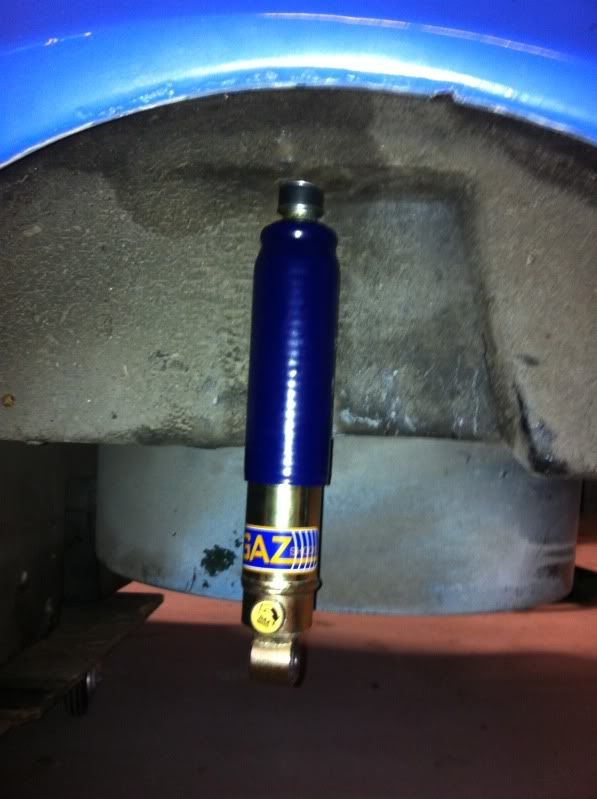
All looked to be well, but the thread that goes through the tower seemed to be just on the short side. Any experiences with this? Do i need to trim the rubber bushings on the shock?
After this i decided also to cut out the reinforcement for the steering rack. This came out without any big troubel.
Tomorrow i will fabricate new plates for both shock towers and for both steering rack mounting positions. And on thursday i have to go pick up my new rear subframe.
So this i basically all for now. More to come probably on friday.
|
Mini Marcos Mk.II 7012
Dennis Overgaard Nielsen
Denmark |
|
|
|
| |
Reply: 63 - 96 |
|
|
| dalla |
| Posted on: December 13th, 2011, 22:48:06 |
|
|
Medium Member
Location: Aarhus Denmark
Posts: 112
|
|
| Ohh yeah, allmost forgot. If anyone can advise on how best to apply new fibreglass to the towers and steering rack mounts, i would really appreciate it. |
Mini Marcos Mk.II 7012
Dennis Overgaard Nielsen
Denmark |
|
|
|
| |
Reply: 64 - 96 |
|
|
| Neil KilBane |
| Posted on: December 13th, 2011, 22:56:26 |
|
|
Maximum Member2


just a little fine tuning left to do.
Location: Newtown Forbes, Ireland
Posts: 1,416
Reputation: 0 (tot: ) |
|
| Are the washers on the bushings of the shock stepped ? |
|
|
|
|
| |
Reply: 65 - 96 |
|
|
| dalla |
| Posted on: December 13th, 2011, 23:20:20 |
|
|
Medium Member
Location: Aarhus Denmark
Posts: 112
|
|
| Yeah they are stepped. Looks like the high part of the washer should fit against the bodywork? |
Mini Marcos Mk.II 7012
Dennis Overgaard Nielsen
Denmark |
|
|
|
| |
Reply: 66 - 96 |
|
|
| dalla |
| Posted on: December 15th, 2011, 14:52:56 |
|
|
Medium Member
Location: Aarhus Denmark
Posts: 112
|
|
| Can you explain a bit further on the washer thing Neil? |
Mini Marcos Mk.II 7012
Dennis Overgaard Nielsen
Denmark |
|
|
|
| |
Reply: 67 - 96 |
|
|
| dalla |
| Posted on: December 17th, 2011, 14:36:10 |
|
|
Medium Member
Location: Aarhus Denmark
Posts: 112
|
|
Hi Guys
More progres yesterday. I went and bought some fibreglass supplies.
This is the first time ever i have tried working with fibreglass. But i have bought John Dickens fantastic book, and also have another handbook, from when i had my Super Seven and was thinking about making a hardtop.
But as this was the first time, i decided to start somewhere easy. I chose the steering rack fixing points. I made up a new stainless plate, and had a go with bonding it in. It worked out very well, and i am really pleased with the result. I does need a few more layers though.
My garage is pretty cold at the moment, and therefore i decided on using Polyester resin. Iam not sure wether i need to use epoxy when i start tackling the rear shock towers? Any experiences?
As for the shock towers, i also used yesterday for finishing the new stainless inserts for the towers. Just need to get a hold og a TIG welder to tack the together.
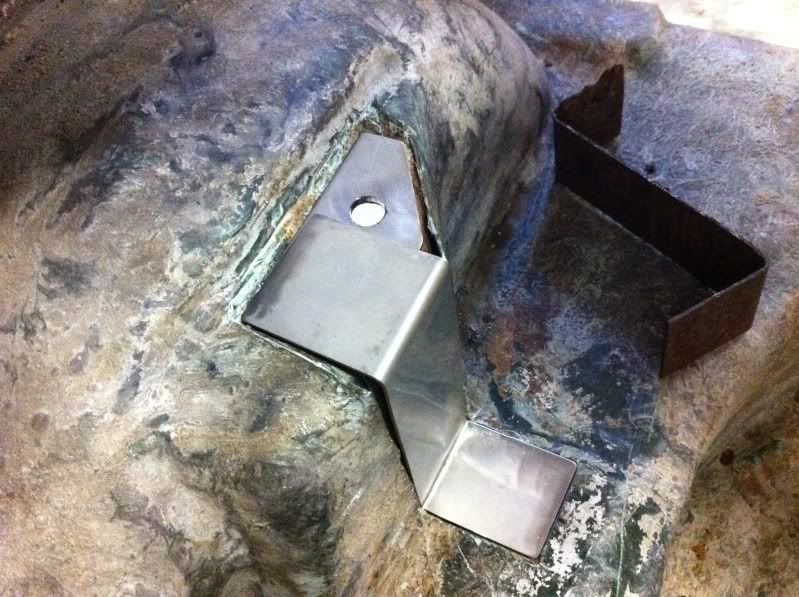

Hopefully i can get a permit to go to the garage tomorrow, and finish up on the steering rack mounts.
More to follow. |
Mini Marcos Mk.II 7012
Dennis Overgaard Nielsen
Denmark |
|
|
|
| |
Reply: 68 - 96 |
|
|
| dalla |
| Posted on: December 20th, 2011, 16:24:25 |
|
|
Medium Member
Location: Aarhus Denmark
Posts: 112
|
|
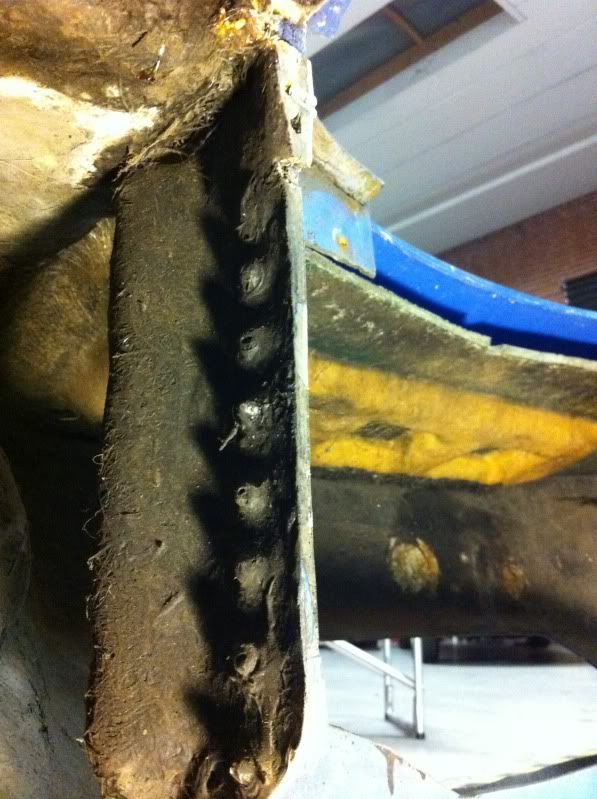
Hi Guys
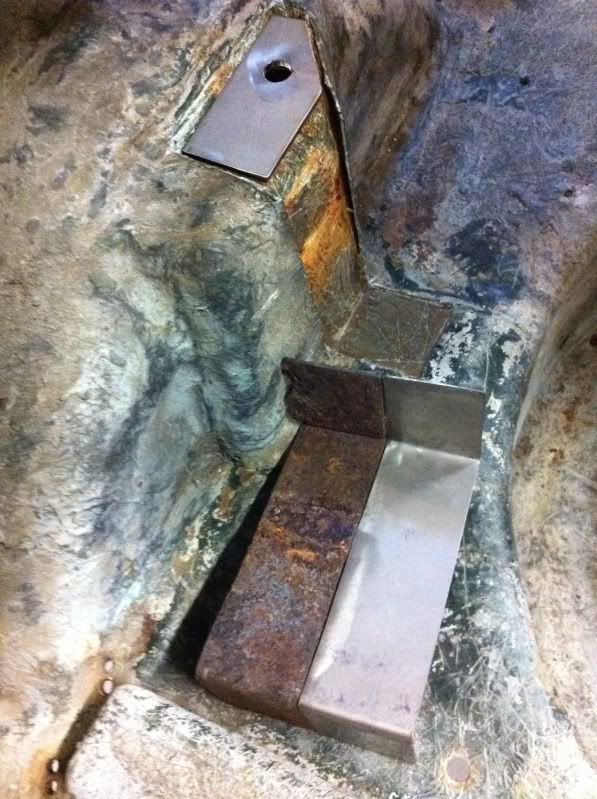
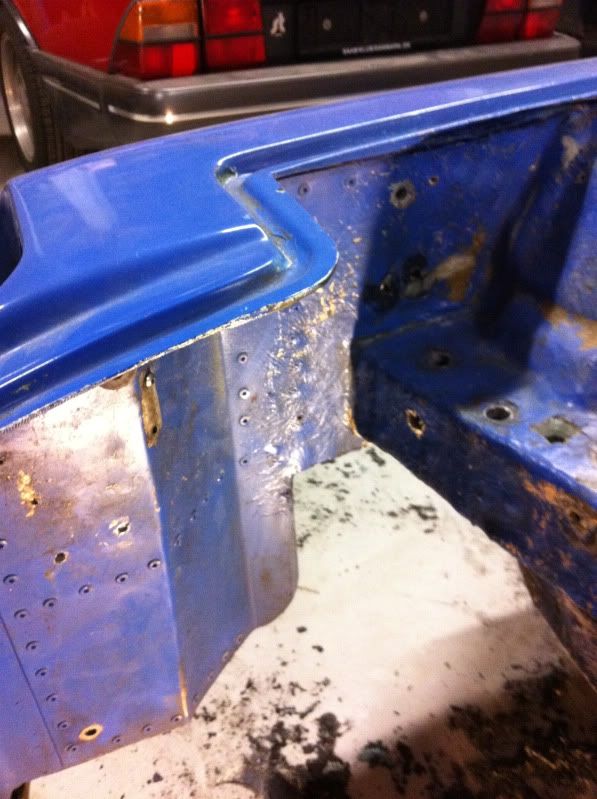
A bit more progress. I started up yesterday with repairing the other side of the steering rack mount. I also closed the RHD hole for the steering collumn, as the car will be converted to LHD. I also found that the hole was hacked totally up, and it had a bodge repair that was delaminating. All this was cut out, and closed up.
All to do here now, is to open up the top parts of the holes with a small hole saw, in order to allow the nuts to rest on the metal.
LHD side:
RHD side opened up:
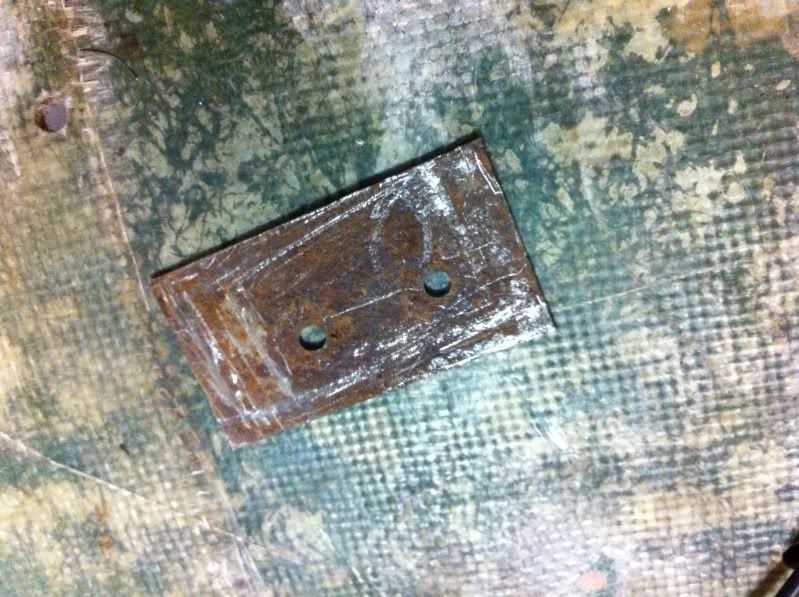
New stainless plate:
Bodge repair:
Forgot to get an after pic, but it basically looks like the LHD side.
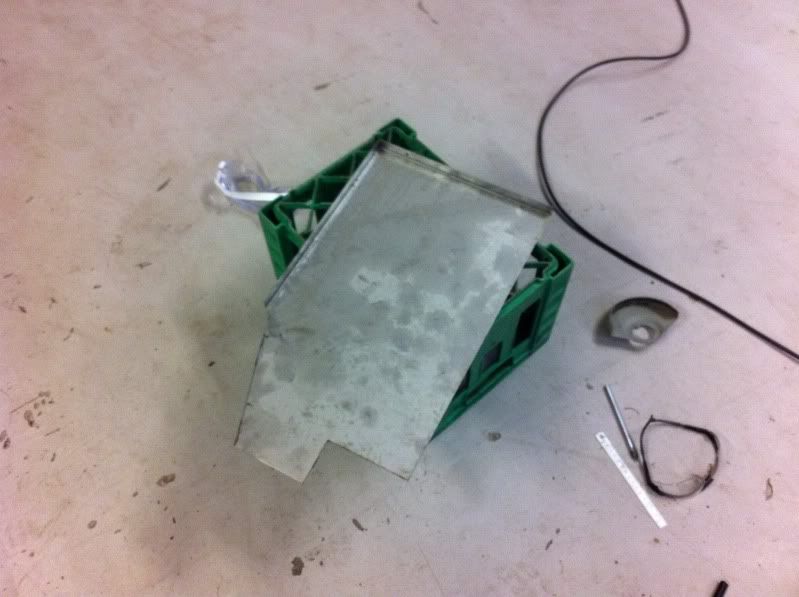
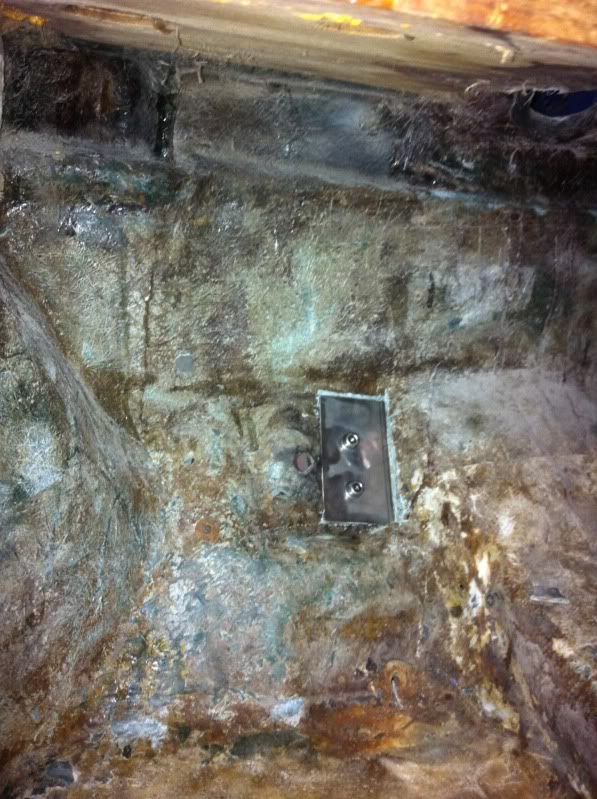
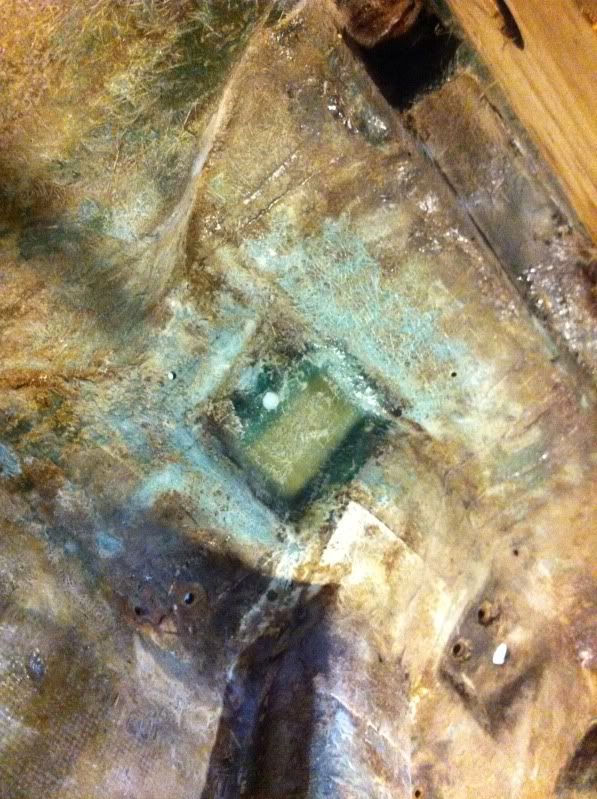
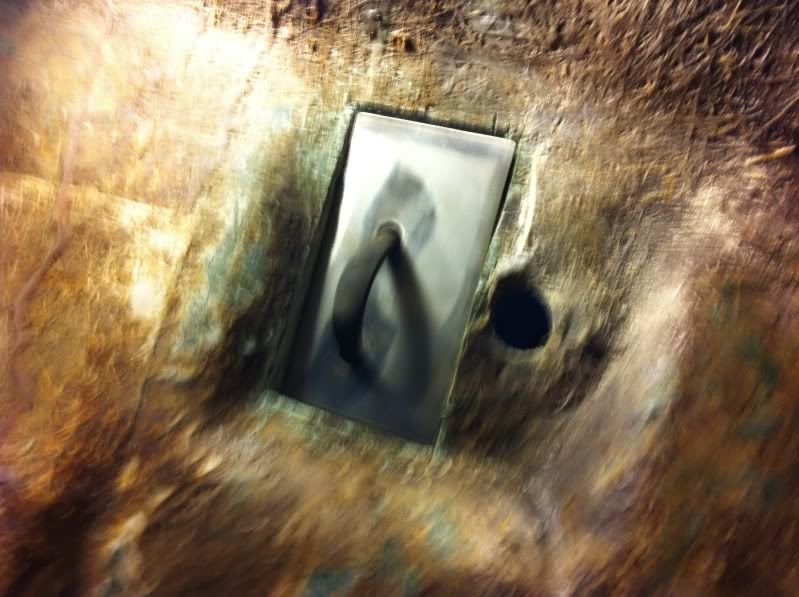
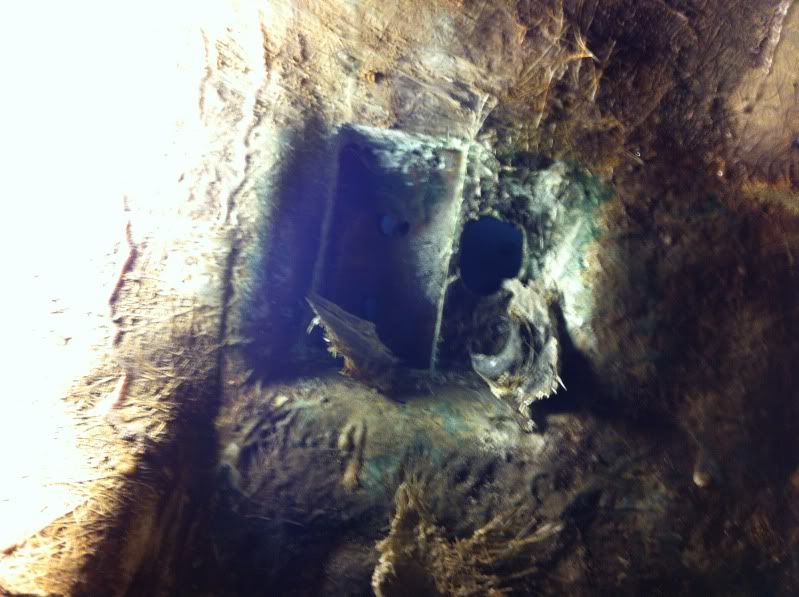
I then started to look at the front section of the car, and found something quite disturbing. First of all, all of the inner fenders and the bottom of the car was covered in under sealant. It was a pain in the *** of a job to remove it, but i got most of it off. Then i focused on an inlet for the heater, this was laminated into the inner fender (where the hole is). When i got it wrestled of, a big part of the inner fender started to delaminate.
Undersealant removed:
Hole in inner fender:

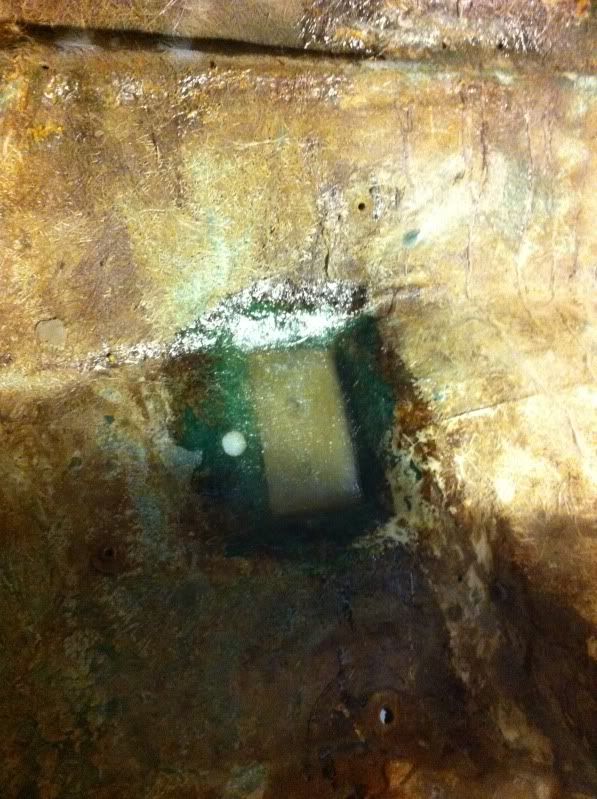
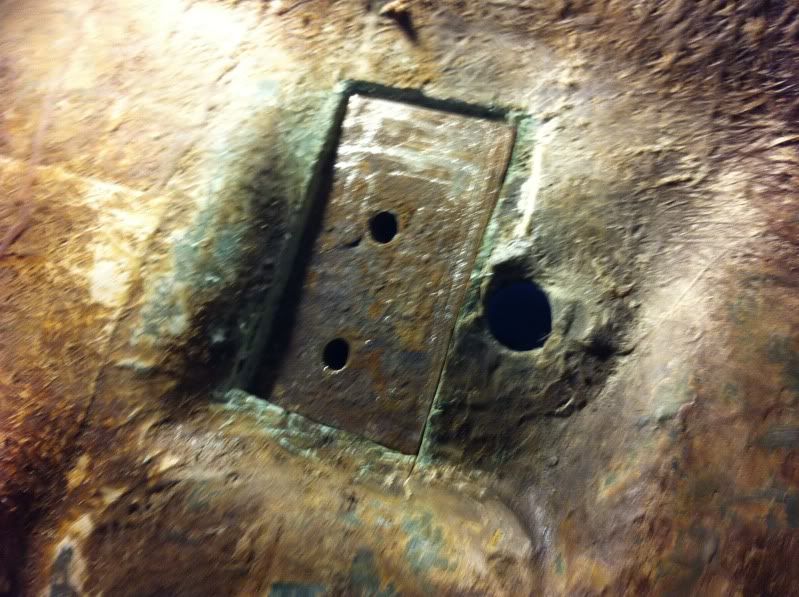
It is caused by some aluminium sheet, that has been bonded into the innerfenders.
When i chose to rip all of the delaminated fibre glass of, this was revealed:
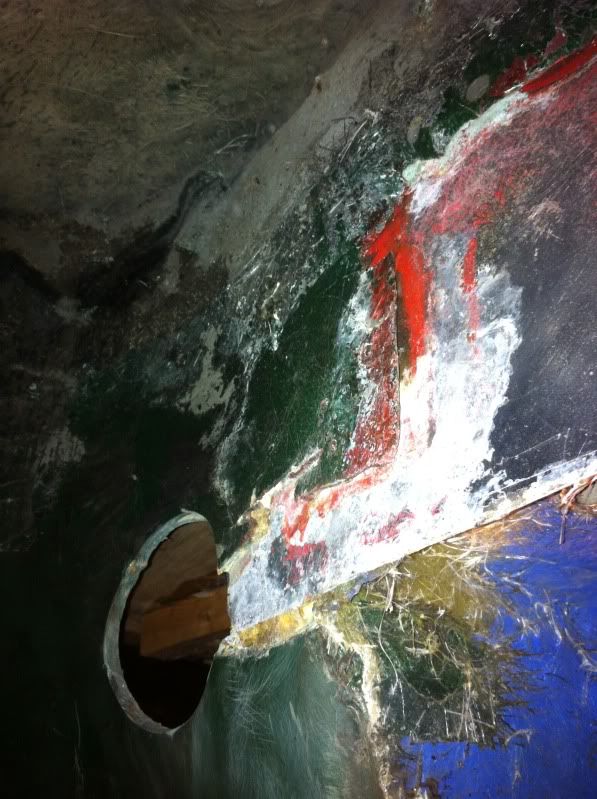
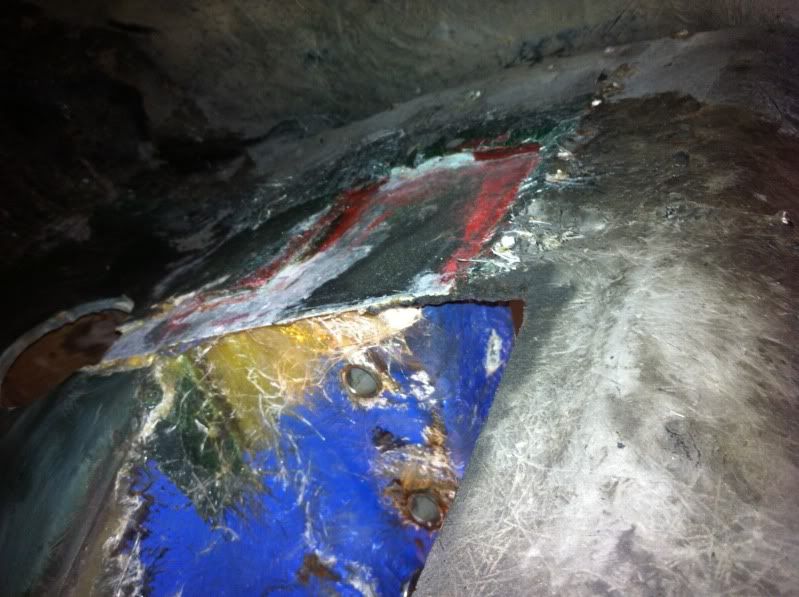
Right now iam a little worried about how critical this is.
I have a few questions about this, that i hoe you guys can help me with.
1. Is is original to have aluminium sheet laminated in here?
2. How hard would it be to remove? Have anyone tried anything similar?
3. It somehow looks like this was done, at the same time as the front cross member repair. So now i don't really trust this either. So i am back at thinking about changing to a new replacement cross member? I have a few questions about this, do these come with cut outs for the master cylinders? Do i need to order one specific for LHD or RHD?
If any of you have pictures of these areas of your engine compartments i would really appreciate it.
Finally i have realised that me working i fibre glass in my own garage is a no go. It simply creates too much dust, and as i share the place with other people, it is not ideal.
So i have contacted a local fibreglass shop, hopefully i can get the car down there, and really get cracking. I could also do with a little help. It would also be nice to really press on and get all the fibreglass work done.
Again if any of you can help with some experiences of above, it would really help me.
Kind regards
Dennis |
Mini Marcos Mk.II 7012
Dennis Overgaard Nielsen
Denmark |
Last modified December 20th, 2011, 16:25:33 by dalla |
|
|
|
| |
Reply: 69 - 96 |
|
|
| dalla |
| Posted on: December 20th, 2011, 20:38:06 |
|
|
Medium Member
Location: Aarhus Denmark
Posts: 112
|
|
| I have just ordered a full Heritage crossmember. Wish me luck. |
Mini Marcos Mk.II 7012
Dennis Overgaard Nielsen
Denmark |
|
|
|
| |
Reply: 70 - 96 |
|
|
| admin |
| Posted on: December 20th, 2011, 22:10:27 |
|
|
Administrator
Location: Maidenhead, UK
Posts: 2,377
Reputation: 1 (tot: 1) |
|
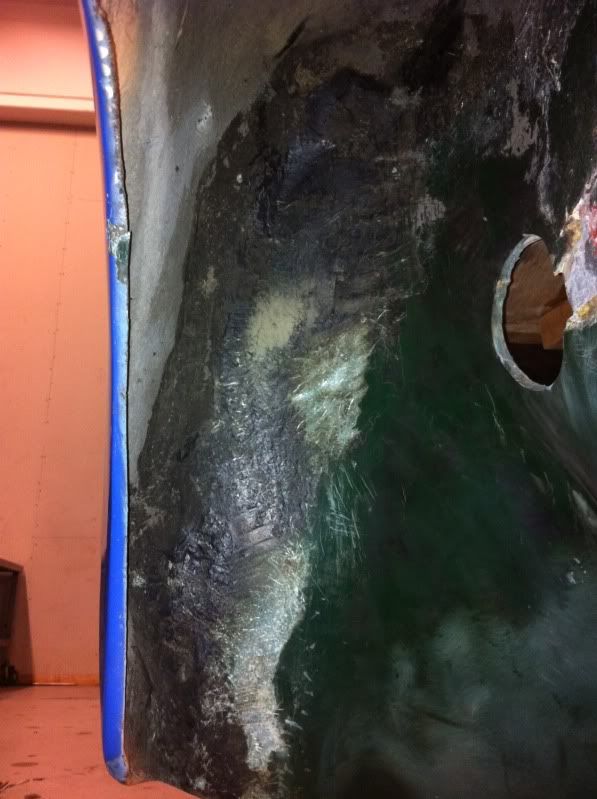
Looks like it's been patched up with bits from different cars.
The aluminium certainly isn't original, but it's roughly the same shape as the original fibreglass. On the left hand side there's a cut-out for a side-mounted radiator.
The pop rivets shouldn't be there either. They may have been put in to hold two bits of fibreglass together for bonding but they should be drilled out now.
The Mk.II/III didn't have provision for mounting the heater elbow under the wing so if you use a fresh air heater you have to make your own arrangements. |
|
|
|
| |
Reply: 71 - 96 |
|
|
| dalla |
| Posted on: December 20th, 2011, 22:45:12 |
|
|
Medium Member
Location: Aarhus Denmark
Posts: 112
|
|
Thanks Richard.
I figured it was the case that it had been patched together.
I guess i will have a go at bringing it back to all fibreglass. Would really appreciate some inputs on how best to do this. Also if some one could show me some detailed pictures of how it looks originally, it would really help me. |
Mini Marcos Mk.II 7012
Dennis Overgaard Nielsen
Denmark |
|
|
|
| |
Reply: 72 - 96 |
|
|
| admin |
| Posted on: December 21st, 2011, 15:13:51 |
|
|
Administrator
Location: Maidenhead, UK
Posts: 2,377
Reputation: 1 (tot: 1) |
|
John Dickens is the best person to advise you there (or Mike Brown, but he's not often on the forum). My approach would be to lay up some flat fibreglass panels roughly the right size on a suitable flat surface, bond them in at the top amd then lay matting over the vertical gaps to get the curved joins.
I can easily take photos of my Mk.IV shell but it's a bit different from the Mk.II/III. |
|
|
|
| |
Reply: 73 - 96 |
|
|
| dalla |
| Posted on: December 21st, 2011, 16:54:40 |
|
|
Medium Member
Location: Aarhus Denmark
Posts: 112
|
|
Thanks alot Richard. Greatly appreciated. I would like to see pictures of your car if possible. Maybe i can get some ideas from them.
Any idea of how to get a hold of John Dickens? If someone could point him in direction of this thread i would appreciate it. |
Mini Marcos Mk.II 7012
Dennis Overgaard Nielsen
Denmark |
|
|
|
| |
Reply: 74 - 96 |
|
|
|


 Mini Marcos Forum > General Boards > Mini Marcos > 7012 Project thread


 Logged