|
|
 Author Author |
 7012 Project thread (currently 18,343 views) 7012 Project thread (currently 18,343 views) |
| Stuart |
| Posted on: December 22nd, 2011, 09:56:08 |
  |
|
Big Member


Location: Peak District
Posts: 284
Reputation: 1 (tot: 1) |
|
|
|
|
 |
Reply: 75 - 96 |
|
 |
| dalla |
| Posted on: December 22nd, 2011, 10:09:32 |
|
|
Medium Member


Location: Aarhus Denmark
Posts: 112
|
|
Cheers mate. I have allready bought his book, but i better buy the other one also.
I could really do with a few pointers on this.
Ohh yes one more thing.
This over laminating inside the arches, is this normal, does that hold some of the bodywork in place?
 |
Mini Marcos Mk.II 7012
Dennis Overgaard Nielsen
Denmark |
|
|
|
 |
Reply: 76 - 96 |
|
|
| admin |
| Posted on: December 23rd, 2011, 00:01:26 |
|
|
 Administrator Administrator


Location: Maidenhead, UK
Posts: 2,377
Reputation: 1 (tot: 1) |
|
That looks fairly normal. All the outer surfaces of the shell are laminated inside the main mould. The inside panels - mainly the sills, the double-skinned area behind the doors and the inner wings are made separately (as is the dashboard) and bonded in later. The inner wings are fitted gelcoat side out so you get this bonding of mat onto gelcoat. It doesn't always stick very well especially if the release agent hasn't been thoroughly removed.
I'll get some pics of my shell tomorrow if it's fine.
I expect JD will show up on here over the holiday!
Thinking about it a bit more, I'd be tempted to grab that bit of fibreglass where it's splitting off and pull it because it looks like a repair rather than original fabrication. It may be properly bonded in or it may come out in one piece. There shouldn't be any exposed matting that hasn't been properly soaked in resin. |
Last modified December 23rd, 2011, 23:59:26 by admin |
|
|
|
| |
Reply: 77 - 96 |
|
|
| dalla |
| Posted on: December 23rd, 2011, 10:20:40 |
|
|
Medium Member
Location: Aarhus Denmark
Posts: 112
|
|
Thanks alot Richard. I have allready talked to John Dickens, it was very helpfull.
It is perfect if i could see some pictures of your arches.
Thanks alot and merry christmas
Kind regards
Dennis |
Mini Marcos Mk.II 7012
Dennis Overgaard Nielsen
Denmark |
|
|
|
| |
Reply: 78 - 96 |
|
|
| admin |
Posted on: December 23rd, 2011, 17:40:34
 Attachment: iw1.jpeg - 36.10 KB (4102 views) Attachment: iw1.jpeg - 36.10 KB (4102 views) |
|
|
Administrator
Location: Maidenhead, UK
Posts: 2,377
Reputation: 1 (tot: 1) |
|
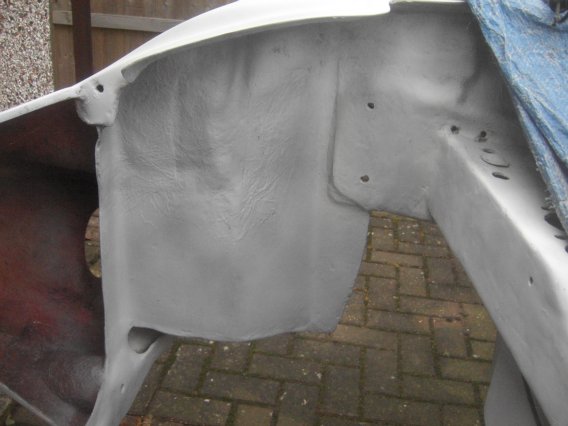
| This is the offside inner wing on the Mk.IV. |
 |
|
|
|
| |
Reply: 79 - 96 |
|
|
| admin |
Posted on: December 23rd, 2011, 17:42:37
Attachment: iw3.jpeg - 42.98 KB (4106 views) |
|
|
Administrator
Location: Maidenhead, UK
Posts: 2,377
Reputation: 1 (tot: 1) |
|
| This is looking up from underneath. The hole on the bottom left is for the heater elbow. |
 |
Last modified December 23rd, 2011, 17:51:04 by admin |
|
|
|
| |
Reply: 80 - 96 |
|
|
| admin |
Posted on: December 23rd, 2011, 17:46:39
Attachment: iw4.jpeg - 48.90 KB (4118 views) |
|
|
Administrator
Location: Maidenhead, UK
Posts: 2,377
Reputation: 1 (tot: 1) |
|
| Another view inside the wheel arch. |
 |
|
|
|
| |
Reply: 81 - 96 |
|
|
| admin |
Posted on: December 23rd, 2011, 17:49:15
Attachment: iw5.jpeg - 40.08 KB (4101 views) |
|
|
Administrator
Location: Maidenhead, UK
Posts: 2,377
Reputation: 1 (tot: 1) |
|
| This is the nearside. I've filled in the top bit of the radiator cut-out for additional rigidity. The nose has been modified. |
 |
|
|
|
| |
Reply: 82 - 96 |
|
|
| dalla |
| Posted on: December 24th, 2011, 13:37:58 |
|
|
Medium Member
Location: Aarhus Denmark
Posts: 112
|
|
Thanks alot mate. I allready got quite a few good ideas of how to go on with this.
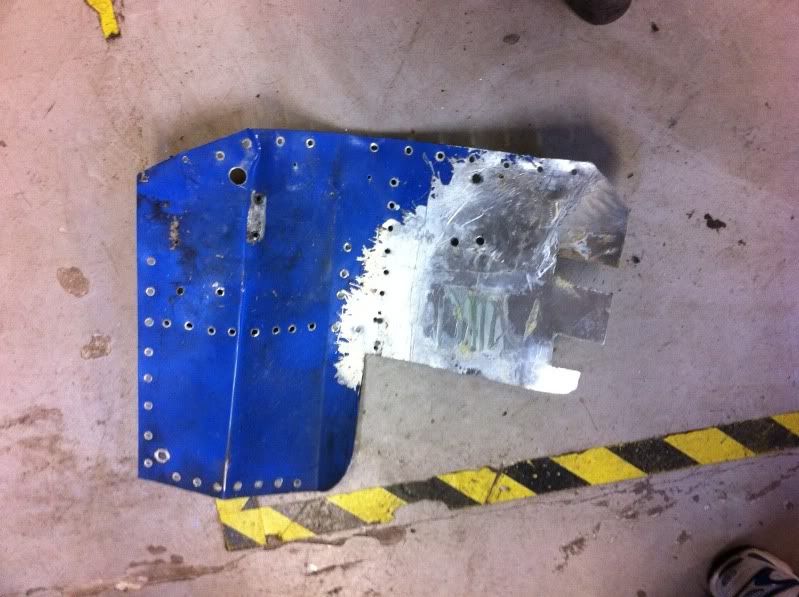
Iam going to remove the aluminium sheets, and use them for templates for new GRP inner arches.
Thanks again, and merry christmas to all of you. |
Mini Marcos Mk.II 7012
Dennis Overgaard Nielsen
Denmark |
|
|
|
| |
Reply: 83 - 96 |
|
|
| dalla |
| Posted on: December 29th, 2011, 19:51:37 |
|
|
Medium Member
Location: Aarhus Denmark
Posts: 112
|
|
Hi Guys
First of all hope that all of you had a great christmas.
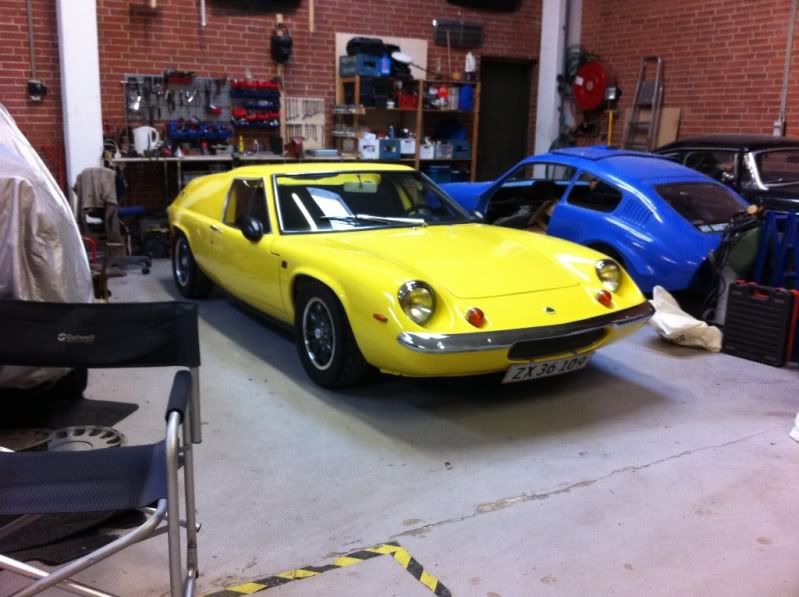
This was my christmas present.

I love it, and it makes me want to work even harder on the car.
Today i made qute good progress. Even though i planned to fit some silicone cooling hoses on my Lotus, i could not resist working on the Marcos instead.
I started with tackeling the alumium arches. Got the rigth side completely removed.
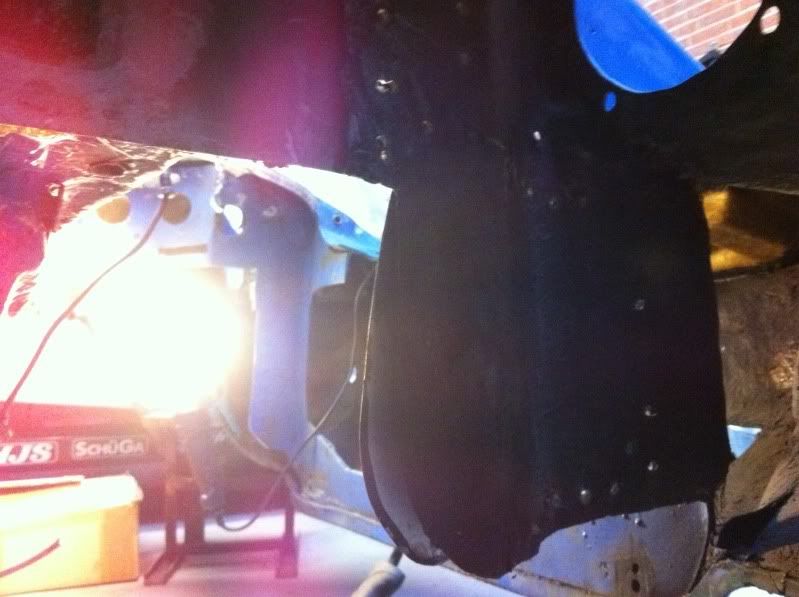
After drilling out all the rivets, i could carefully cut out the laminated areas inside the arches, and out it came.
After this, i found a pleasant surprise. There is quite a lot of fibreglass left in the arches. So it looks like i can build on to this.
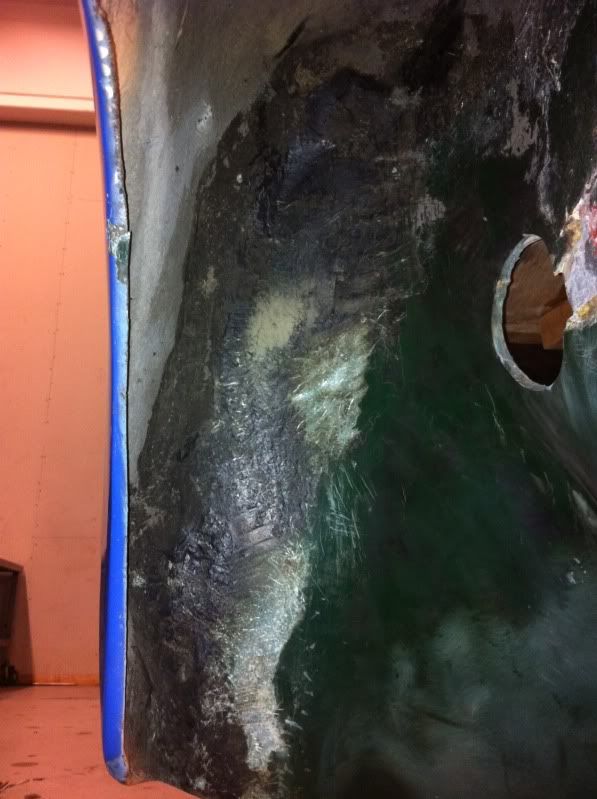
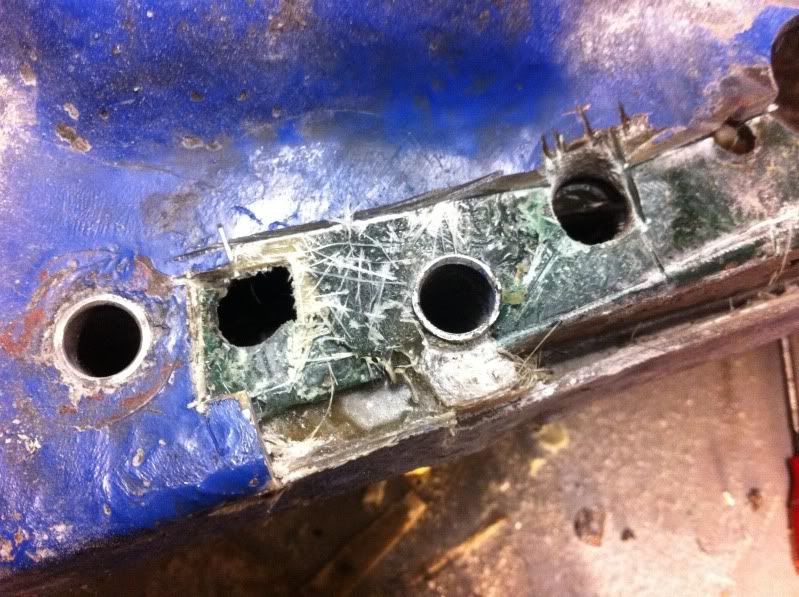
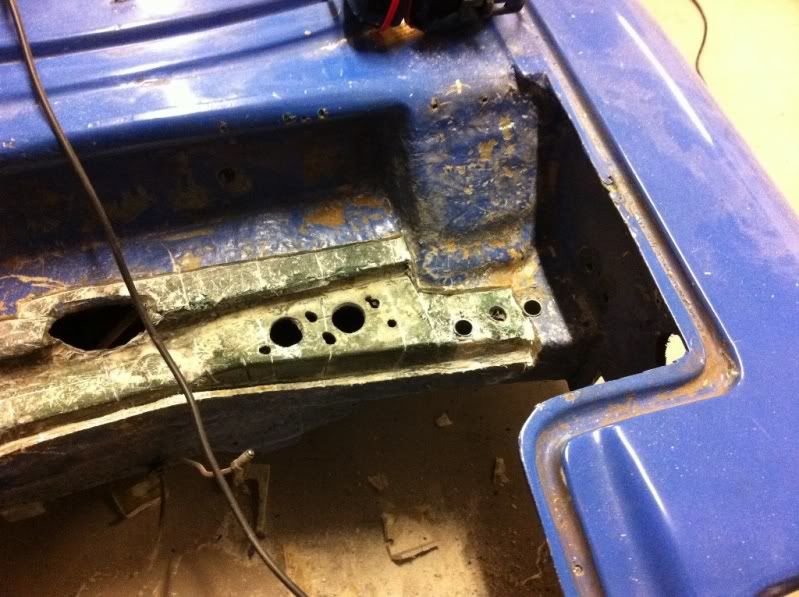
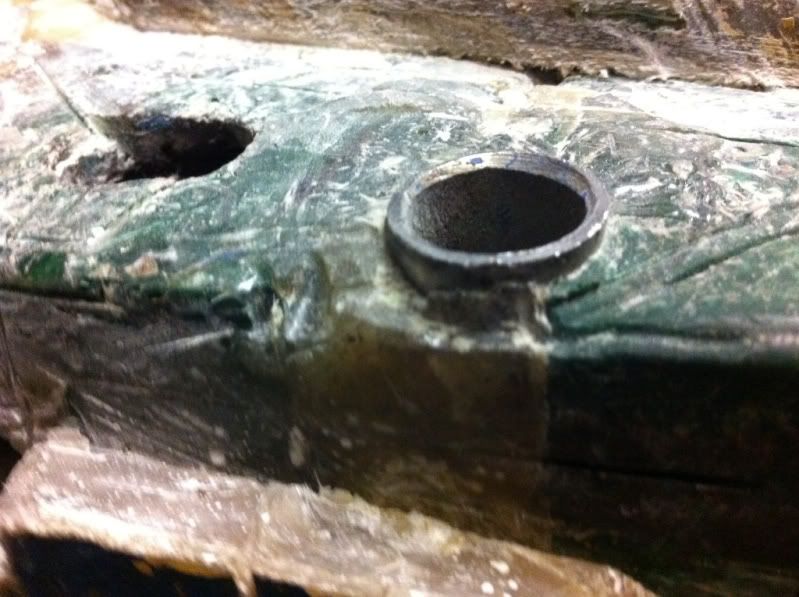
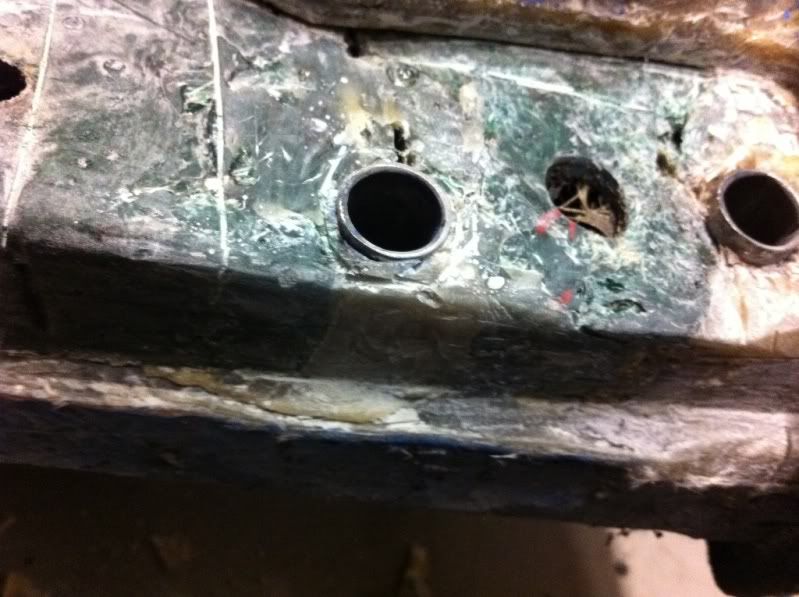
This is how it looked after the aluminium was removed. This is looking from inside the arch onto the side of the cross member.
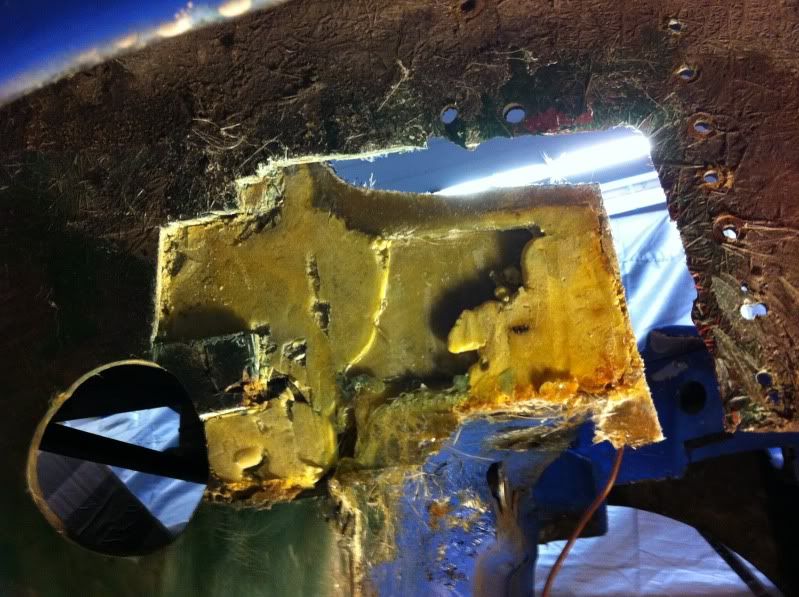
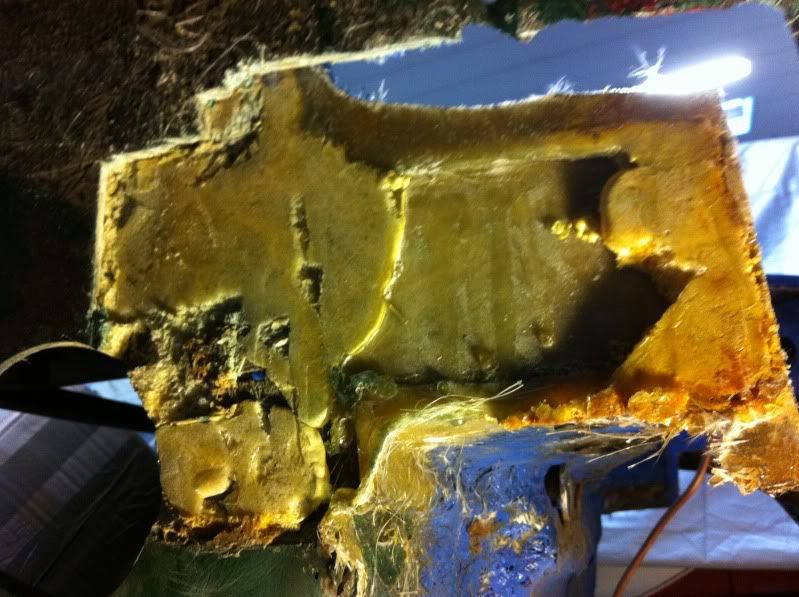
I have allready recieved my new BMH crossmember. And good thing i ordered one, because when i started looking at the subframe mounting points, i discovered that there wasn't any metal at all, where the cross member was supposed to be. Only thing is two steel pipes laminated/glued into a lot of fibreglass.
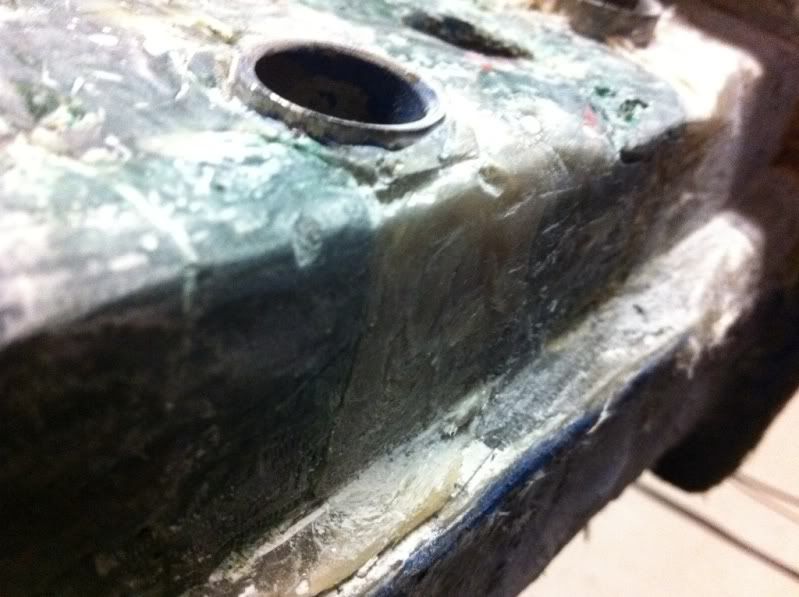
This is what i found when i started to cut.
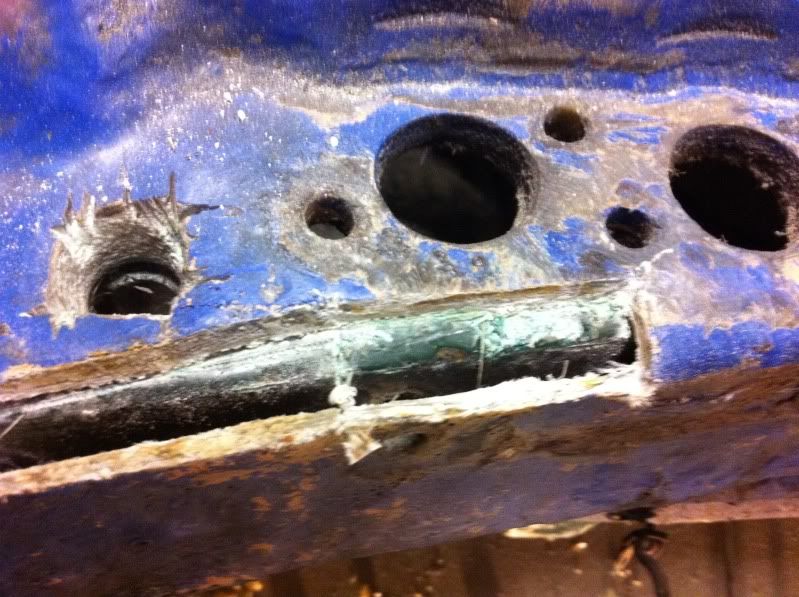
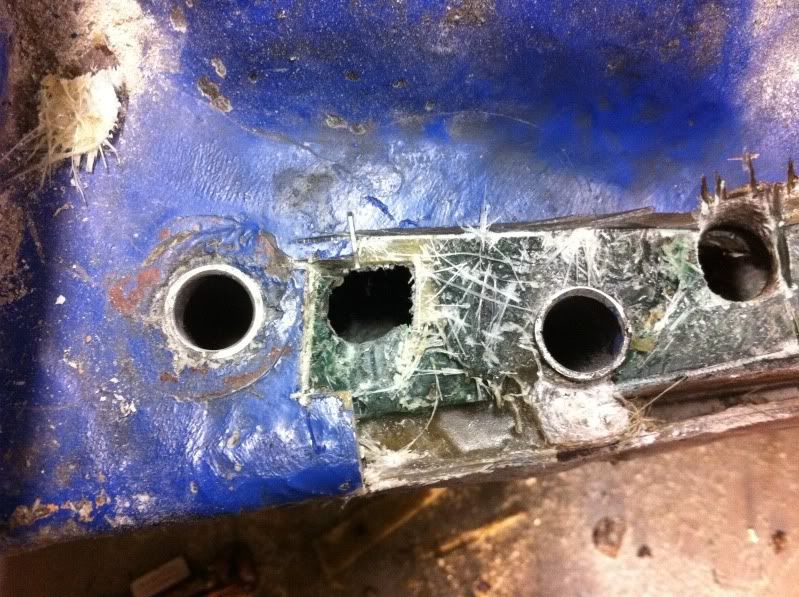
The positive thing is, that i think, that with some careful cutting, i can possibly expose most of the original bulkhead underneath. That is the green GRP you can see underneath. I think this will be helpful when i have to laminate the new crossmember in.
But before this, there will be a lot of cutting to do.
That was all for now, i hope all of you have a great New Years party tomorrow. |
Mini Marcos Mk.II 7012
Dennis Overgaard Nielsen
Denmark |
|
|
|
| |
Reply: 84 - 96 |
|
|
| Neil KilBane |
| Posted on: December 29th, 2011, 21:20:11 |
|
|
Maximum Member2


just a little fine tuning left to do.
Location: Newtown Forbes, Ireland
Posts: 1,416
Reputation: 0 (tot: ) |
|
“ |
Quoted from dalla, posted December 29th, 2011, 19:51:37 at here |
” |
|
|
They really are a very good model  |
|
|
|
|
| |
Reply: 85 - 96 |
|
|
| dalla |
| Posted on: February 23rd, 2012, 17:41:11 |
|
|
Medium Member
Location: Aarhus Denmark
Posts: 112
|
|
Hi Guys
Here is a short update. I have been super busy lately, and have got very little done to the MM. I have been in Japan for most of January, and now i am in Croatia. Work is taking way too much of my time. 
But between this and trying to get my Lotus ready for summer, i did manage a little on the MM.
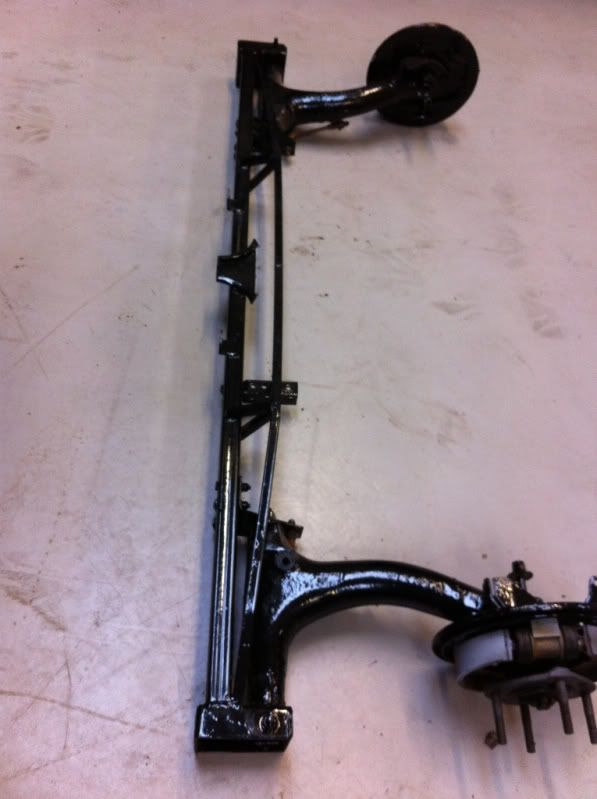
First of i stared at the special Lightweight rear subframe that came with the car.
Looks like i can use the rear trailing arms for my new genuine subframe. Pleased with that.
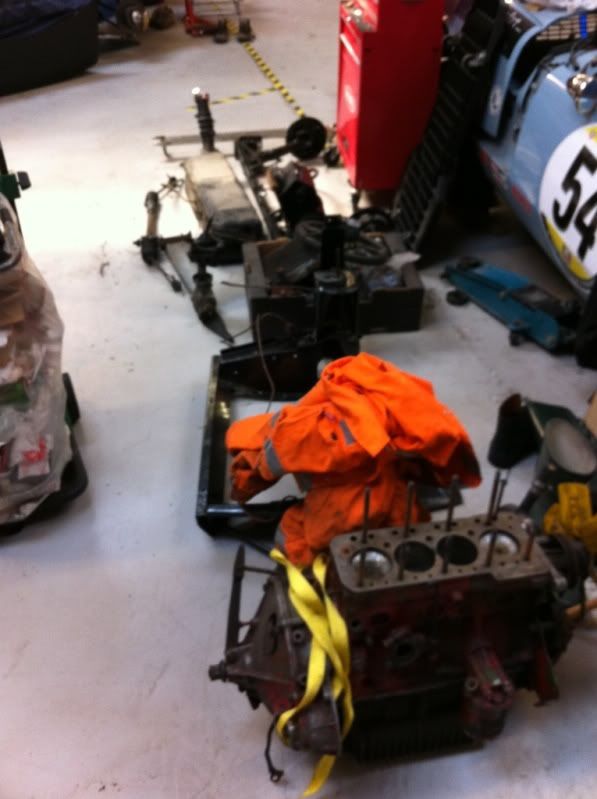
Then btw, i have also been spending a lot of time moving around in our garage, which i share with a few other guys. The plan is for me to get some more space. Maybe even for a car more.
This is how my old space looks:

And the new one:
The MGB in the background, is not mine and will be moved eventually.
Some of all the old crap from the car also had to be moved:
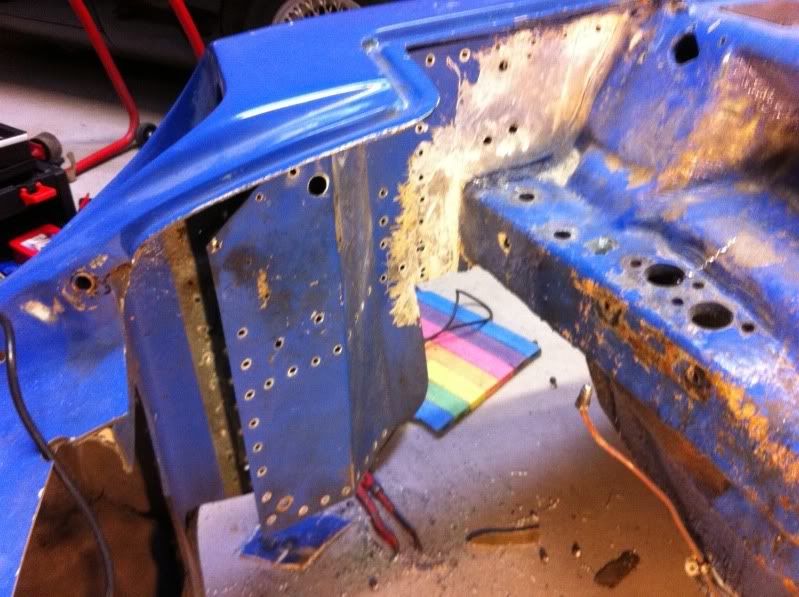
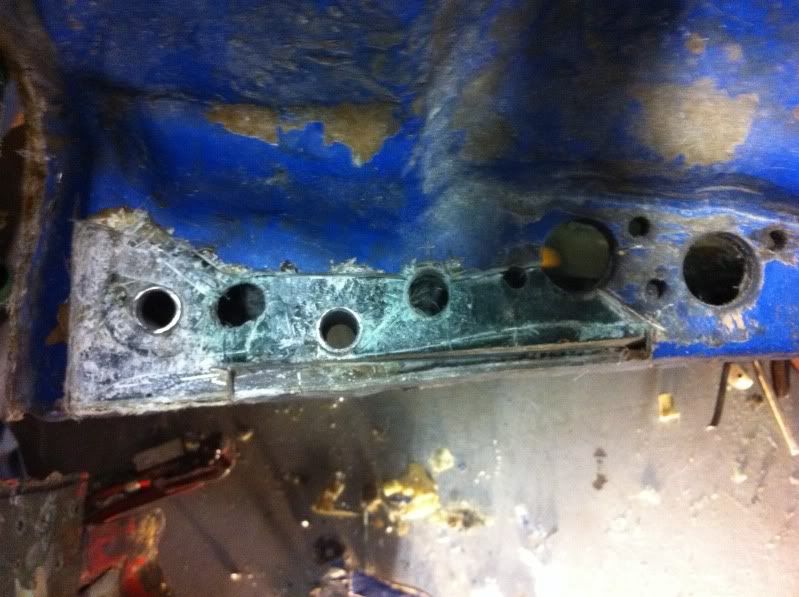
Then i actually started cutting some more. The bulkhead now looks like this:
Most of the top part is removed. Dreading to be doing the bottom.
I also need to get the LH inner arch removed. But it is going in the right direction fibreglass wise.
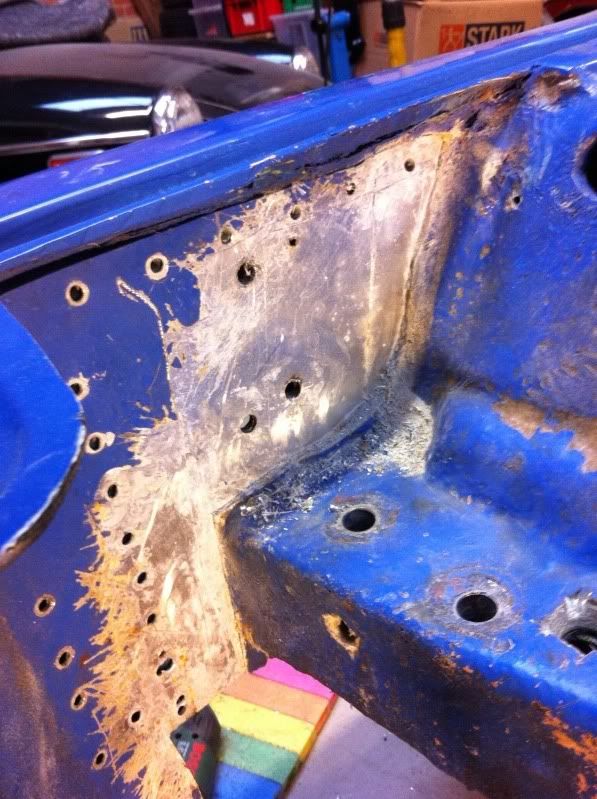
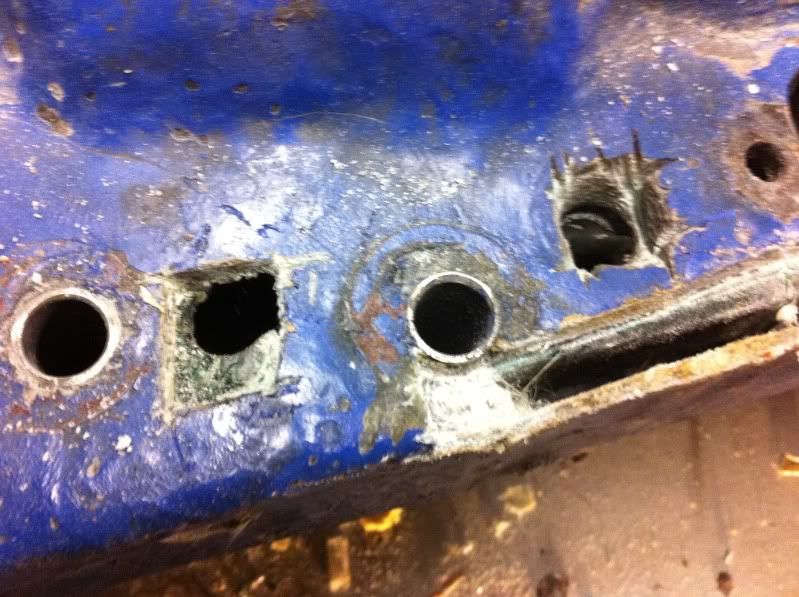
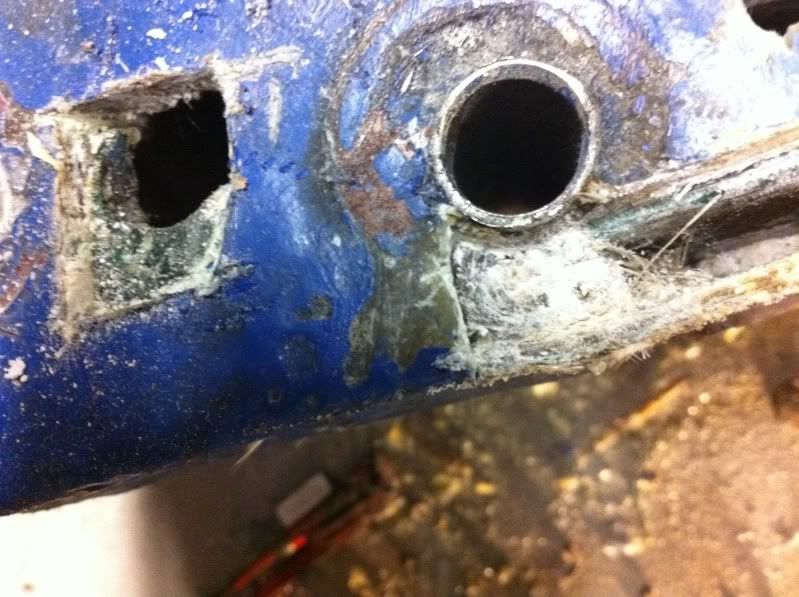
I found this on the LH side of the bulk head.
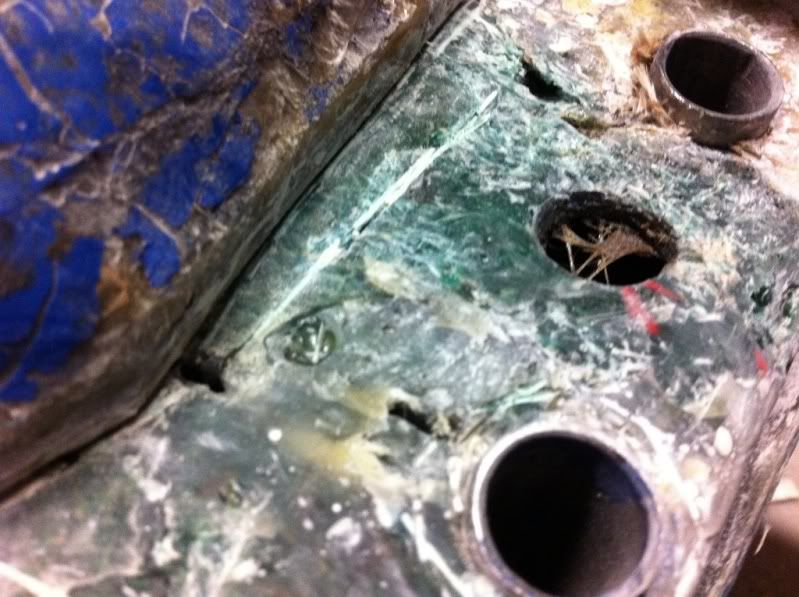
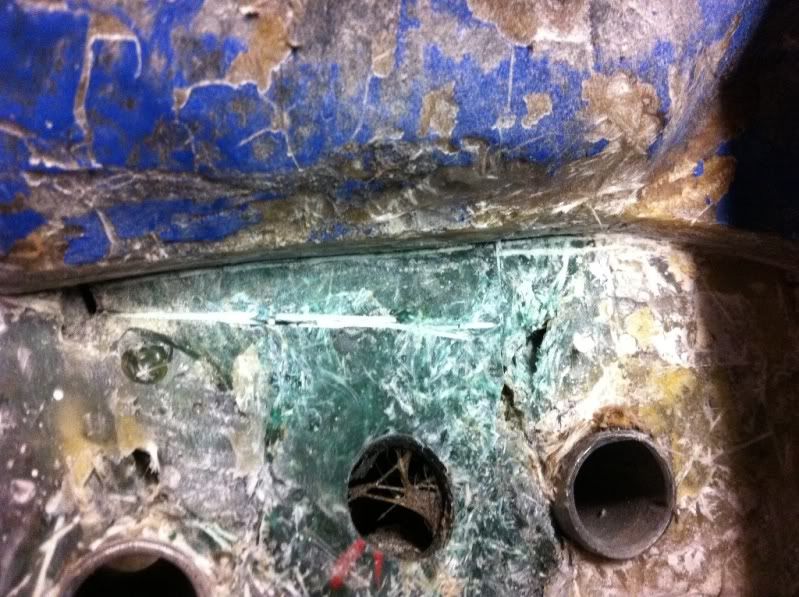
It looks like the pipes for the subframe bolts have just been "glued" in, and there is some severe cracking to be found.
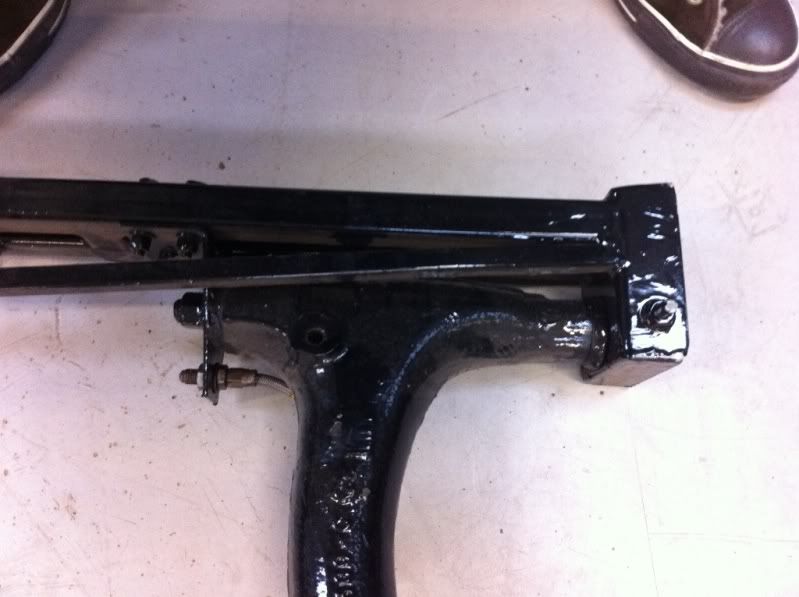
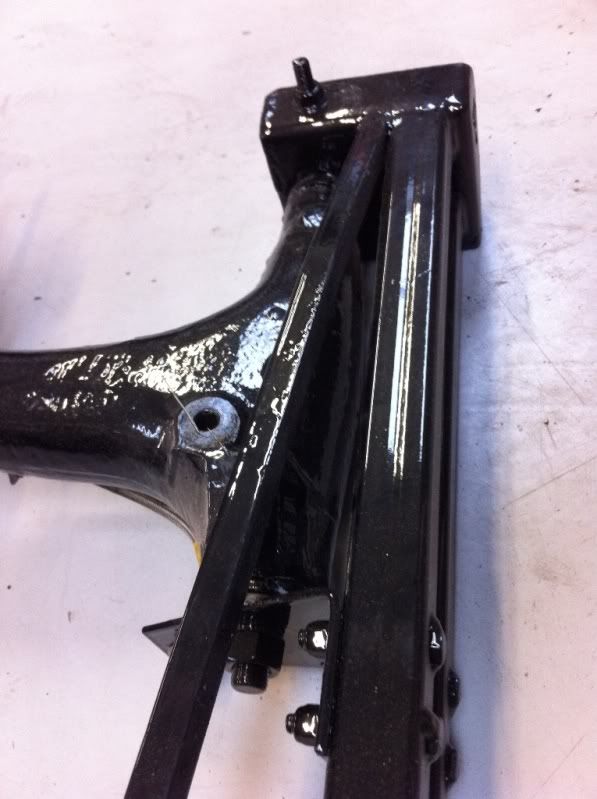
I then started removing the front plate on my new Heritage parts crossmember. Spot weld drills are a god send.
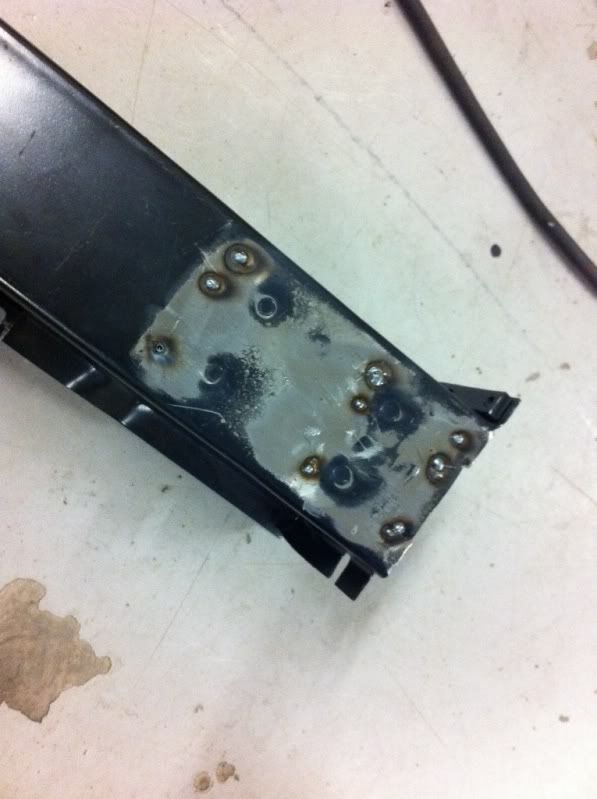
Right now iam thinking about what to do with this. The crossmember is the new type with only a single bolt in each side, and my front subframe is the old 2 bolt type. Iam leaning towards biting the bullet and buying a new single bolt subframe, as this will make this repair much easier, and probably also more precise. Haven't decided yet thoug, as that will not be totally original correct.
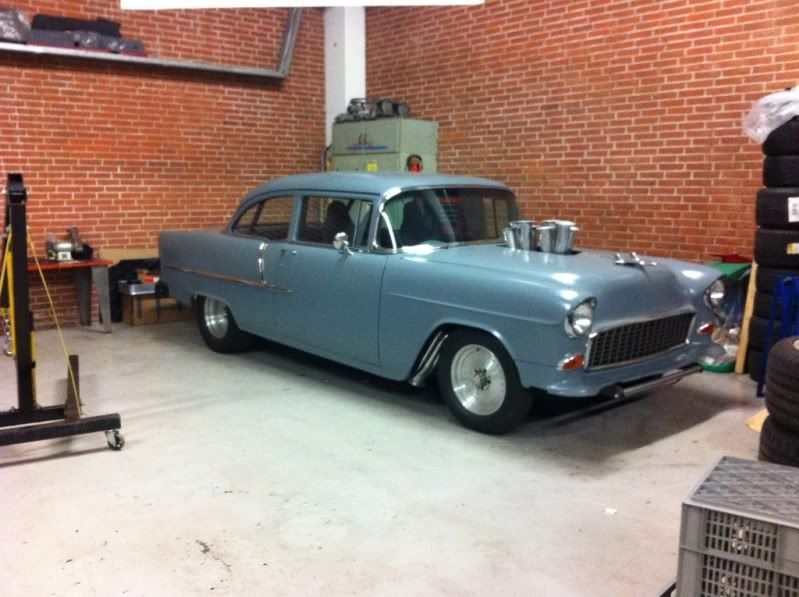
Anyways i will end with this pic. One of the guys from the garage finally got his 55 Chevy of the axle stands. Looks pretty mean?
 |
Mini Marcos Mk.II 7012
Dennis Overgaard Nielsen
Denmark |
|
|
|
| |
Reply: 86 - 96 |
|
|
| dalla |
| Posted on: May 30th, 2012, 04:41:12 |
|
|
Medium Member
Location: Aarhus Denmark
Posts: 112
|
|
Hi guys.
Ohh dear, it is almost 3 months since i updated this thread. Very little have happned on the Marcos since. I have been very busy at work, and what little time i have had left, have been used on getting my Lotus ready for summer.
But i have just ordered my FIA cage from RORY today. Should be here in 4-5 weeks.
I also looks like i have found a page, who makes the front bulkhead crossmember for the twinbolt subframe. They are called M-machine.co.uk, I am just waiting for an reply from them. Any experiences trading with them?
So iam sorry, no pics this time. I am currently working in Japan (again), but as soon as i get home, i have to crack on with the MM (there are a few small jobs on the Lotus first though). Will post pics then. |
Mini Marcos Mk.II 7012
Dennis Overgaard Nielsen
Denmark |
|
|
|
| |
Reply: 87 - 96 |
|
|
| Neil Barr |
| Posted on: June 2nd, 2012, 08:35:31 |
|
|
Baby Member

Posts: 30
|
|
Hi Dennis Ive just seen your thread; Im at a similar stage to you with the MM- interesting to see yours. Totally dismantled and Ive jsut replaced the front cross member etc; Richard kindly let me cut one out and gave me the sub frame to match, single bolt combination. but the SF didnt fit the MM so had to cut off the rear tails from the old SF and weld onto the new to make it fit. Also there was a need (?- well copying the old one)- to fabricate new end plates for the beam and weld onto the beam end which are glassed in to the wings. I had to bolt in the SF and bolt the beam on to position it , after initial glassing took the SF out and carried on with the beam now all done.
Dont know if Ive got the heart to rip apart the rear towers as well now, Ive had this thing for three and a half years and need to see an end in sight soonish !!! |
|
|
|
| |
Reply: 88 - 96 |
|
|
| dalla |
| Posted on: June 3rd, 2012, 00:11:20 |
|
|
Medium Member
Location: Aarhus Denmark
Posts: 112
|
|
Hi Neil
Thank you very much for your reply. Very interesting to hear from you.
I have now come a little further in my quest. I called M-Machine and ordered 2 twin bolt repair sections.
The plan is to weld these into the heritage crossmember.
Then i had been thinking of a similar approach to yours. One question though. On the back side of the crossmember, did you use some fibreglass putty or something to make it settle?
If you have any pictures, it would love to see them.
Also i allready cut out the rear towers, and made new stainless inserts. It was really a breeze to do, so i wouldn't hold back. I can only strongly recommend you to get an oscilating saw, like a fein cutter or the bosch that i have. Recently i used it for cutting out the floor of an old Lancia, it is really a versatile tool. You can cut the towers very precise with this.
If you have any pics, my mail is honda_st50_dax@hotmail.com
Kind regards
Dennis |
Mini Marcos Mk.II 7012
Dennis Overgaard Nielsen
Denmark |
|
|
|
| |
Reply: 89 - 96 |
|
|
|


 Mini Marcos Forum > General Boards > Mini Marcos > 7012 Project thread


 Logged