|
|
 Author Author |
 mini marcos (currently 7,833 views) mini marcos (currently 7,833 views) |
| Rodger Howard |
|
Medium Member

Location: Melbourne Australia
Posts: 162
Reputation: 0 (tot: ) |
|
| i'm just finishing off the finer details of my car |
 |
|
|
|
|
 |
| admin |
| Posted on: December 20th, 2014, 00:26:24 |
  |
|
 Administrator Administrator


Location: Maidenhead, UK
Posts: 2,377
Reputation: 1 (tot: 1) |
|
| Looks good! I tweaked the pic a little to get it all on my screen. |
|
|
|
  |
Reply: 1 - 35 |
|
|
| Steve_Schmidt |
| Posted on: December 20th, 2014, 00:53:14 |
|
|
Medium Member

Location: Gippsland, Victoria, Australia
Posts: 167
|
|
Nice touch Rodger  . .
Are you intending to put the Marcos on a Club Permit , or is purely for competition use?
|
Steve (MM 7056) Downunder
http://www.mm7056.wordpress.com |
|
 Logged Logged |
|
|
| |
Reply: 2 - 35 |
|
|
| Rodger Howard |
| Posted on: December 20th, 2014, 20:34:04 |
|
|
Medium Member
Location: Melbourne Australia
Posts: 162
Reputation: 0 (tot: ) |
|
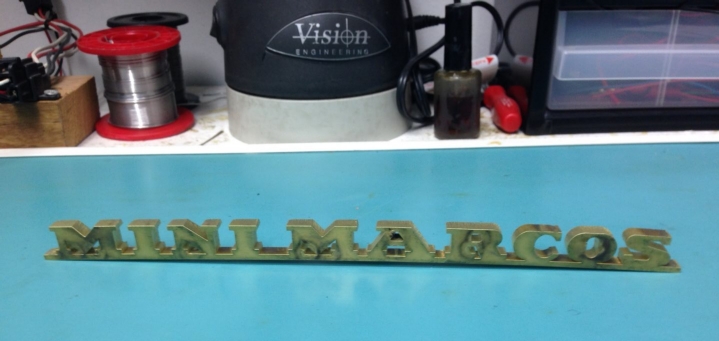
Thanks for sorting the picture. I will mill down the letters to leave a raised line below them then polish before chroming.
The car has actually been on full registration since i imported it 8 years ago Steve. I figured i might have trouble registering it after adding the full cage. I have built a 970s engine recently to use as a road engine. |
|
|
|
| |
Reply: 3 - 35 |
|
|
| Rodger Howard |
| Posted on: December 26th, 2014, 10:20:42 |
|
|
Medium Member
Location: Melbourne Australia
Posts: 162
Reputation: 0 (tot: ) |
|
Merry Christmas to one and all. Trust the new year is prosperous and productive.
What is the conventional wisdom with respect to cooling fans on a front mount radiator? 1 or 2 and if 1 should it be mounted close to the inlet and outlet which in my case are both on the passengers side.
 |
Last modified December 26th, 2014, 11:16:00 by Rodger Howard |
|
|
|
| |
Reply: 4 - 35 |
|
|
| mike brown |
| Posted on: December 26th, 2014, 14:58:54 |
|
|
Big Member


Location: Southampton
Posts: 419
|
|
I had one on all my cars mounted in the middle never had a problem with over heating. But in the UK over heating is generally only a problem for one week in July then it starts raining again.
Mike |
|
|
|
| |
Reply: 5 - 35 |
|
|
| Rodger Howard |
| Posted on: December 26th, 2014, 20:28:32 |
|
|
Medium Member
Location: Melbourne Australia
Posts: 162
Reputation: 0 (tot: ) |
|
| I suppose it is the wrong time of the year to be asking an englishman about overheating |
|
|
|
| |
Reply: 6 - 35 |
|
|
| Neil KilBane |
| Posted on: December 26th, 2014, 21:14:20 |
|
|
Maximum Member2


just a little fine tuning left to do.
Location: Newtown Forbes, Ireland
Posts: 1,416
Reputation: 0 (tot: ) |
|
| Love the chrome around the light covers, are they homemade ? |
|
|
|
|
| |
Reply: 7 - 35 |
|
|
| Steve_Schmidt |
| Posted on: December 26th, 2014, 22:27:13 |
|
|
Medium Member
Location: Gippsland, Victoria, Australia
Posts: 167
|
|
G'day Rodger, the car's looking good mate - hope to see it on the road in 2015 
In regard to cooling fans, I'd be aiming to cover as much of the radiator finned area as possible with one fan using a shroud if necessary to ensure the fan is drawing air through the core and not from around the periphery. The radiator in my car is in a similar location to yours and probably a little smaller in size (it's one from the very late model Rover Mini which had a front radiator) The thermatic fan isn't needed whist the car is in motion, but does a good job when stationary.
|
Steve (MM 7056) Downunder
http://www.mm7056.wordpress.com |
Last modified December 26th, 2014, 22:36:07 by Steve_Schmidt |
|
| Logged |
|
|
| |
Reply: 8 - 35 |
|
|
| Rodger Howard |
| Posted on: December 27th, 2014, 01:05:38 |
|
|
Medium Member
Location: Melbourne Australia
Posts: 162
Reputation: 0 (tot: ) |
|
Thanks Steve and Neil. The intention is to have the car ready by April. i have a full week this week to work on it so I plan to complete the dash and the items behind it.
I can fit two fans easily as the radiator is the full width and height of the front of the car.
l will look into making a shroud as well.
The headlight covers were one of those items I just had to have....
I must thank my friend Stuart for turning my dream into a reality.
First of all we made a buck for each side out of fiberglass. I had a pair of the standard lens' but they were a little short. We used them to create the shape of the bucks. We then cut a channel around the outside of the hole for the rims to sit in and recessed ss tubes for the screws to go into.
We then had the rims laser cut in brass. From there Stuart formed the rims in about 5 planes and rounded the edges. A mamouth job. Then my specialist polishing mate took to them. Finally they were chromed.
The lens were cut out of flat perspex then put into the oven at Stuarts until they dropped over the buck at about 80c. from there we used clothes pegs to clip them to the rims while they were still hot. Then the process of trimming and polishing before they were glued to the backs of the rims. |
|
|
|
| |
Reply: 9 - 35 |
|
|
| Rodger Howard |
| Posted on: December 27th, 2014, 01:39:27 |
|
|
Medium Member
Location: Melbourne Australia
Posts: 162
Reputation: 0 (tot: ) |
|
this is the next body fitting to complete.
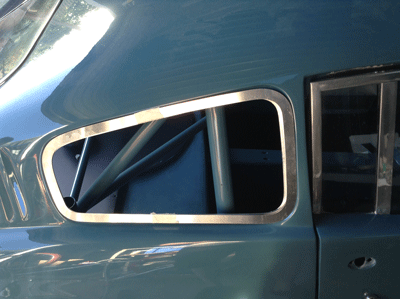
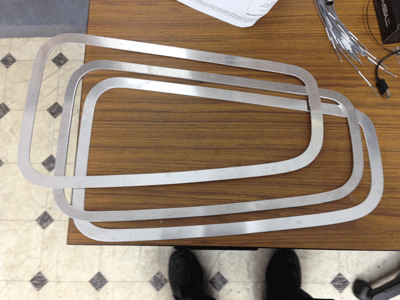
They will (hopefully) open like mini ones.
They are made in aluminium to match the door frames and rear window frame
The front of the car has a few more bits to be fabricated yet.
 |
|
|
|
| |
Reply: 10 - 35 |
|
|
| Rodger Howard |
Posted on: January 16th, 2016, 09:23:36
 Attachment: image.jpeg - 40.75 KB (6214 views) Attachment: image.jpeg - 40.75 KB (6214 views) |
|
|
Medium Member
Location: Melbourne Australia
Posts: 162
Reputation: 0 (tot: ) |
|
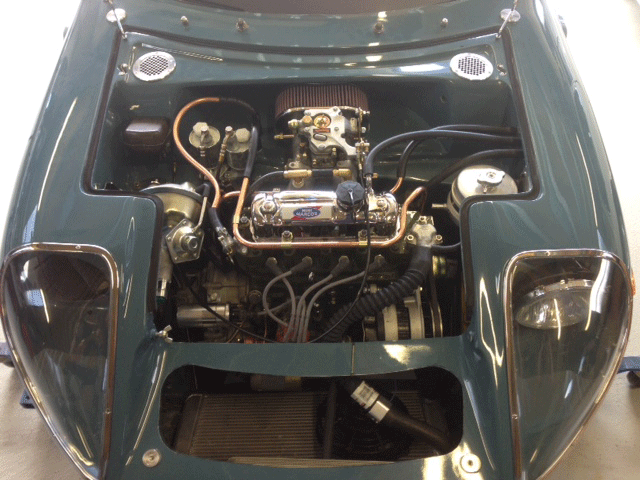
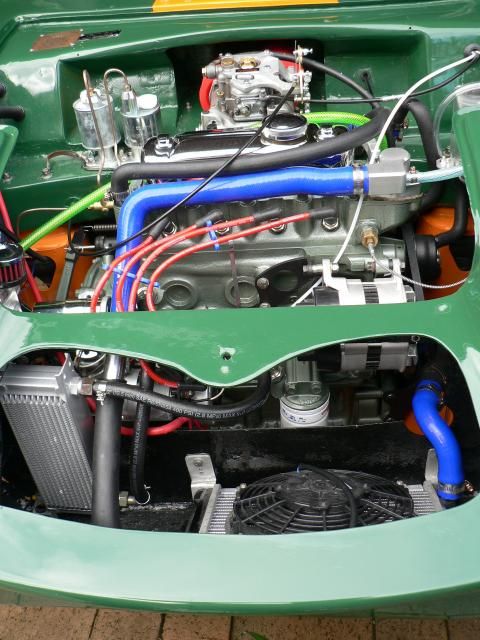
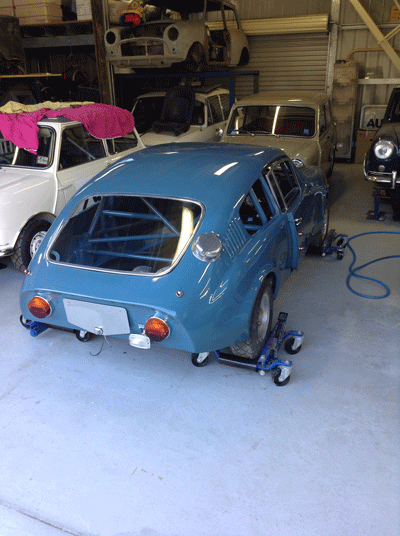
I've been saying this for a number of years now but i think i can actually see the end of my mm project.
The trim was done late last year and over the past few weeks all of the glass and perspex has been fitted and the aluminium parts polished and clear coated. This week the paint will be polished and touched up where necessary ready for the last mechanical items to be fitted. |
 |
|
|
|
| |
Reply: 11 - 35 |
|
|
| Rodger Howard |
|
Medium Member
Location: Melbourne Australia
Posts: 162
Reputation: 0 (tot: ) |
|
| Slowly getting toward the end |
 |
|
|
|
| |
Reply: 12 - 35 |
|
|
| Rodger Howard |
| Posted on: April 21st, 2016, 08:13:56 |
|
|
Medium Member
Location: Melbourne Australia
Posts: 162
Reputation: 0 (tot: ) |
|
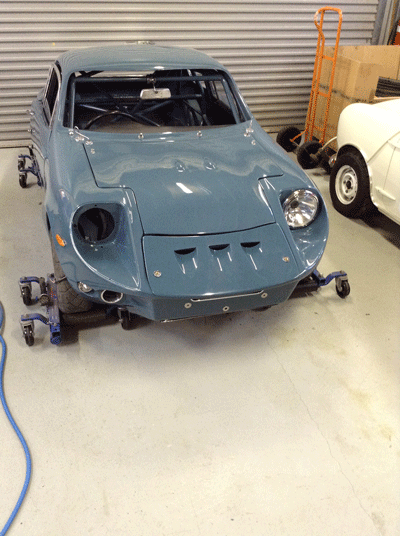
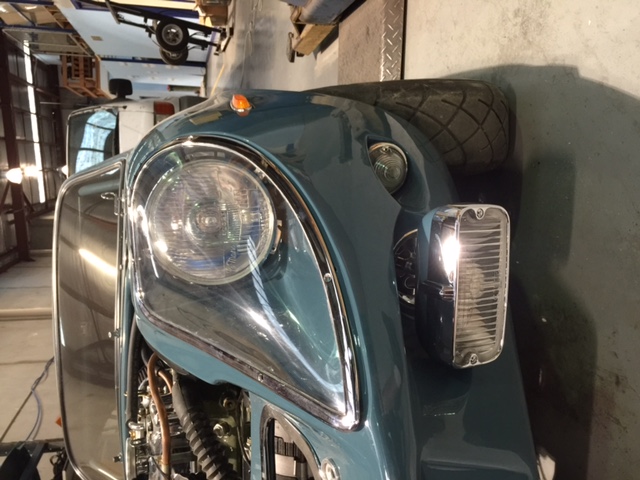
Have i done justice to the front corner of a lemans style mk3?
I've used ferrari teardrop side indicators
Kept the wheels under the original shape guards
Lemans lucas lens with h4 innards and low beam globes included
Custom steel covers and lens made from scratch
Frenched in the ferrari indicators
Air vents for the brakes turned in aluminium behind the original cibie spots mounted on removable plynths |
|
|
|
| |
Reply: 13 - 35 |
|
|
| Steve_Schmidt |
| Posted on: April 22nd, 2016, 11:19:00 |
|
|
Medium Member
Location: Gippsland, Victoria, Australia
Posts: 167
|
|
The restoration journey consists of many small steps, your attention to detail and customisation has extended that journey well beyond what many, including myself, would be satisfied with. It's a credit to your vision and persistence, just a shame you missed the Classic LeMans anniversary.
I'm looking forward to seeing your MM on the road in the near future, is the Geelong Revival in November on your agenda? |
Steve (MM 7056) Downunder
http://www.mm7056.wordpress.com |
|
| Logged |
|
|
| |
Reply: 14 - 35 |
|
|
|


 Mini Marcos Forum > General Boards > Mini Marcos > mini marcos


