|
|
 Author Author |
 7012 Project thread (currently 3,335 views) 7012 Project thread (currently 3,335 views) |
| dalla |
| Posted on: September 5th, 2011, 08:30:45 |
  |
|
Medium Member


Location: Aarhus Denmark
Posts: 112
|
|
Hi Guys
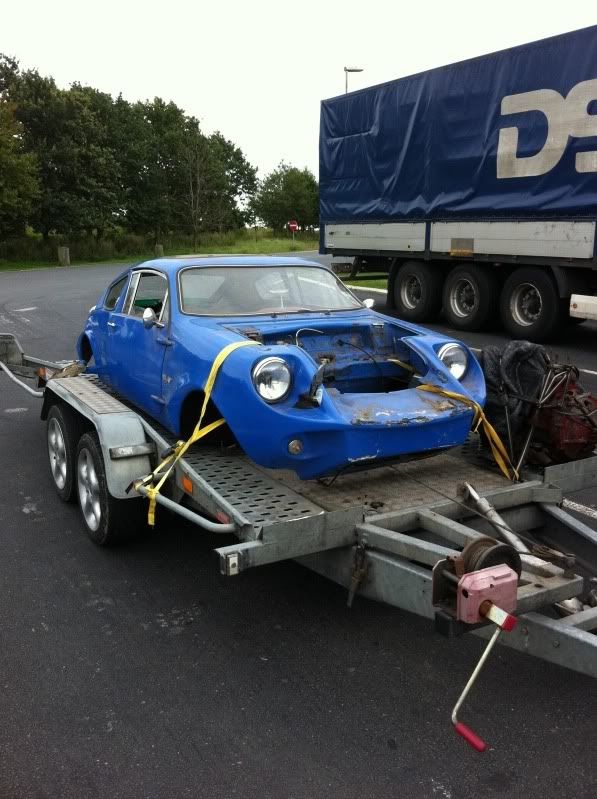
Decided i wanted to start this thread, as 7012 now is in my garage, and i have started tackling some of the smaller jobs. My plan is to get it running and registred. Then run it for a while and take it apart again.
I picked it up last Thursday
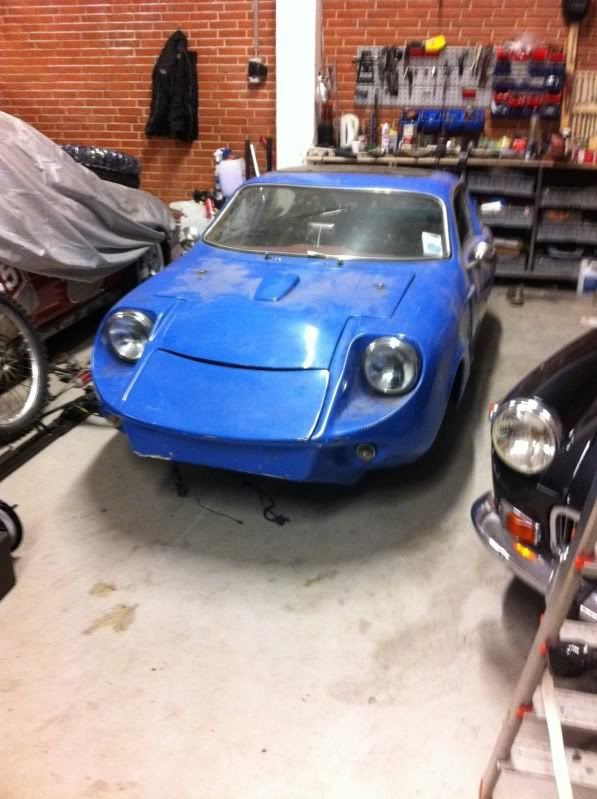
Sitting in the garage i share with a group of friends.
This weekend i have been fully occupied with my dads 60 years birthday. But yesterday when i got back home, even the hangovers couldn't keep me from the garage.
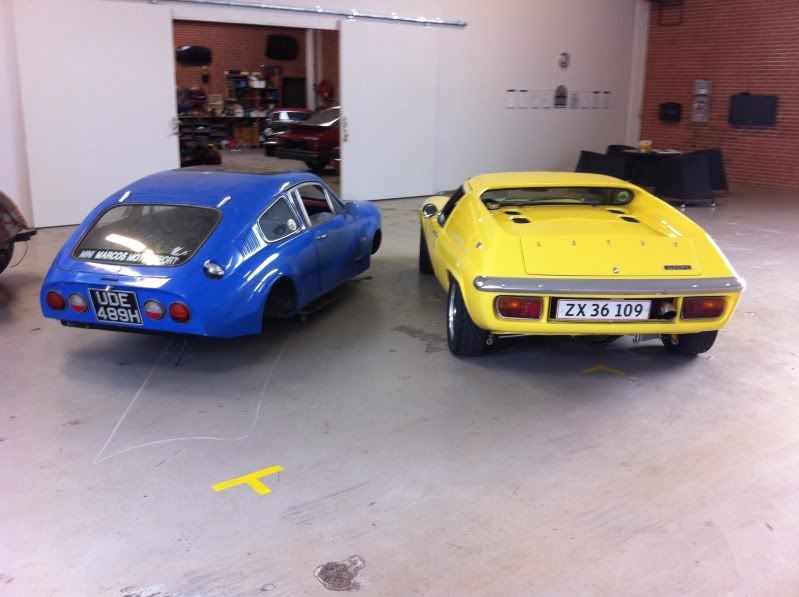
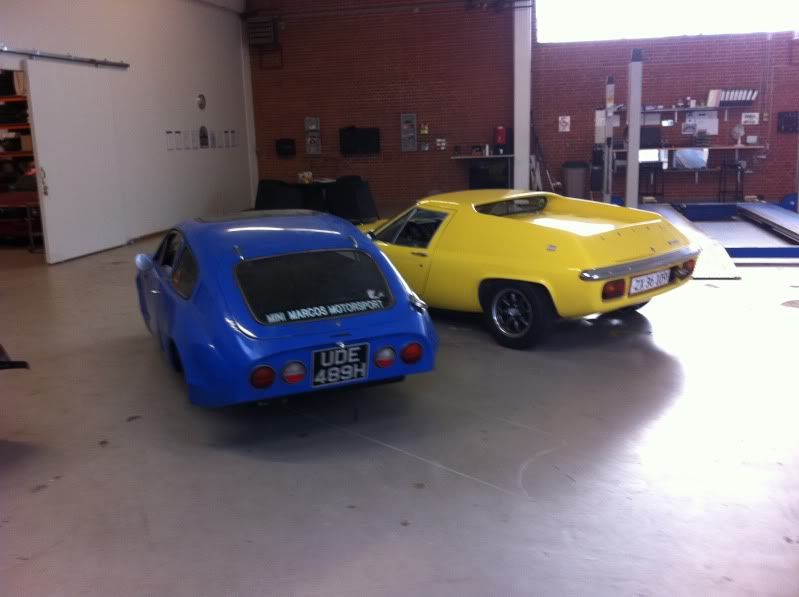
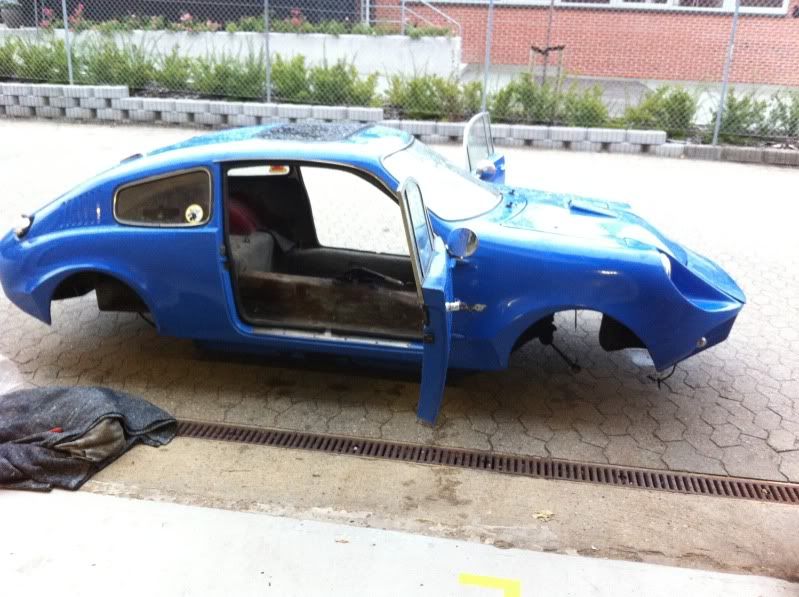
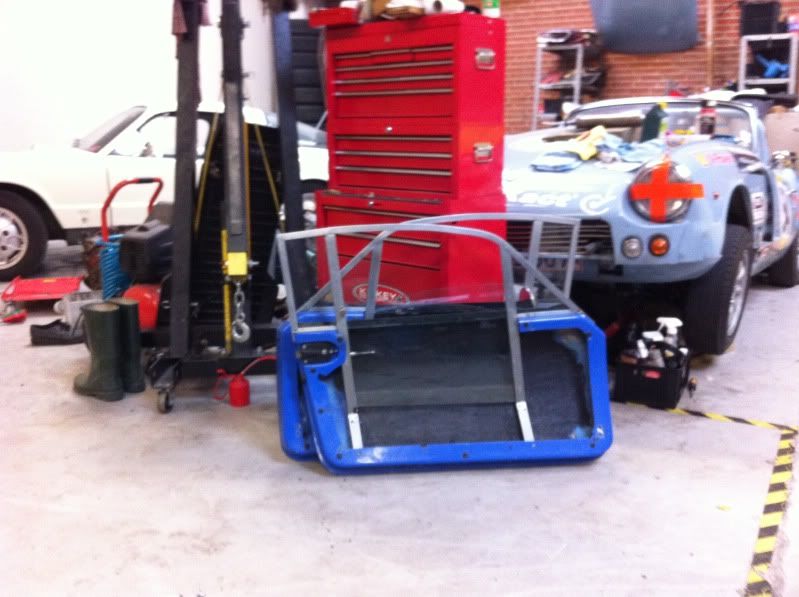
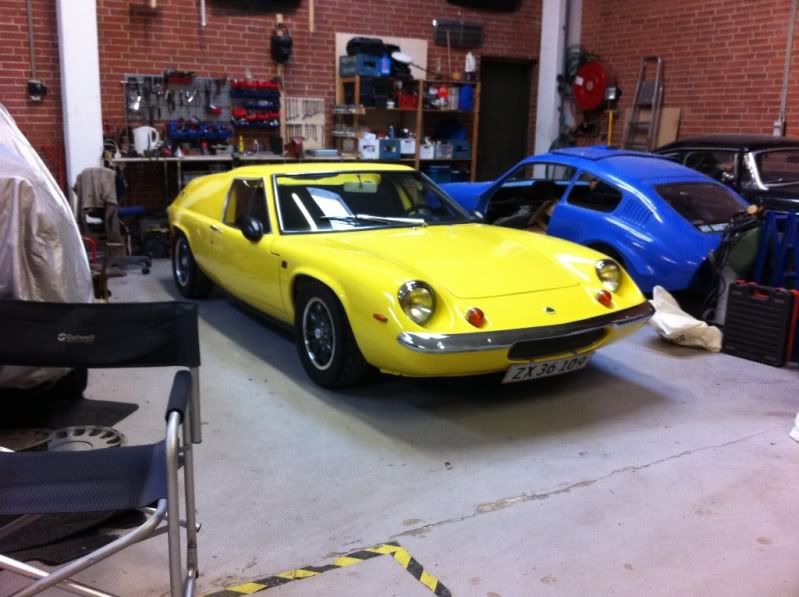
I started with rolling it out so i could get some pics of it together with my Lotus.


Then i decided to give it a quick clean.

Before i knew it, i was busy pulling out headliner and carpets. I think next up is the dashboard.


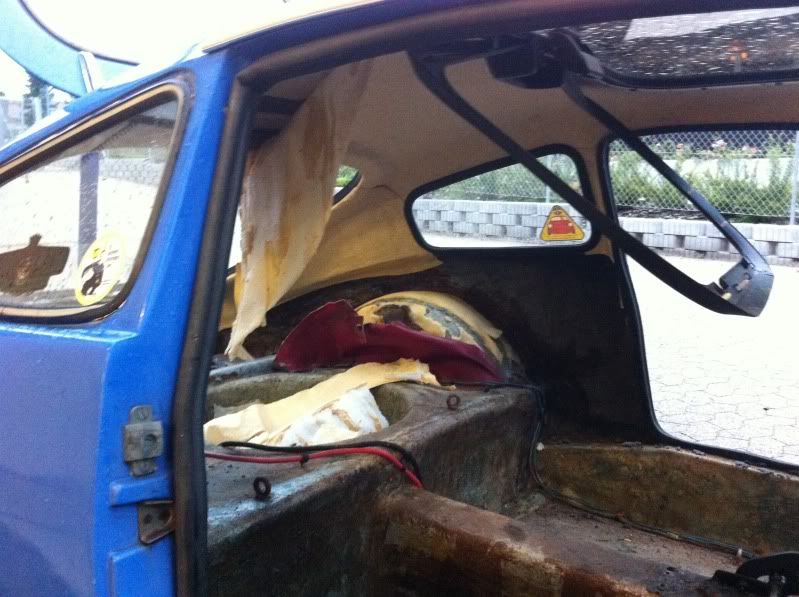
All these door covers were inside the car. I think they will look good once retrimmed.

It was nice to make a little progress yesterday. Iam off to Korea later today, and it will be a week before iam able to continue.
I was really pleased with how it looked after a wash, iam sure a really good polish will do wonders on the bodywork.

One of the first big jobs will be to assemble the rear subframe. I have the swingarms from the lightweight beam that came with the car. But i will have to buy the rest. Could any of you perhaps point me in the direction of the best place to buy these parts?
BR
Dennis |
Mini Marcos Mk.II 7012
Dennis Overgaard Nielsen
Denmark |
|
|
|
|
 |
| Graham Bichard |
| Posted on: September 5th, 2011, 18:36:09 |
|
|
Maximum Member2


Posts: 751
|
|
Dennis - looks like a great project! Let us know what problems you encounter  |
|
|
|
 |
Reply: 1 - 96 |
|
|
| dalla |
| Posted on: September 9th, 2011, 13:04:47 |
|
|
Medium Member
Location: Aarhus Denmark
Posts: 112
|
|
Hi Guys
Iam still in the process of ripping out what is left of the interior. I do have a question though. As my intitial plan is just to get the car on the road, i would like to just paint the fibreglass in the interior. I was hoping you guys knew of a good type of paint to use, i was thinking of just applying it with a roll. |
Mini Marcos Mk.II 7012
Dennis Overgaard Nielsen
Denmark |
|
|
|
 |
Reply: 2 - 96 |
|
|
| jimnaylor |
| Posted on: September 9th, 2011, 17:07:52 |
|
|
Big Member


Location: Bedfordshire
Posts: 222
|
|
It's a long time since I painted mine but I remember it well.
I used the same paint as the outside. I tried spraying it, but the bounce back particularly in the rear was terrible and I soon abandoned that and ended up brushing it... but mine is hardly concours! Brushing it did use a huge volume of paint.
I was spraying with a HP gun, but I suspect with a modern HVLP gun, spraying would be practical. If so that's the way to go, faster and a better finish. |
|
|
|
| |
Reply: 3 - 96 |
|
|
| Nigel_Holmes |
| Posted on: September 9th, 2011, 19:11:19 |
|
|
Minimum Member

Posts: 78
|
|
| Dennis - the paintwork looks pretty good in the pictures, much better than on mine. I never got around to painting the interior, but for the underside I used a gloss household paint (but that was 25 years ago when gloss paint was solvent based). This has kept well, and has not caused any crazing on the fibreglass. |
|
|
|
| |
Reply: 4 - 96 |
|
|
| Peter Bremner |
| Posted on: September 9th, 2011, 19:21:49 |
|
|
Big Member

Location: Ongar, Essex
Posts: 410
|
|
| Hello, I used International yacht paint, one coat of undercoat (International Pre-Kote) then two of topcoat (International Toplac). I used the type of roller for behind radiators (10cm wide, 2.5cm diameter on 60cm handle). I used the same paint under the bonnet and all the underside surfaces. I also used Pre-Kote on the metal parts followed by Toplac black. |
|
|
|
| |
Reply: 5 - 96 |
|
|
| dalla |
| Posted on: September 11th, 2011, 07:36:10 |
|
|
Medium Member
Location: Aarhus Denmark
Posts: 112
|
|
Cheers guys. I guess boat paint must be the way to go as it should be durable and made for fibreglass? I would like a Satin/Matt finish, and idea where i can buy this?
I have just returned back home after a trip to Korea, and while i was bored on the hotel, i accidentally bought these.
I might be getting a bit ahead of myself.
The plan is the get the fibreglass cleaned up, repaired where nessecary and get it painted.
Then i will start to build up the rear and front subframes. The front is almost complete, the rear is from the beginning.
But it just noticed that Mini Sport makes these kits:
http://www.minisport.com/mini-spare-parts/Mini_Sport_Sports_Suspension_Kits_with_Adjusta_Ride.html
I am just not sure what shocks to go for. The car will eventually be used for hill climbs and historic racing, so would like some 2 way adjustable ones, iam just not sure about the GAZ's? Are they any good? I would really appreciate the hear some reccomendations. |
Mini Marcos Mk.II 7012
Dennis Overgaard Nielsen
Denmark |
Last modified September 11th, 2011, 08:25:00 by dalla |
|
|
|
| |
Reply: 6 - 96 |
|
|
| admin |
| Posted on: September 11th, 2011, 09:19:38 |
|
|
 Administrator Administrator


Location: Maidenhead, UK
Posts: 2,380
Reputation: 1 (tot: 1) |
|
| I've never used GAZs. My kit came with Armstrong Redmax 4s but I've always used Spax Gas shocks since. They need replacing so I might give Avos a try next. |
|
|
|
| |
Reply: 7 - 96 |
|
|
| Stuart |
| Posted on: September 11th, 2011, 10:13:46 |
|
|
Big Member

Location: Peak District
Posts: 284
Reputation: 1 (tot: 1) |
|
|
|
|
| |
Reply: 8 - 96 |
|
|
| dalla |
| Posted on: September 14th, 2011, 19:39:11 |
|
|
Medium Member
Location: Aarhus Denmark
Posts: 112
|
|
Hi Guys
Update on my quest.
Yesterday i continued with pulling out dashboard, heater, steering collum and rack. Out came also the windshield, the rest of the headliner and the sound deadening.

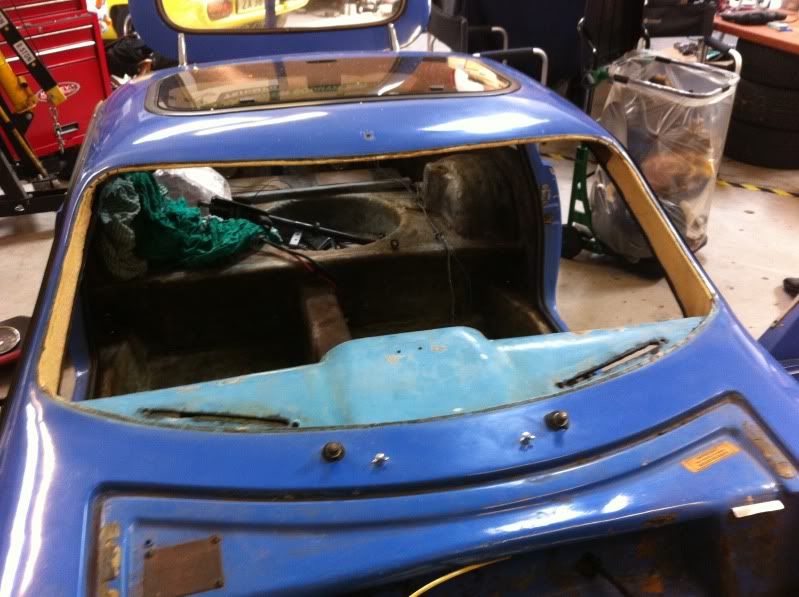

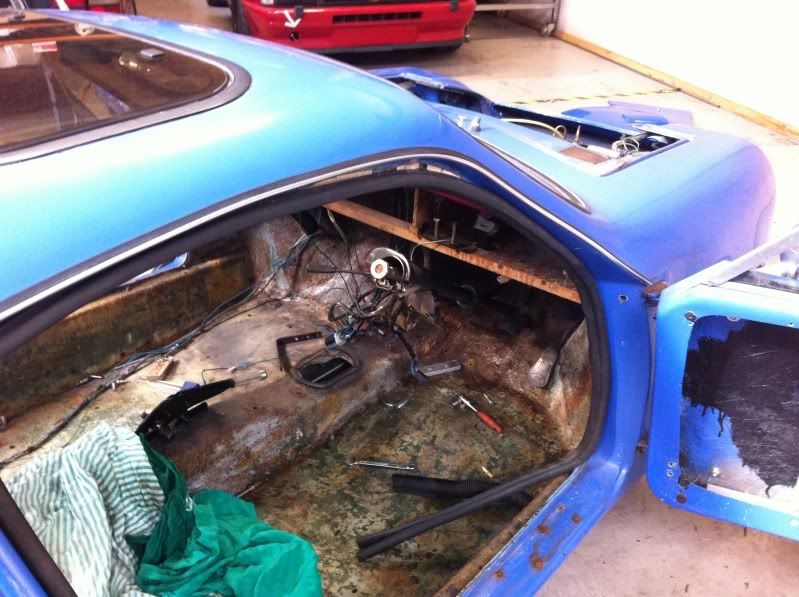
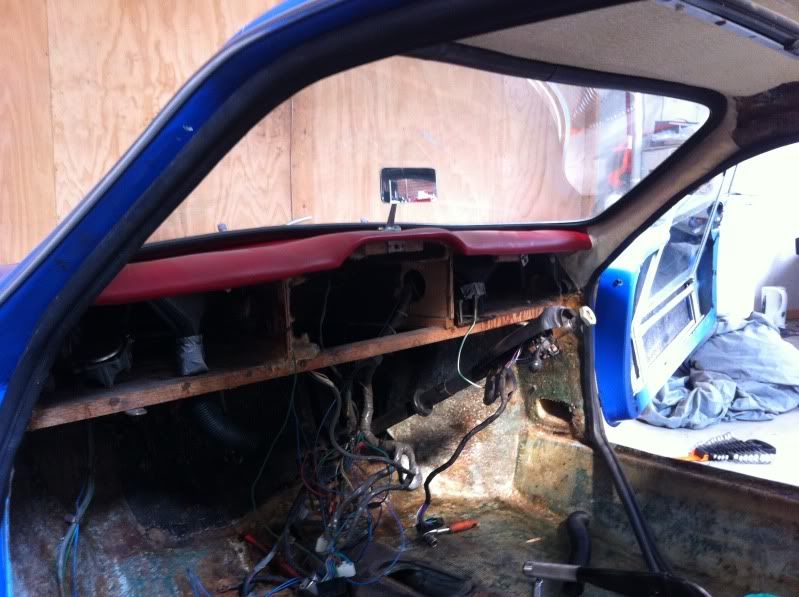
Under the dash, i found all this "wood work" can you guys tell me wether this is original?
It is my plan to fit a Works dash board from Rae Davis, do you know if it will fit over this?
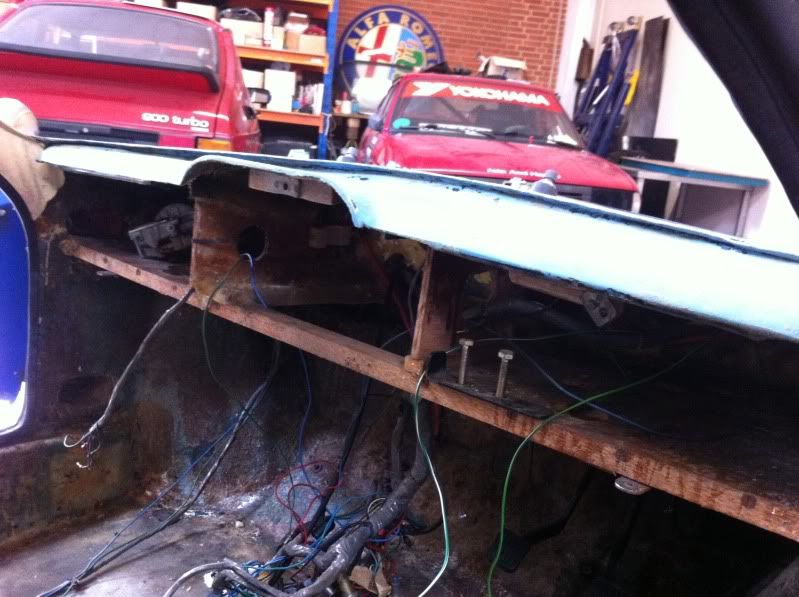
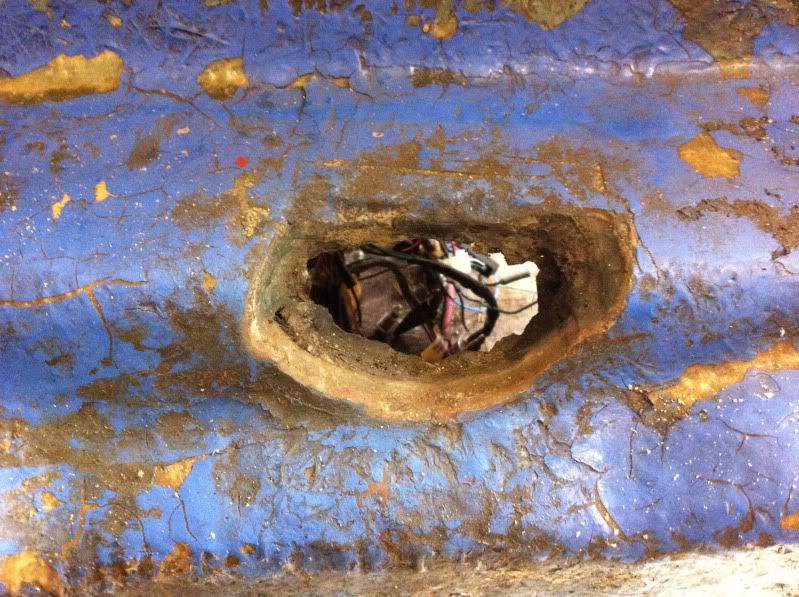
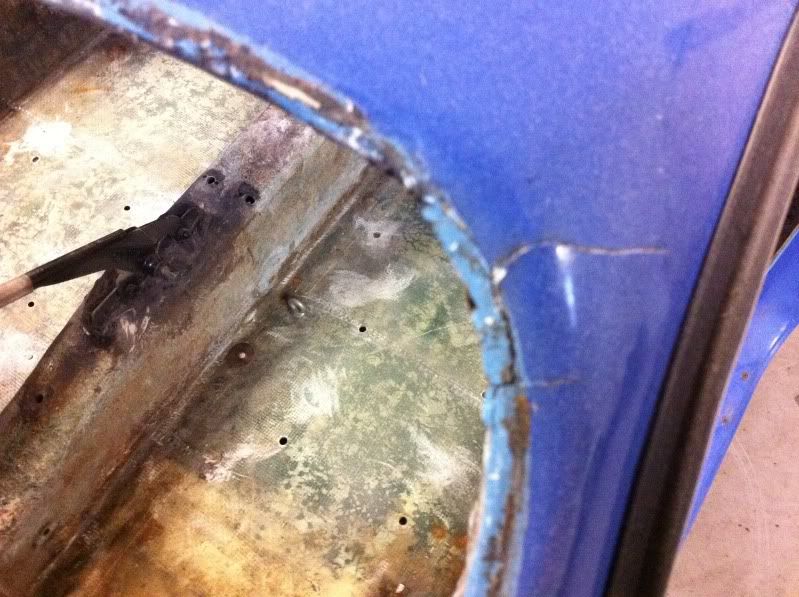
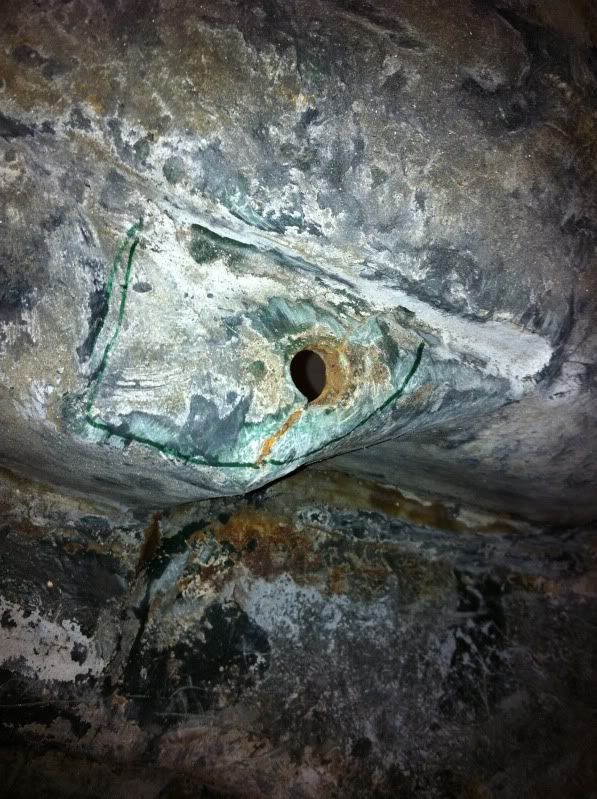
It also gave me a chance to acces this hole from the indside. It obviously need repair, and modification for a Weber DCOE.
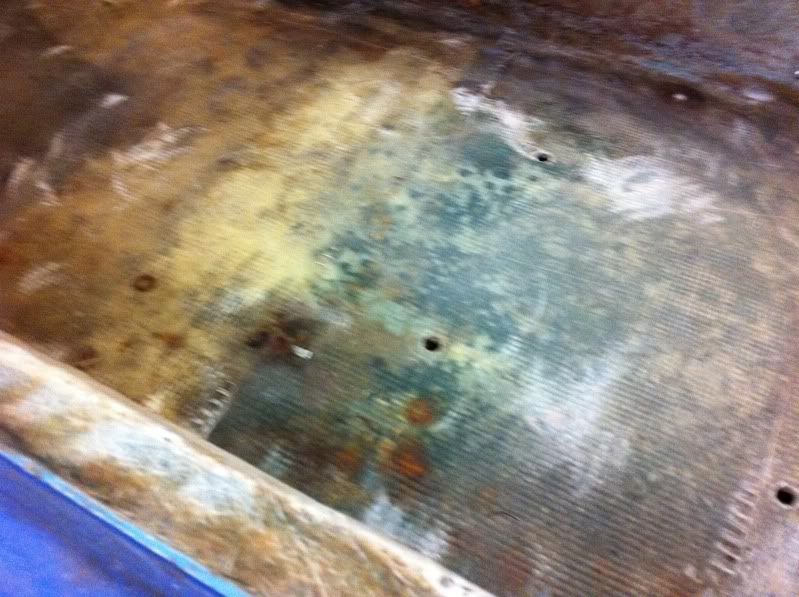
This was the result of the sound deadening removed:
In the afternoon i took my Lotus to a local meeting, but it was a poor show to say the least:

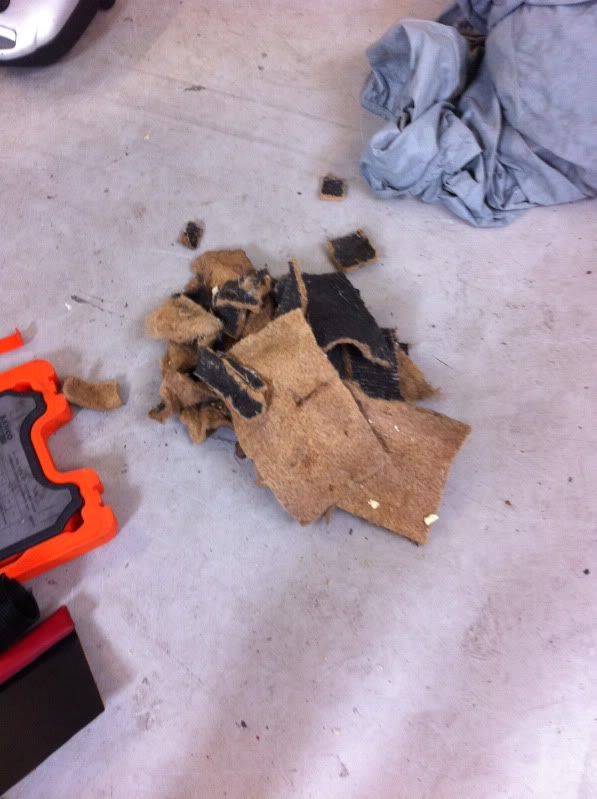
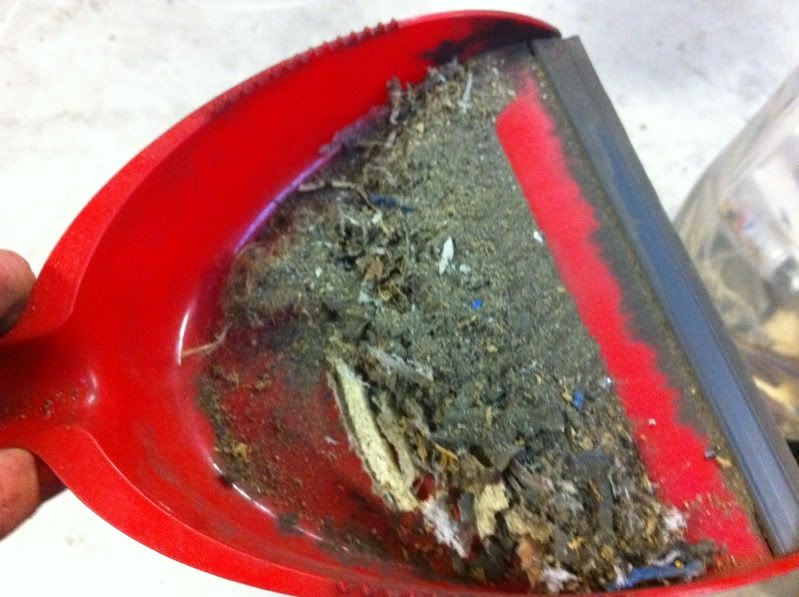
Today i started up again. My quest today was to remove all the glue from the inside of the roof. I tackled this job with a drill mounted rotating wire brush. this worked ok, but was a pain in the donkey to do. I finished the roof today and need to tackle the floor sections next time.

This was what was on the floor around the car afterwards:
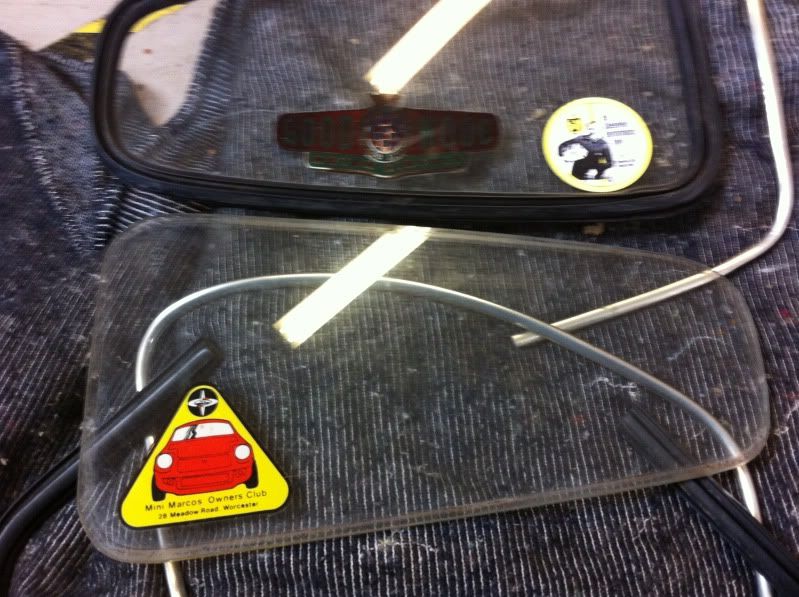
I also took out the rear side windows, these will be replaced with lexan windows, but i will very much like to maintain the stickers. I have found that you can still buy the Goodwood and Speedwell ones, but is the Mini Marcos owners club one still available?
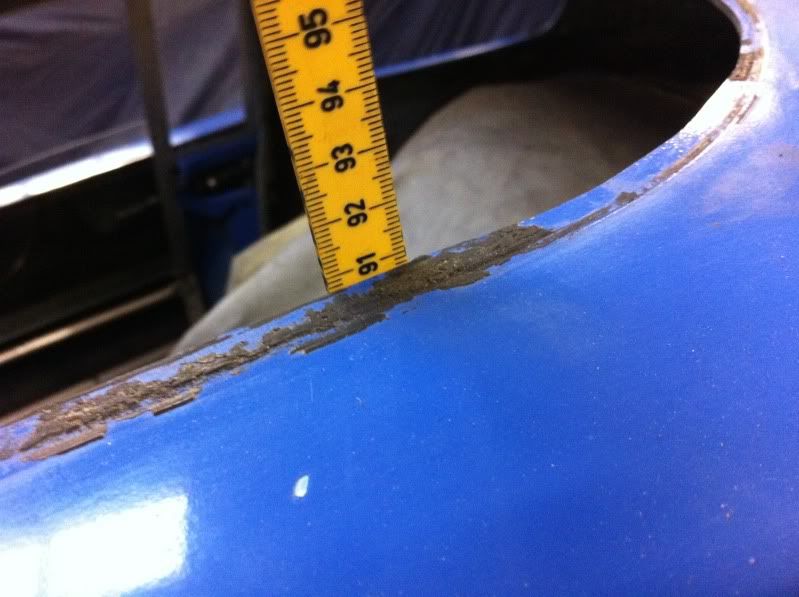
Afterwards for the fun of it, and to see which race seat will fit in there, i measured the roof height. 90,5 cm, boy it is going to be tight.
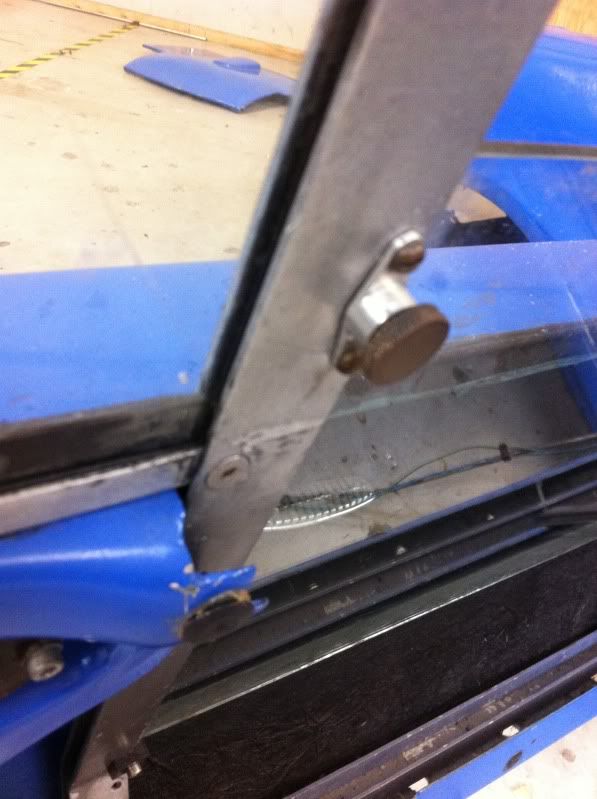
I also noticed iam missing one of these locking screws for the door windows. Any idea what they are from?
When i got home, this was waiting for me:

I will soon have to start tackling the glass fibre repairs. There is a shop very close to my garage, who specialises in this. My plan is to ask him if i can rent a space in his workshop for the grinding and lay up. I think i also need to check and probably replace all the steel reinforcements. If any of you guys could elaborate on how to do this, maybe there is a link to a forum post or something, i would really appreciate it.
This was all for this time.
BR
Dennis |
Mini Marcos Mk.II 7012
Dennis Overgaard Nielsen
Denmark |
|
|
|
| |
Reply: 9 - 96 |
|
|
| Craig Smith |
| Posted on: September 16th, 2011, 15:00:02 |
|
|
Big Member

Location: Bury
Posts: 256
|
|
Dennis there are a few photo's here of the metal work being changed on my Mk IV..
http://s266.photobucket.com/albums/ii279/gridnutter/#!cpZZ2QQtppZZ28
The crossmember is different on the Mk III running the full width of the car and is completely encased, the Mk IV only has steel inserts either end of a fibreglass crossmember.
There was an article a while back in the magazine of a Mk III being done. |
|
|
|
| |
Reply: 10 - 96 |
|
|
| dalla |
| Posted on: September 16th, 2011, 16:08:48 |
|
|
Medium Member
Location: Aarhus Denmark
Posts: 112
|
|
Thanks a lot mate, that is greatly appreciated.
Any idea of how i get hold of that particular magazine?
Also any ideas about wether the Wood behind the dash is original? |
Mini Marcos Mk.II 7012
Dennis Overgaard Nielsen
Denmark |
|
|
|
| |
Reply: 11 - 96 |
|
|
| Roger Garland |
| Posted on: September 16th, 2011, 22:25:21 |
|
|
Big Member
Location: Worcester, UK
Posts: 258
Reputation: 1 (tot: 1) |
|
Hi Dennis
Back issues of club magazines are available from Allan Brown at just £3 each plus postage
The Mini Marcos Owners Club badge you asked about earlier is available from Melanie. She tells me she supplies one free of charge when people join the owners club, but extra copies are available for a small sum (about £1)
Good luck with the restoration
Roger
Club Secretary |
|
|
|
| |
Reply: 12 - 96 |
|
|
| jimnaylor |
| Posted on: September 17th, 2011, 10:56:45 |
|
|
Big Member
Location: Bedfordshire
Posts: 222
|
|
| In my MkIII the bits that are in wood on yours are fibreglass on mine, but the top of my dash is flat not curved with a central hump. But I don't know if mine is original either. |
|
|
|
| |
Reply: 13 - 96 |
|
|
| dalla |
| Posted on: September 17th, 2011, 11:43:16 |
|
|
Medium Member
Location: Aarhus Denmark
Posts: 112
|
|
Thanks alot guys, i gotta pull my self together and join the owners club.
Can anyone tell me which issue the mk 3 fibreglass repair article is in?
Thanks again
Dennis |
Mini Marcos Mk.II 7012
Dennis Overgaard Nielsen
Denmark |
|
|
|
| |
Reply: 14 - 96 |
|
|
| dalla |
| Posted on: September 17th, 2011, 12:37:19 |
|
|
Medium Member
Location: Aarhus Denmark
Posts: 112
|
|
Cheers Jim
What kind of dash is in yours? Do you have a cut out in the dash for the rollcage?
Another question, the front crossmember on a mk. III, i take it is a item taken from a normal Mini?
Is is from any particular model, and where can you buy it?
Kind regards
Dennis |
Mini Marcos Mk.II 7012
Dennis Overgaard Nielsen
Denmark |
|
|
|
| |
Reply: 15 - 96 |
|
|
| Olly Lewis |
| Posted on: September 17th, 2011, 15:19:12 |
|
|
Medium Member
Posts: 194
|
|
Hello all.
I have to say, I believe that the wood isn't original on your dash as mine is all grp. I know a number of people can supply various panels and that dash panels have been mentioned. I'm sure asking on here will unearth some possibilities. Hope that helps
Olly |
|
|
|
| |
Reply: 16 - 96 |
|
|
| dalla |
| Posted on: September 17th, 2011, 16:53:08 |
|
|
Medium Member
Location: Aarhus Denmark
Posts: 112
|
|
Cheers mate. Would really like some additional Info on this.
Also on how to tackle the front cross member? Any ideas where i can source a fresh one? |
Mini Marcos Mk.II 7012
Dennis Overgaard Nielsen
Denmark |
|
|
|
| |
Reply: 17 - 96 |
|
|
| Allan Brown |
| Posted on: September 17th, 2011, 19:02:24 |
|
|
Administrator

Location: Billingshurst, UK
Posts: 452
|
|
The article about replacing the cross member is in club magazine 115.
I have some spare copies, if you join the club I will send a copy to you.
Allan |
|
|
|
| |
Reply: 18 - 96 |
|
|
| dalla |
| Posted on: September 17th, 2011, 20:02:31 |
|
|
Medium Member
Location: Aarhus Denmark
Posts: 112
|
|
“ |
Quoted from Allan Brown, posted September 17th, 2011, 19:02:24 at here |
” |
The article about replacing the cross member is in club magazine 115.
I have some spare copies, if you join the club I will send a copy to you.
Allan
|
|
Cheers mate, i have joined up today. Please let me know what information you need?
br
Dennis |
Mini Marcos Mk.II 7012
Dennis Overgaard Nielsen
Denmark |
|
|
|
| |
Reply: 19 - 96 |
|
|
| dalla |
| Posted on: September 18th, 2011, 20:39:37 |
|
|
Medium Member
Location: Aarhus Denmark
Posts: 112
|
|
Is this the correct cross member?
Iam not totally aware what to look for, but as i understand it, these are not made anymore?
Hope you can help.
 |
Mini Marcos Mk.II 7012
Dennis Overgaard Nielsen
Denmark |
|
|
|
| |
Reply: 20 - 96 |
|
|
| admin |
| Posted on: September 18th, 2011, 22:11:59 |
|
|
Administrator
Location: Maidenhead, UK
Posts: 2,380
Reputation: 1 (tot: 1) |
|
It's uncanny. An 'A' Series manages to leak oil even when it's not there! 
|
Last modified September 18th, 2011, 22:31:32 by admin |
|
|
|
| |
Reply: 21 - 96 |
|
|
| dalla |
| Posted on: September 19th, 2011, 06:21:37 |
|
|
Medium Member
Location: Aarhus Denmark
Posts: 112
|
|
He he, just water mate, but yeah it is probably less funny when the actual engine starts leaking.
Any idea's about the cross member? Last one they have, would like to grab it, so if any og you could verify if it is the correct one, i would really appreciate it. |
Mini Marcos Mk.II 7012
Dennis Overgaard Nielsen
Denmark |
|
|
|
| |
Reply: 22 - 96 |
|
|
| admin |
| Posted on: September 19th, 2011, 17:52:17 |
|
|
Administrator
Location: Maidenhead, UK
Posts: 2,380
Reputation: 1 (tot: 1) |
|
“ |
Quoted from dalla, posted September 18th, 2011, 20:39:37 at here |
” |
Is this the correct cross member?
Iam not totally aware what to look for, but as i understand it, these are not made anymore?
Hope you can help.
|
|
Where are the tubes for the subframe bolts to go through? Where are the flanges with captive nuts for the upper shock absorber mounts? Where are the master cylinder/pedal box mounting positions? What are those bits with round holes welded onto it?
No, it's a cross-member but I think it's one that goes on the floor where the back subframe bolts on. I've never seen an engine bulkhead cross-member for sale at any of the usual panel suppliers. Your best bet is to cut one out of a scrap Mini shelll. The cross-member usually survives and if it doesn't the shell isn't worth repairing, so there's no call for replacements. |
Last modified September 19th, 2011, 18:01:35 by admin |
|
|
|
| |
Reply: 23 - 96 |
|
|
| dalla |
| Posted on: September 19th, 2011, 18:59:04 |
|
|
Medium Member
Location: Aarhus Denmark
Posts: 112
|
|
Cheers mate, didn't think it looked right.
If anyone has a cross member going spare i have money waiting.
BR
Dennis |
Mini Marcos Mk.II 7012
Dennis Overgaard Nielsen
Denmark |
|
|
|
| |
Reply: 24 - 96 |
|
|
| jimnaylor |
| Posted on: September 19th, 2011, 20:08:30 |
|
|
Big Member
Location: Bedfordshire
Posts: 222
|
|
Mini Spares usually sell them,
Vhttp://www.minispares.com/Product.aspx?ty=pb&pid=42141
but are out of stock at the moment. But you could always go direct to British Motor Heritage who still make them, and almost certainly make the mini spares ones.
http://www.bmh-ltd.com/index.html
You will have to contact a human! as they are not listed as a standard part, but they still make them for the full shells so should sell you one. Part number if interested is CZH 3355 or CZH 3345 depending on the car.
|
Last modified September 19th, 2011, 20:12:27 by jimnaylor |
|
|
|
| |
Reply: 25 - 96 |
|
|
| jimnaylor |
| Posted on: September 19th, 2011, 20:16:17 |
|
|
Big Member
Location: Bedfordshire
Posts: 222
|
|
| Just noticed Herritage do list it but in two halves AHC36003R and AHC36003L at £45.30 each. |
|
|
|
| |
Reply: 26 - 96 |
|
|
| dalla |
| Posted on: September 19th, 2011, 21:26:16 |
|
|
Medium Member
Location: Aarhus Denmark
Posts: 112
|
|
Cheers mate, i have also just found this. But this is for a single bolt subframe? Right?
Is is possible to modify this? I am thinking about getting the Cross member and all the steel reinforcing plates galvanised before bonding them back in again. Have anyone tried this? |
Mini Marcos Mk.II 7012
Dennis Overgaard Nielsen
Denmark |
|
|
|
| |
Reply: 27 - 96 |
|
|
| admin |
| Posted on: September 20th, 2011, 13:27:32 |
|
|
Administrator
Location: Maidenhead, UK
Posts: 2,380
Reputation: 1 (tot: 1) |
|
There was an article in the MMOC Magazine a while back about making up steel cross-member inserts à la Mk.IV.
You can use the later subframe with the cross-member to match. Just get the solid mounting brackets for the subframe tails and drill some new holes to bolt them onto the shell. |
|
|
|
| |
Reply: 28 - 96 |
|
|
| dalla |
| Posted on: September 20th, 2011, 18:35:02 |
|
|
Medium Member
Location: Aarhus Denmark
Posts: 112
|
|
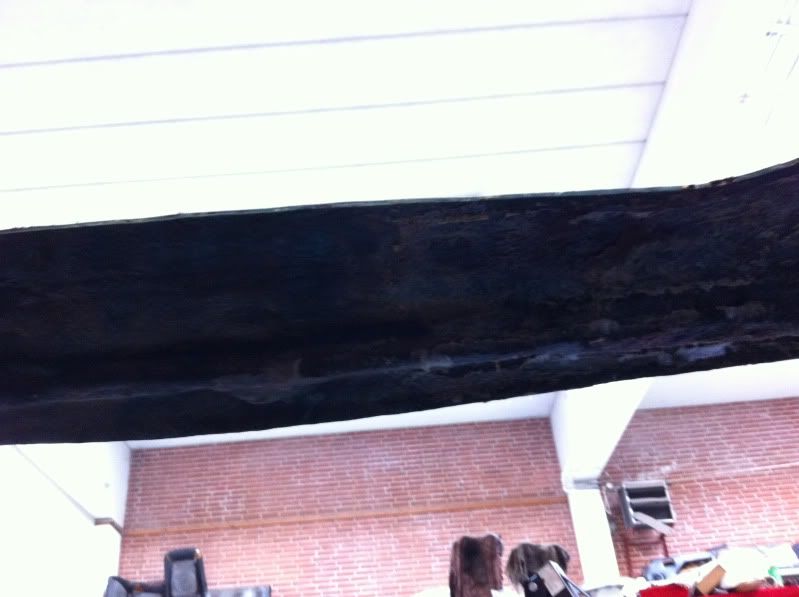
Thanks but i allready have a twinbolt subframe?
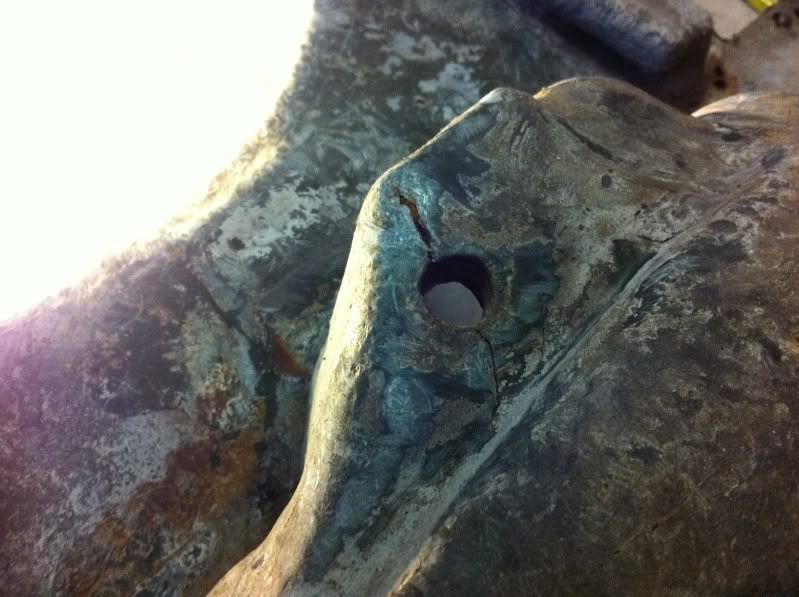
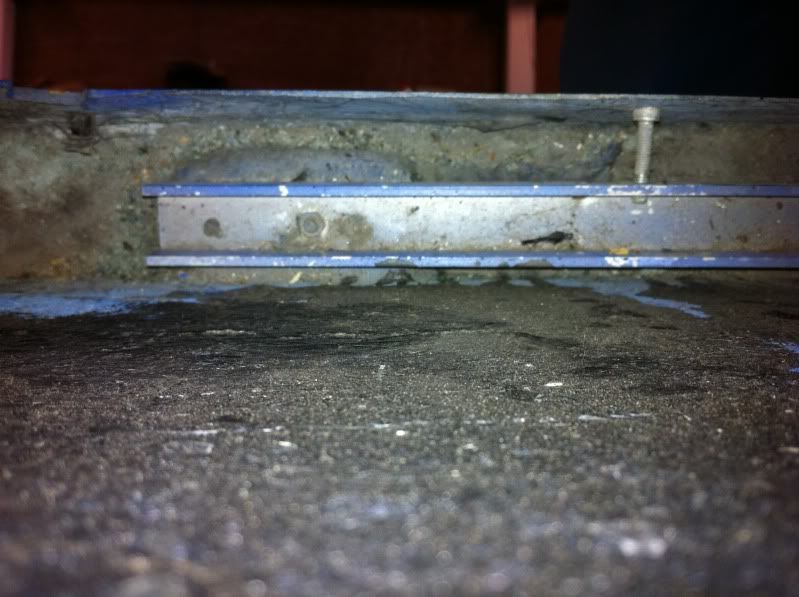
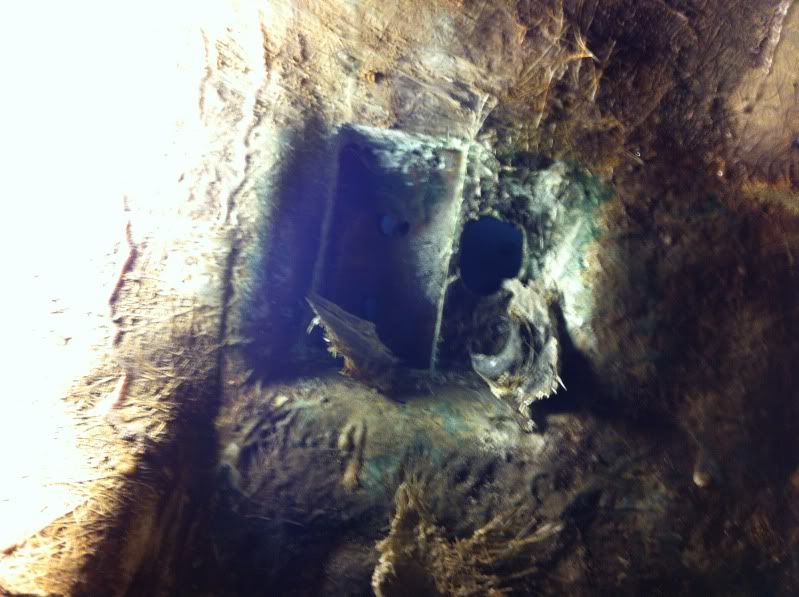
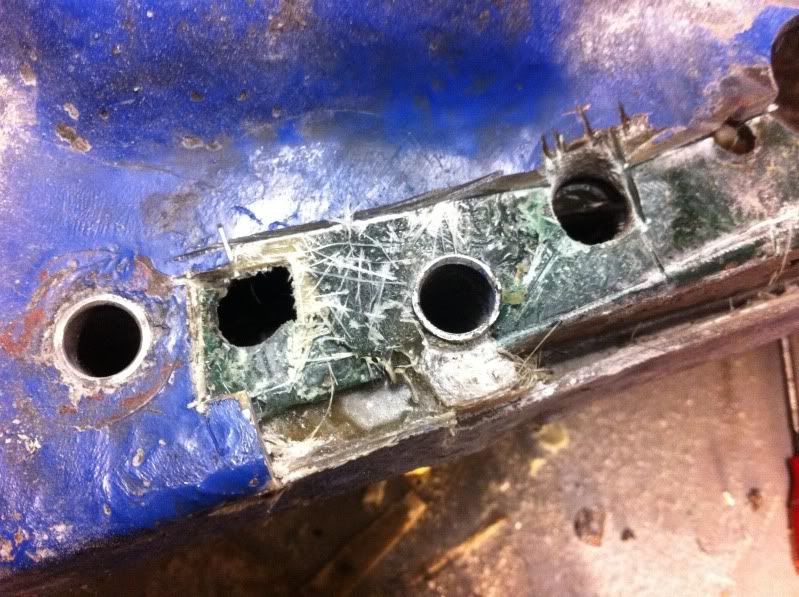
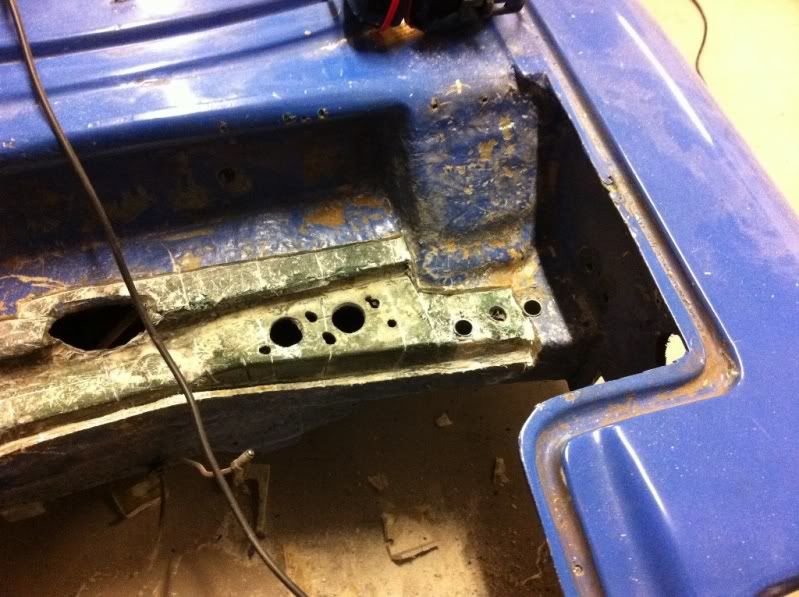
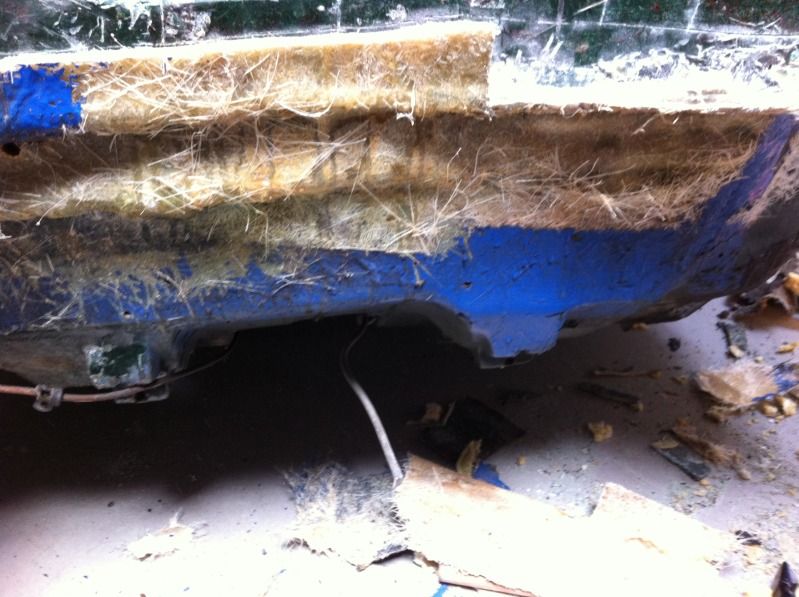
Looked a bit more at it today, and isn't there supposed to be metal here?
Seem like my car has no cross member, just very thick fibre glass.
Maybe it have been converted to run just two box sections like the later cars?
Will this be strong enough?
 |
Mini Marcos Mk.II 7012
Dennis Overgaard Nielsen
Denmark |
|
|
|
| |
Reply: 29 - 96 |
|
|
| admin |
| Posted on: September 20th, 2011, 22:20:55 |
|
|
Administrator
Location: Maidenhead, UK
Posts: 2,380
Reputation: 1 (tot: 1) |
|
| What's at the bottom of that hole? Anyway, fibreglass is stronger than steel, weight for weight, but it needs to be thicker. You'll need the tubes for the subframe bolts and the bit surrounding it, to give you something to tighten the bolts up on. All the other bits of embedded steel are there to allay the fears of customers rather than as a structural necessity. The thick fibreglass might be a problem where the master cylinders are bolted on because it reduces pedal travel. |
|
|
|
| |
Reply: 30 - 96 |
|
|
| dalla |
| Posted on: September 20th, 2011, 23:12:32 |
|
|
Medium Member
Location: Aarhus Denmark
Posts: 112
|
|
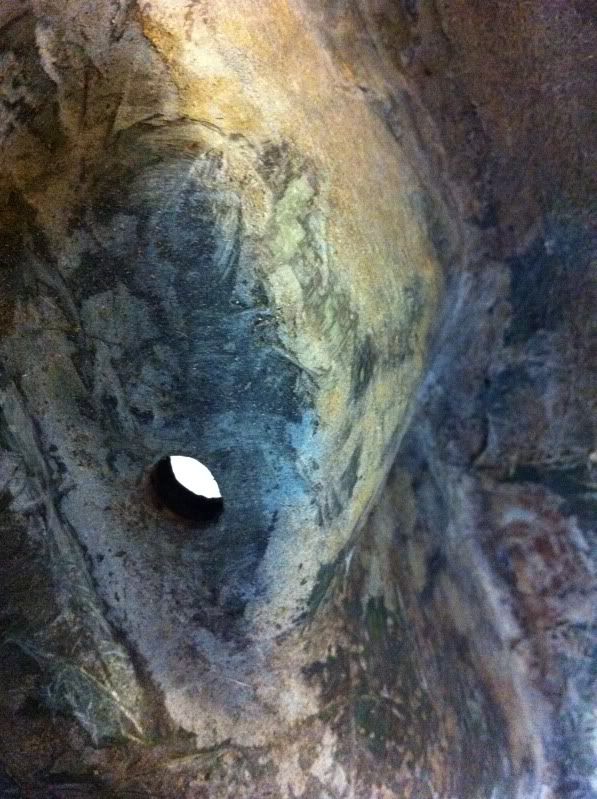
The hole goes through to inside that car.
I removed the pedal assembly today, and it didn't seem like there was any issues with pedal travel.
Iam just wondering why my car doesn't have a full beam running the with of the car? This must have been modified? Any idea if this was done when the car was built up by the club, at Stoneleigh in 1991?
Anyways, i guess i should try and get it opned up, as i don't want to paint a car with potential rotten subframe mounts.
But you don't think it will be a problem without the steelbeam? The fibreglass is pretty thick. Maybe close to 10 mm. |
Mini Marcos Mk.II 7012
Dennis Overgaard Nielsen
Denmark |
|
|
|
| |
Reply: 31 - 96 |
|
|
| Stuart |
| Posted on: September 21st, 2011, 06:44:53 |
|
|
Big Member
Location: Peak District
Posts: 284
Reputation: 1 (tot: 1) |
|
“ |
Quoted from dalla, posted September 20th, 2011, 23:12:32 at here |
” |
But you don't think it will be a problem without the steelbeam? The fibreglass is pretty thick. Maybe close to 10 mm.
|
|
a Midas doesn't have any steel embedded in the shell and they have no issues with strength.
|
|
|
|
| |
Reply: 32 - 96 |
|
|
| admin |
| Posted on: September 21st, 2011, 15:13:13 |
|
|
Administrator
Location: Maidenhead, UK
Posts: 2,380
Reputation: 1 (tot: 1) |
|
| The shell wasn't modified at Stoneleigh and I'm pretty certain it didn't have anything major done to it beforehand. Ideally we would have liked a new shell but there wasn't one available so we got that one and returned it as far as possible to its original state. We also took the donor van to bits, cleaned up the parts we wanted and put it back together again so we knew there wouldn't be any problems at the show. |
Last modified September 21st, 2011, 15:13:59 by admin |
|
|
|
| |
Reply: 33 - 96 |
|
|
| dalla |
| Posted on: September 22nd, 2011, 07:20:05 |
|
|
Medium Member
Location: Aarhus Denmark
Posts: 112
|
|
Hi Guys
More progress.
Today i removed the rest of the glue from headliner and carpets. So it should be ready to go to the fibre glass doctor soon.
After this i started stripping the rest of the car. Took of the doos and rear hatch. The lights and indicators were also removed. The tank is also off the car, think i have decided to close the original hole for the tank, and go for a round one for the spare wheel well.


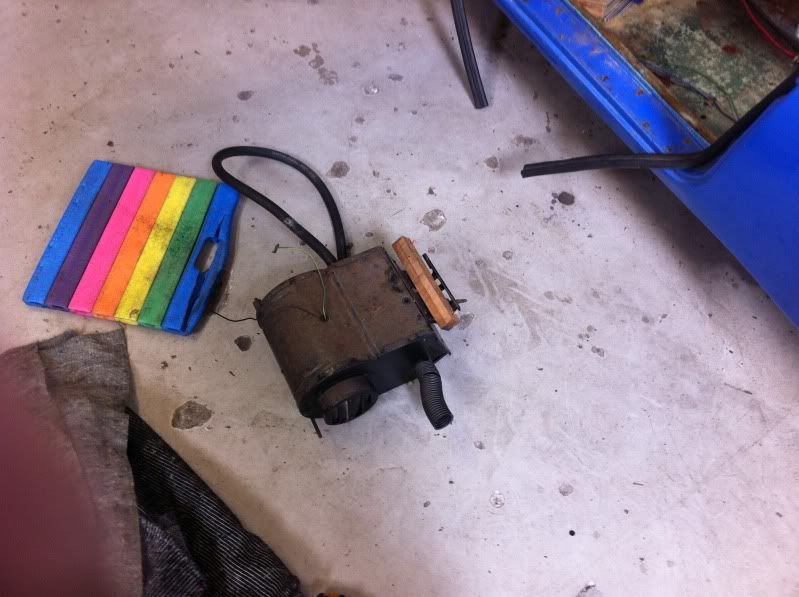
I also took out the wiper motor and are wondering wether i should put a saw to the wood work behind the dash?
After this i took some time (between sitting in the bare shell making engine noises) accessing the fibre glass damage.
There is the odd hole in the floors, which is probably where i will start, as i have never worked with fibreglass before.
I have made a deal with a fibre glass company very close to my garage. They have agreed that i can come there with the car, and do as much of the job i can myself, and then they will help me along the way. We haven' agreed on a price yet though. 
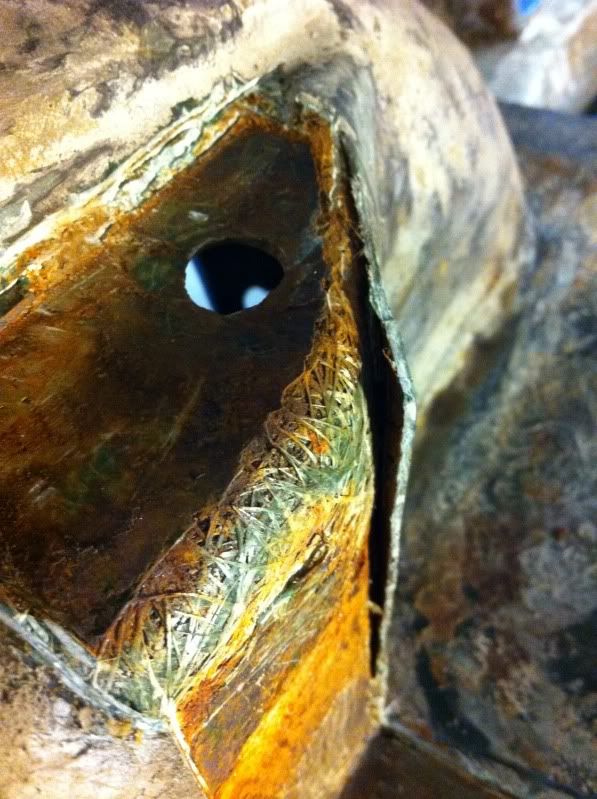
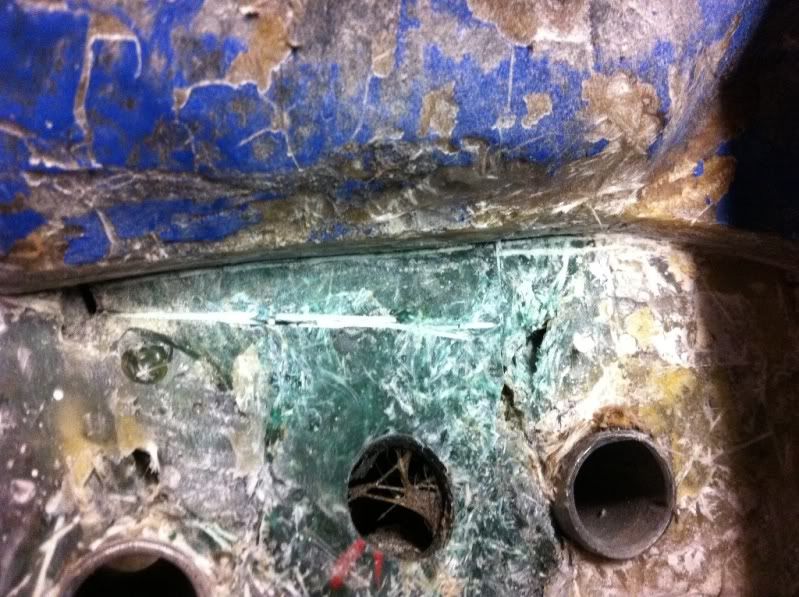
These are the places i found that needs repair.

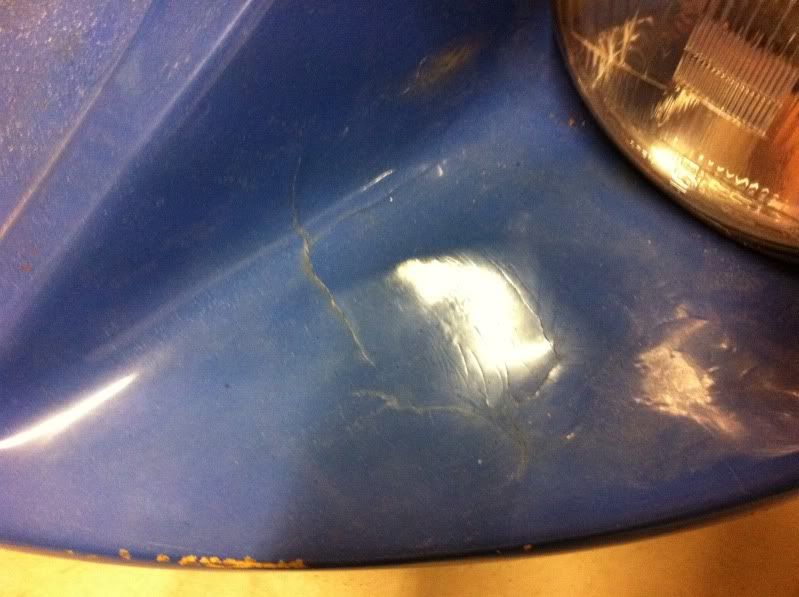


Furthermore there are going to be quite a lot of repair to the steel reinforced parts of the body.
Shock towers in the rear, one is cracked, and both metal inserts looks to be rotten.
Steering rack mounts are also looking quite "red"
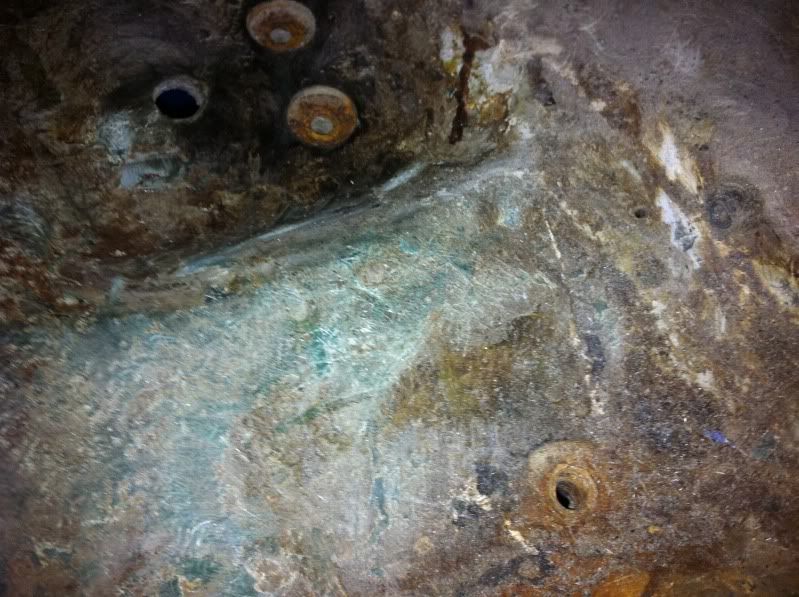

Door mounts on the front fender. Looks like theres also metal in there. A bit concerned about replacing this and make everything line up.

As for lining the steel inserts up, i think i need to get the rear subframe bought and assembled, so i can use that to maintain the position of the inserts. My plan was to bolt it all up to the shell, and then take on steel plate at a time. That way iam sure the geomtry doesn't slide? Any other suggestions?
As for the steel reinforcing plates, i have readily acces to stainless steel. I have thinking about making the plates in stainless, as it would basically last forever then. Is that a bad idea? I know that stainless is a bit more brittle than ordinary steel, but when it is laminatied in i guess its main purpose is to dispatch stress over a bigger area, and it doesn't really bend as such? What do you guys think?
|
Mini Marcos Mk.II 7012
Dennis Overgaard Nielsen
Denmark |
|
|
|
| |
Reply: 34 - 96 |
|
|
| Craig Smith |
| Posted on: September 22nd, 2011, 09:39:57 |
|
|
Big Member
Location: Bury
Posts: 256
|
|
Hi Dennis,
I replaced all of the steelwork in my shell with Stainless, including the cross member inserts (& Fuel Tank!) - I can't see any issues arising from using Stainless in the bonded in areas, it certainly won't rust and cause the fibre glass to delaminate in the way mild steel invariably will. |
|
|
|
| |
Reply: 35 - 96 |
|
|
| jimnaylor |
| Posted on: September 22nd, 2011, 12:18:44 |
|
|
Big Member
Location: Bedfordshire
Posts: 222
|
|
“ |
Quoted Text |
” |
That way iam sure the geomtry doesn't slide?
|
|
If your cars geometry was correct to start with, it would be a first !
MM's are notorious for their suspension alignment being way out. |
|
|
|
| |
Reply: 36 - 96 |
|
|
| dalla |
| Posted on: September 22nd, 2011, 13:17:12 |
|
|
Medium Member
Location: Aarhus Denmark
Posts: 112
|
|
Yeah, but i guess it will be nearly impossible to check as it is now? Then i should build up the entire subframes and ad weight for all ancillyries? The second best thing must be assuming that the mounting points are some what in the right place?
Thanks for your replies guys. They are very very useful for a newbie like me.
Think i will go for stainless then. Then i don't have to wonder about it anymore. |
Mini Marcos Mk.II 7012
Dennis Overgaard Nielsen
Denmark |
|
|
|
| |
Reply: 37 - 96 |
|
|
| dalla |
| Posted on: September 22nd, 2011, 17:53:43 |
|
|
Medium Member
Location: Aarhus Denmark
Posts: 112
|
|
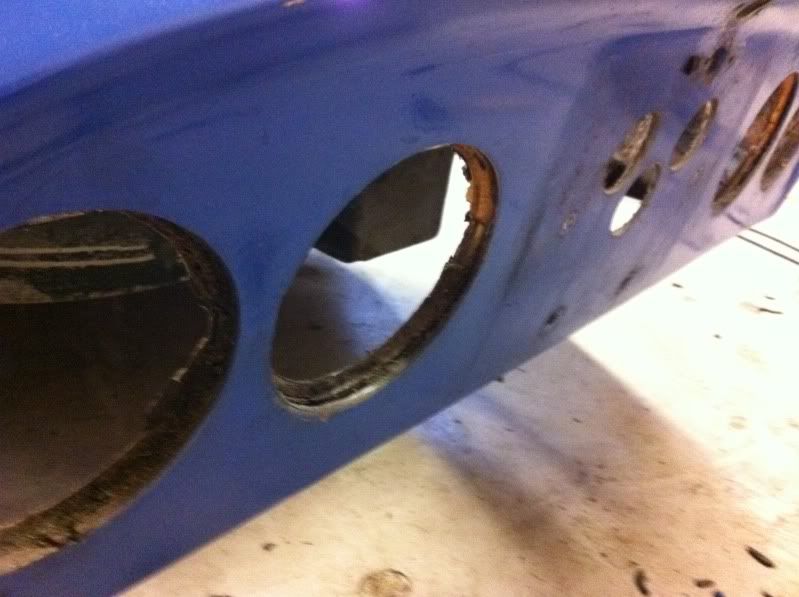
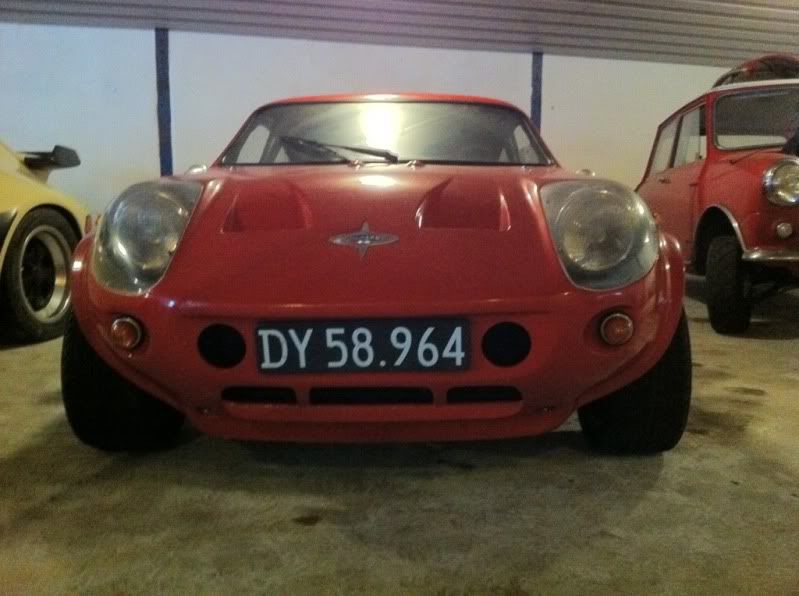
Today i got a picture of one of the other Mini Marcos's in Denmark.
The red one belongs to Per who also has a page on here:
http://www.minimarcos.org.uk/memcars/hahn/index.html
I think i might steal the details with the two big holes either side of the number plate, and also the matt black under the headlight covers.
 |
Mini Marcos Mk.II 7012
Dennis Overgaard Nielsen
Denmark |
|
|
|
| |
Reply: 38 - 96 |
|
|
| Peter Bremner |
| Posted on: September 22nd, 2011, 19:34:56 |
|
|
Big Member
Location: Ongar, Essex
Posts: 410
|
|
Hello, I put my car on its roof and fitted the subframes. The rear needed spacers over 2.5cm thick on one side to get the axles to line up. It proved impossible to get the front and rear wheels to line up, the rear is offset to the left by a couple of cms as well. The reference points don't make a rectangle, they make a parallelogram.
I had steel plates in the doors, the hinge studs completely missed them! I took them out and just rebuilt with layers of glass fibre. I think you're better off putting the steel plates (if any) directly under the nuts and washers. Then the plate has to be pulled through the entire thickness of the glassfibre, rather than just half or less the thickness. |
Last modified September 22nd, 2011, 19:35:36 by Peter Bremner |
|
|
|
| |
Reply: 39 - 96 |
|
|
| dalla |
| Posted on: September 22nd, 2011, 20:23:39 |
|
|
Medium Member
Location: Aarhus Denmark
Posts: 112
|
|
Thanks Peter. I guess your are right about the doors. But i am pretty sure that my doors doesn't have any steel reinforcement. So will probably just make a backing plate like you suggest.
I am a bit concerned about the whole reinforcement vs. tracking afterwards issues.
But i think i have heard about the rear subframe being offset before? This is commom on a MM isn't it? |
Mini Marcos Mk.II 7012
Dennis Overgaard Nielsen
Denmark |
|
|
|
| |
Reply: 40 - 96 |
|
|
| Peter Bremner |
| Posted on: September 22nd, 2011, 20:30:40 |
|
|
Big Member
Location: Ongar, Essex
Posts: 410
|
|
Hello, the original moulds were faulty and were never fixed.

These were the first spacers I fitted, in the end I had to remake them another 6mm thicker! |
|
|
|
| |
Reply: 41 - 96 |
|
|
| dalla |
| Posted on: September 23rd, 2011, 07:08:20 |
|
|
Medium Member
Location: Aarhus Denmark
Posts: 112
|
|
| Cheers mate. I will have to check this too i guess. |
Mini Marcos Mk.II 7012
Dennis Overgaard Nielsen
Denmark |
|
|
|
| |
Reply: 42 - 96 |
|
|
| admin |
| Posted on: September 25th, 2011, 09:17:10 |
|
|
Administrator
Location: Maidenhead, UK
Posts: 2,380
Reputation: 1 (tot: 1) |
|
| Heritage had a stand at Castle Combe yesterday. They had a later type (large bolt) engine bulkhead crossmember for £88.00. |
|
|
|
| |
Reply: 43 - 96 |
|
|
| dalla |
| Posted on: September 26th, 2011, 13:55:42 |
|
|
Medium Member
Location: Aarhus Denmark
Posts: 112
|
|
Cheers mate, i have seen it on their homepage.
Do you think it is possible to modify it to the earlier type? |
Mini Marcos Mk.II 7012
Dennis Overgaard Nielsen
Denmark |
|
|
|
| |
Reply: 44 - 96 |
|
|
| admin |
| Posted on: September 26th, 2011, 16:29:10 |
|
|
Administrator
Location: Maidenhead, UK
Posts: 2,380
Reputation: 1 (tot: 1) |
|
| Well I suppose you could just drill some holes for the bolts and weld in a couple of steel tubes on each side. If you are going to do that it might be simpler just to fabricate the inserts for each side, or alternatively use a later subframe. |
Last modified September 26th, 2011, 16:31:29 by admin |
|
|
|
| |
Reply: 45 - 96 |
|
|
| dalla |
| Posted on: September 26th, 2011, 18:05:02 |
|
|
Medium Member
Location: Aarhus Denmark
Posts: 112
|
|
Yeah i know it might be easier just to do the inserts, but i would like it to be like it left the factory.
Also i have a bit more faith in the full beam?
Changing the subframe is pretty expensive. |
Mini Marcos Mk.II 7012
Dennis Overgaard Nielsen
Denmark |
|
|
|
| |
Reply: 46 - 96 |
|
|
| dalla |
| Posted on: September 27th, 2011, 19:12:45 |
|
|
Medium Member
Location: Aarhus Denmark
Posts: 112
|
|
Hi Guys
A short update, iam going to Japan tomorrow for 6 weeks. No pleasure though only work.
I am trying to arrange a visit at a Classic Car dealer, they have a Deep Sanderson 301 there.
But yesterday and today i spent a little time to take the doors and windows apart.
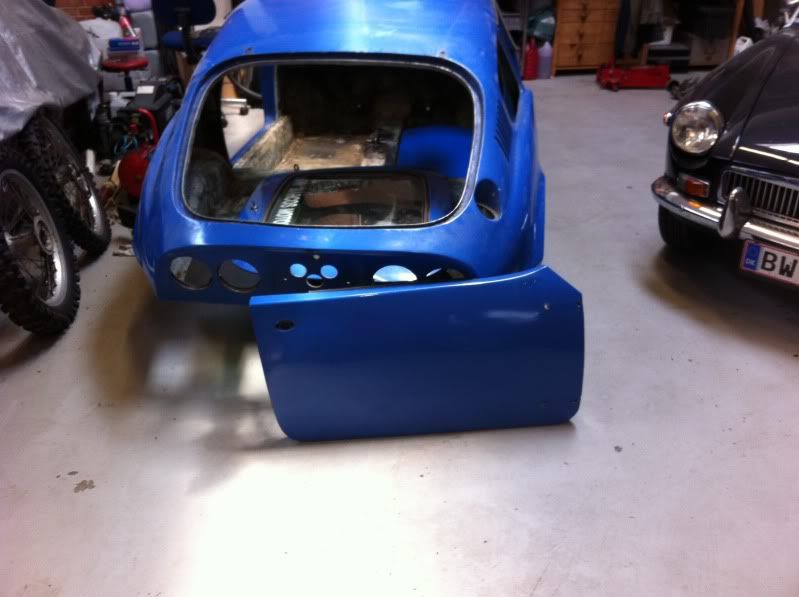
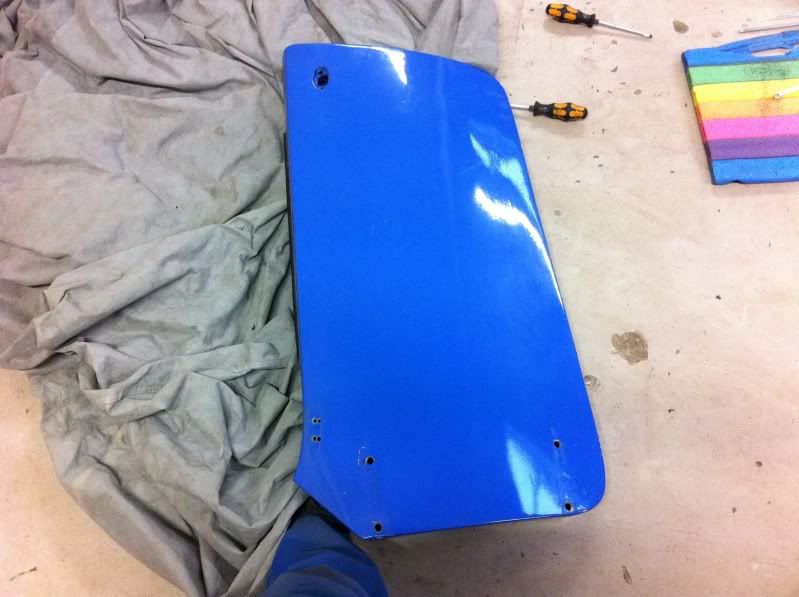
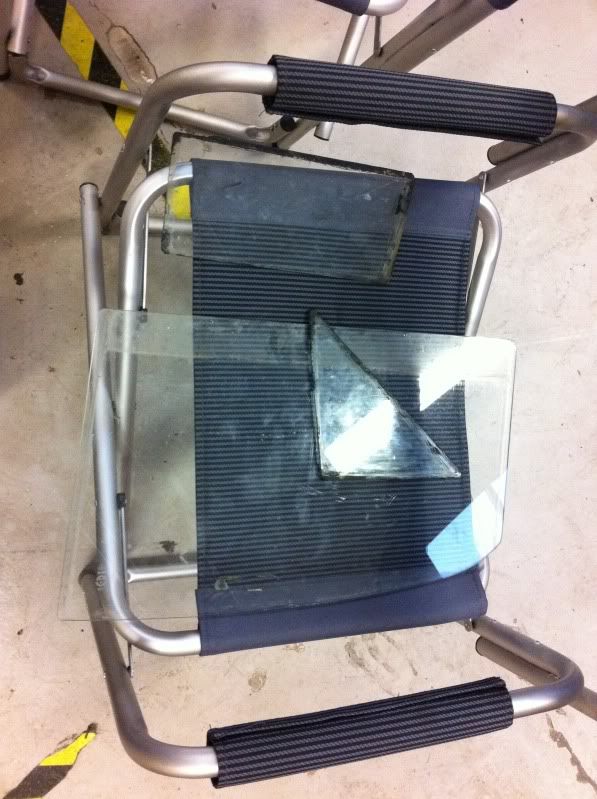


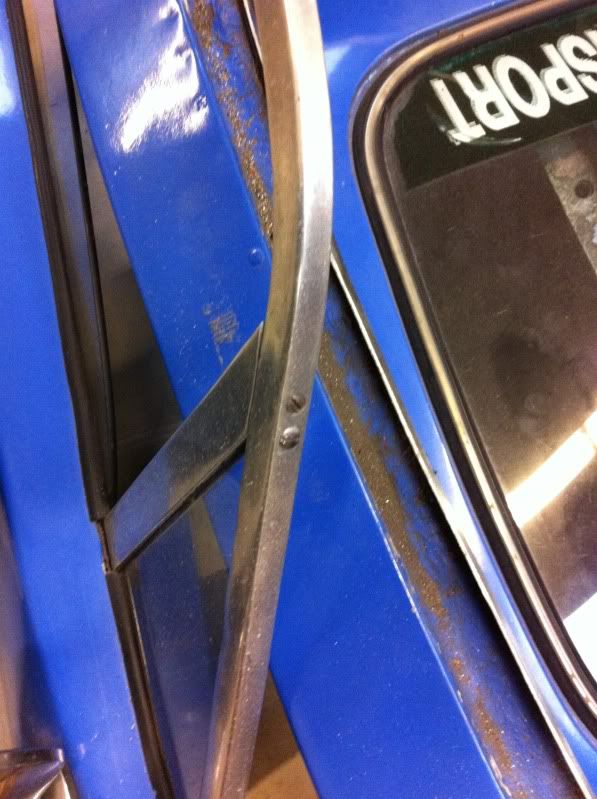
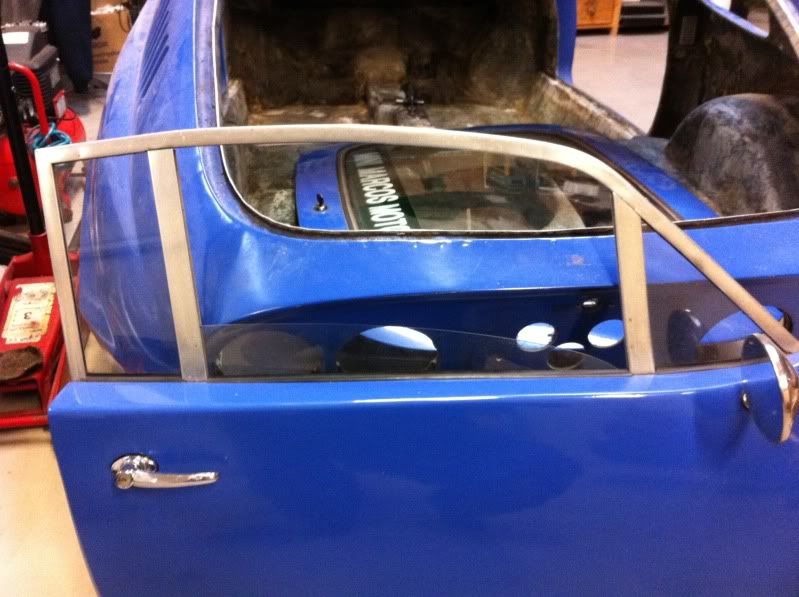
The window glass will be made of lexan, and all the rubber seals will have to be replaced.
Is it possible to buys the different seals through the Club?
Also the door lachtes and handles will probably also have to be exchanged. I allready have a bid in on Ebay for the interior handles.
BTW today when i was driving to my garage, i spotted this "blast from the past".

Pretty cool.
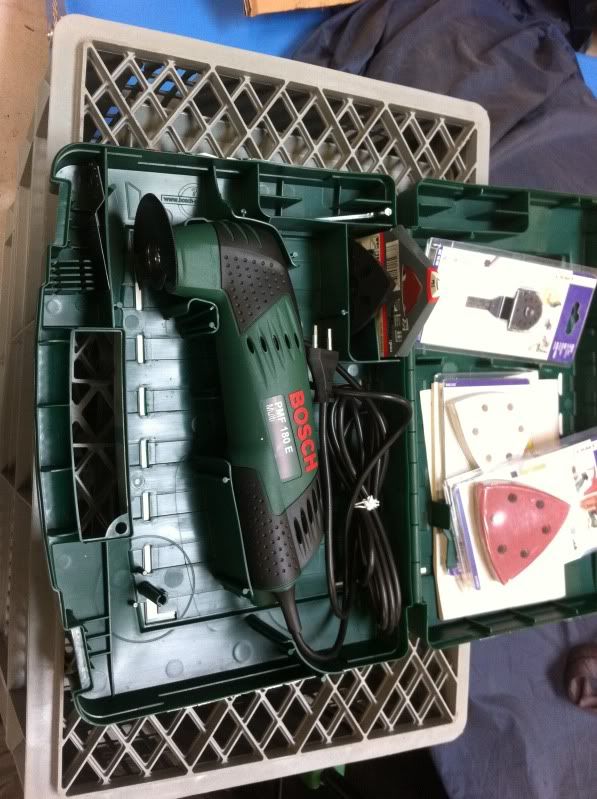
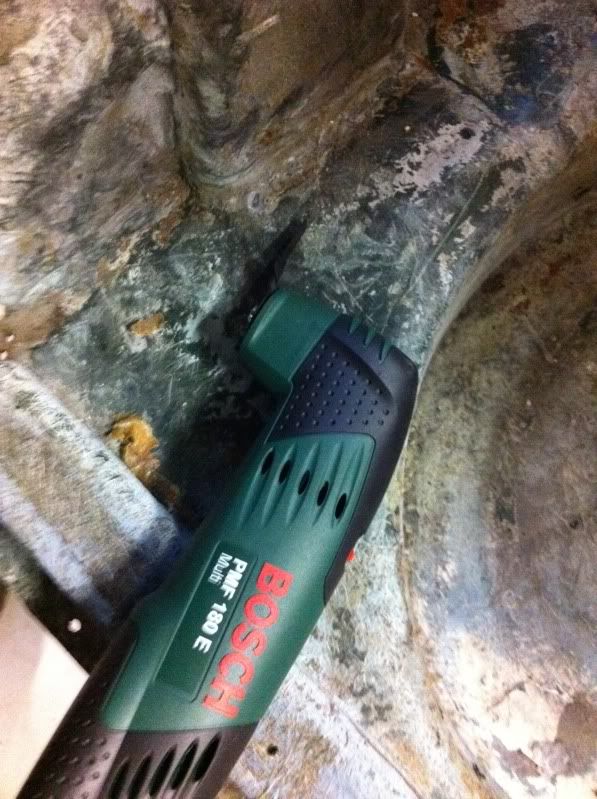
After the last disassembly, the car should allmost be ready for fibreglass work. Hopefully i will get that started when i return from Japan. I have also bought this Multi Cutter tool for the purpose. It is basically an oscillating saw, hopefully it will be usefull for cutting the fibreglass in narrow spots?
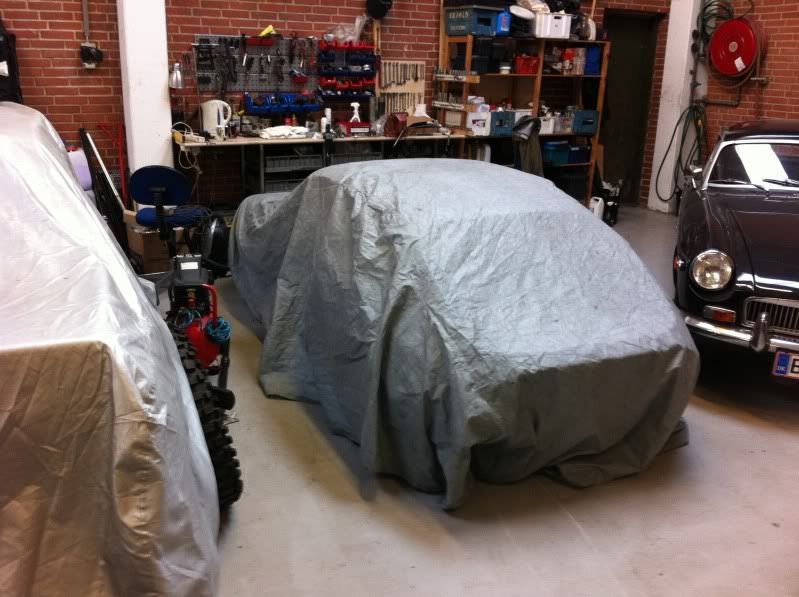
But for right now everything is wrapped up, and iam ready to leave tomorrow.

My plan is to get the dash board and rear subframe ordered while iam in Japan.
And then i can hopefully get the fibreglass work done before christmas.
That was all for now. Will be back in 6 weeks. |
Mini Marcos Mk.II 7012
Dennis Overgaard Nielsen
Denmark |
Last modified September 27th, 2011, 19:16:30 by dalla |
|
|
|
| |
Reply: 47 - 96 |
|
|
| Craig Smith |
| Posted on: September 27th, 2011, 20:37:07 |
|
|
Big Member
Location: Bury
Posts: 256
|
|
"but i would like it to be like it left the factory"
Dennis,
Very admirable and if that is the direction that you have chosen then all well and good..
However no two Mini Marcos are the same, and I doubt that any two cars even left the factory looking exactly the same, so a minor modificaton to the cross member would hardly be a big deal, especially as the MkIII has a cross member that is completely encapsulated in fibreglass. It really would take an obsessed rivet counter to spot the change, and those that did probably wouldn't care less. The twin bolt subframes are far more difficult to come by and therefore command a higher price..
It is still possible to retain the solid rear mounts of the twin bolt type if you are prepared to spend the time modifying it.
Enjoy Japan !!!
My final controversial point is that the DeLorean DMC-12 is WAY more than pretty cool.. It is infinately Sub-Zero and deserves a chiller all to itself (sorry if that is lost on you!). |
Last modified September 27th, 2011, 20:43:43 by Craig Smith |
|
|
|
| |
Reply: 48 - 96 |
|
|
| dalla |
| Posted on: September 27th, 2011, 22:12:53 |
|
|
Medium Member
Location: Aarhus Denmark
Posts: 112
|
|
Cheers mate
Solid rear mounts? Is this on the rear subframe? Iam not sure that i follow?
Iam still not 100% decided on what to do with the cross member btw.
Br
Dennis |
Mini Marcos Mk.II 7012
Dennis Overgaard Nielsen
Denmark |
|
|
|
| |
Reply: 49 - 96 |
|
|
| dalla |
| Posted on: October 5th, 2011, 17:05:42 |
|
|
Medium Member
Location: Aarhus Denmark
Posts: 112
|
|
Hi Guys
I have ordered the Works dash from Rae Davis. And right now i am trying to piece together an order for an rear subframe, and for a damper kit with hi-lo's.
But iam not totally sure wether to go for std. ride height dampers, or to go for the lowered version? Exactly how low will it be, and is there any improvement in handling? |
Mini Marcos Mk.II 7012
Dennis Overgaard Nielsen
Denmark |
|
|
|
| |
Reply: 50 - 96 |
|
|
| admin |
| Posted on: October 5th, 2011, 22:15:24 |
|
|
Administrator
Location: Maidenhead, UK
Posts: 2,380
Reputation: 1 (tot: 1) |
|
I think the point of lowered dampers is that you don't hit the limit of travel of the dampers if you've lowered your suspension. As long as that doesn't happen there shouldn't be any difference in handling. If the dampers do bottom out* you will know about it!
I've always used standard height dampers. If you lower your suspension enough to require lowered dampers then you're also going to have to modify the wheel arches significantly to stop the tyres rubbing. In fact wouldn't you also have to modify the bump stops, otherwise even if you set the ride height lower the limits of travel of the top arm are still the same?
* I mean "top out" i.e. the damper is fully compressed before you hit the top bump stop and you run out of suspension. At the other end the wheel comes off the ground. |
Last modified October 5th, 2011, 22:34:12 by admin |
|
|
|
| |
Reply: 51 - 96 |
|
|
| jimnaylor |
| Posted on: October 7th, 2011, 09:16:12 |
|
|
Big Member
Location: Bedfordshire
Posts: 222
|
|
|
|
|
| |
Reply: 52 - 96 |
|
|
| Craig Smith |
| Posted on: October 7th, 2011, 23:11:44 |
|
|
Big Member
Location: Bury
Posts: 256
|
|
Sorry all, at the risk of major thread drift, but quite possibly of interest to some.. Wheeler Dealers is back on Discovery Channel on Tuesday 11th at 21:00 - kicking off with a DeLorean DMC-12.
One day 
|
|
|
|
| |
Reply: 53 - 96 |
|
|
| dalla |
| Posted on: October 12th, 2011, 06:33:28 |
|
|
Medium Member
Location: Aarhus Denmark
Posts: 112
|
|
| Awesome will have to watch that, even though Brewer isn't exactly my cup of tea. |
Mini Marcos Mk.II 7012
Dennis Overgaard Nielsen
Denmark |
|
|
|
| |
Reply: 54 - 96 |
|
|
| dalla |
| Posted on: October 14th, 2011, 13:06:08 |
|
|
Medium Member
Location: Aarhus Denmark
Posts: 112
|
|
|
|
|
| |
Reply: 55 - 96 |
|
|
| jimnaylor |
| Posted on: October 14th, 2011, 18:32:42 |
|
|
Big Member
Location: Bedfordshire
Posts: 222
|
|
I do find Wheeler Dealers entertaining, but they do tend to miss quite a lot out of their costings in most of their programmes. In this one for example although they quote shipping and taxes at £2500, that literally just covers shipping and shipping taxes. Nothing is said about import duty (17.5% probably then, 20% now) or Customs duty of 10% payable on both the car AND the imported parts, thats at least another £2900... then a nice clean new carpet set apeared, nothing about the £400+ those cost... and of course nothing about the time spent. They might just have turned a profit, but nothing like the ones they make out.
Still I enjoyed it. |
|
|
|
| |
Reply: 56 - 96 |
|
|
| dalla |
| Posted on: November 19th, 2011, 11:16:11 |
|
|
Medium Member
Location: Aarhus Denmark
Posts: 112
|
|
Hi Guys
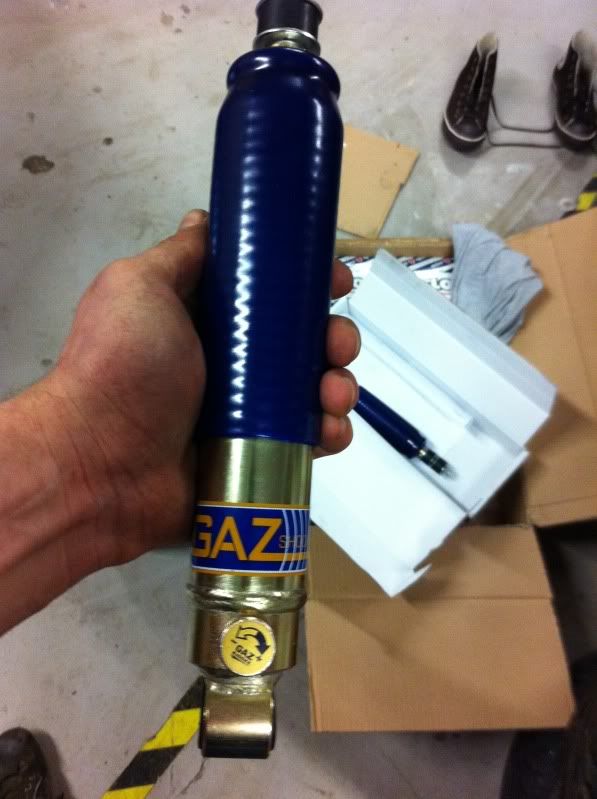
It has been really short on updates here lately. Iam still in Japan, and have been here for allmost 2 months now. But iam going home hopefully next week, and i have a brand new genuine rear subframe and a set of GAZ shock absorbers waiting for me when i get home.
This evening i also secured a set of 5x10 GB minilites. One of the centrecaps are missing though, any idea where i can find a replacement? |
Mini Marcos Mk.II 7012
Dennis Overgaard Nielsen
Denmark |
|
|
|
| |
Reply: 57 - 96 |
|
|
| Simon Robinson |
| Posted on: November 19th, 2011, 19:01:52 |
|
|
Big Member

Location: Northampton
Posts: 338
|
|
|
|
|
| |
Reply: 58 - 96 |
|
|
| dalla |
| Posted on: November 20th, 2011, 00:44:02 |
|
|
Medium Member
Location: Aarhus Denmark
Posts: 112
|
|
Cheers mate
Iam going back to Denmark next week though. Are you sure minilite centre caps will fit GB's?
I was thinking about it, then i can use the lovely centre cap badges that the club makes.
Actually i have genuine Minilites on my Lotus Europa, i can just do a check with a centre cap from these. |
Mini Marcos Mk.II 7012
Dennis Overgaard Nielsen
Denmark |
|
|
|
| |
Reply: 59 - 96 |
|
|
| admin |
| Posted on: November 20th, 2011, 15:34:04 |
|
|
Administrator
Location: Maidenhead, UK
Posts: 2,380
Reputation: 1 (tot: 1) |
|
|
|
|
| |
Reply: 60 - 96 |
|
|
| dalla |
| Posted on: November 20th, 2011, 16:51:43 |
|
|
Medium Member
Location: Aarhus Denmark
Posts: 112
|
|
Perfect, cheers mate. Think i will try if the Minilite ones fit first. I like the look of the alloy ones. |
Mini Marcos Mk.II 7012
Dennis Overgaard Nielsen
Denmark |
|
|
|
| |
Reply: 61 - 96 |
|
|
| dalla |
| Posted on: November 26th, 2011, 20:25:47 |
|
|
Medium Member
Location: Aarhus Denmark
Posts: 112
|
|
“ |
Quoted from Allan Brown, posted September 17th, 2011, 19:02:24 at here |
” |
The article about replacing the cross member is in club magazine 115.
I have some spare copies, if you join the club I will send a copy to you.
Allan
|
|
Hi Guys
Iam back home from Japan, and need to get started on the MM soon again. My new subframe is waiting for me at my parents place, so will have to go a pick that up soon. Unfortunately i got my daily car sold, while i was in Japan, so i need to get a new one sorted ASAP. I also need to do a few bit and bops on the Lotus soon. But it is the MM that i look most forward to work on.
One thing though, i have been looking in my new MMOC magazines. And i have discovered that issue 115 covers the cross member replacement on a mk IV. Any idea of which issue it is that has a story about a mk III? |
Mini Marcos Mk.II 7012
Dennis Overgaard Nielsen
Denmark |
|
|
|
| |
Reply: 62 - 96 |
|
|
| dalla |
| Posted on: December 13th, 2011, 22:42:56 |
|
|
Medium Member
Location: Aarhus Denmark
Posts: 112
|
|
Hi Guys
A little progress today. As mentioned above my fully equiped 200 hp Seat Altea FR sold while i was i Japan. I have been home for a good 2 weeks now, and have been searching for a cheap runaround, as i don't really drive that much. After a good deal of searching i ended up with this Fiat Punto.
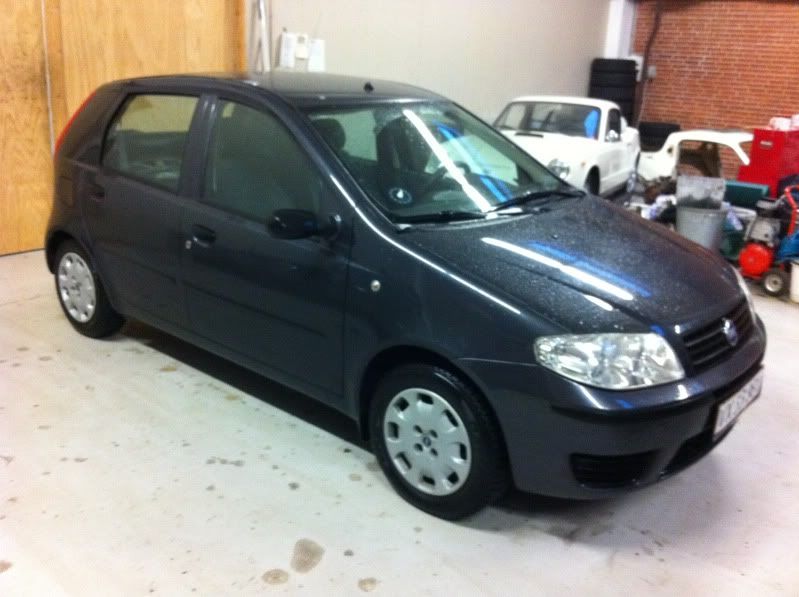
It is very basic (i better get used to it, for when the Marcos gets on the road), but it allows me to get to the garage.
So today is the first real progress since i came home. That is appart from collecting some parts at my parents place.
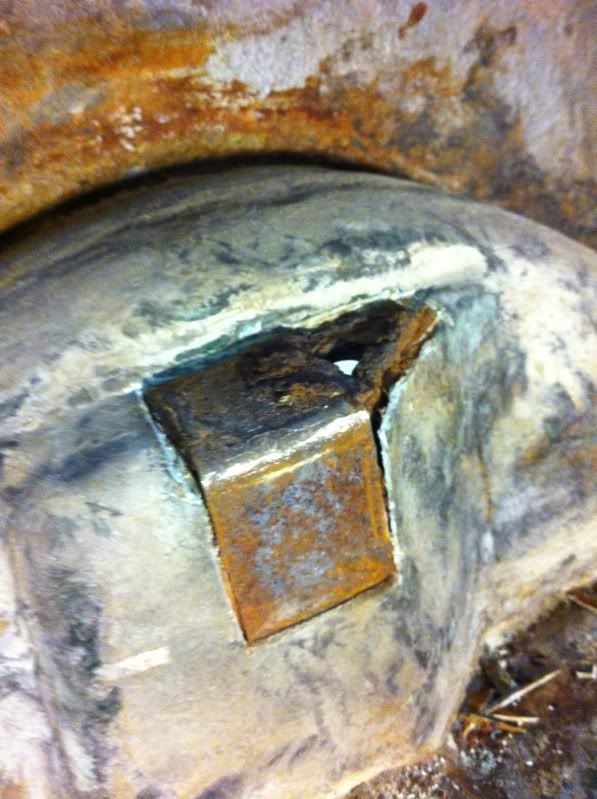
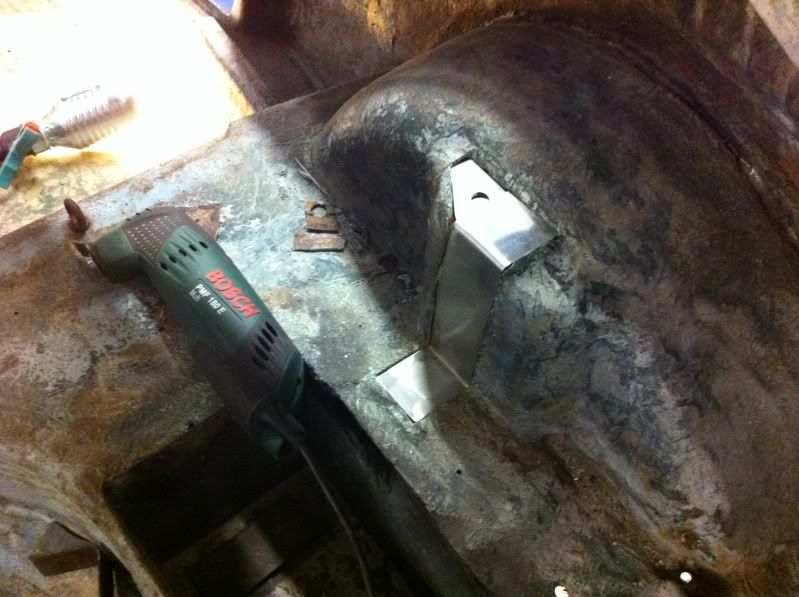
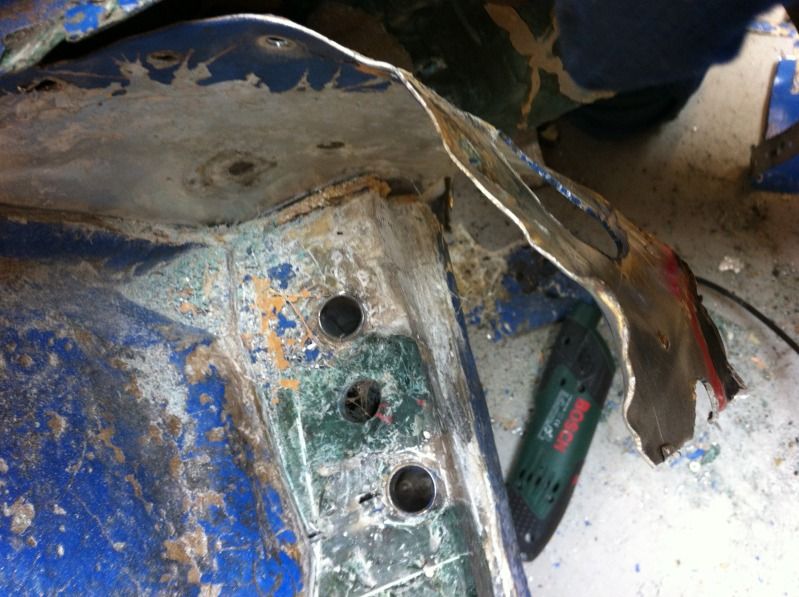
The plan for today was to try and cut out the metal in one of the rear schock towers, as it was very obivous that there was rust in there.
This also gave me a chance to test my new oscillating saw. This i genuinely the best tool i ever bought. Very effective.
This is how it looked when i got it "opened" up.
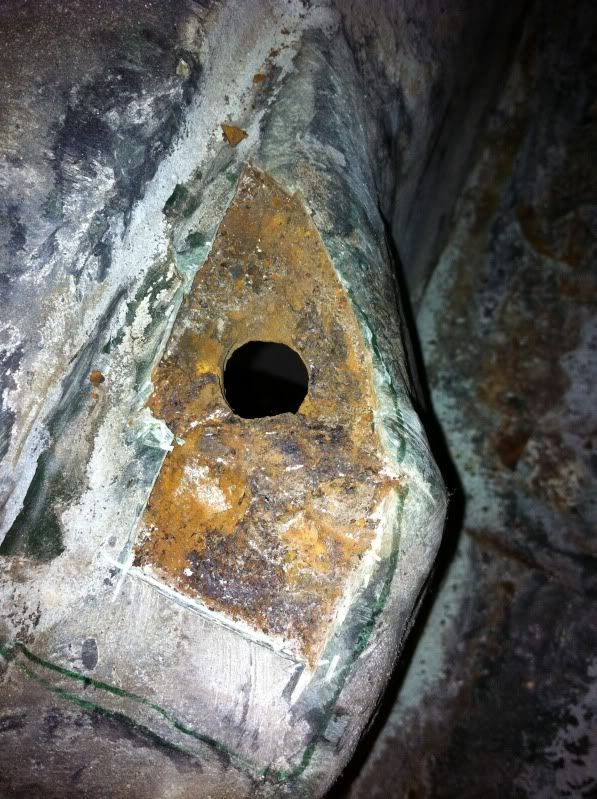
A bit more
After more caerful cutting i finally got all of the metal exposed, and i could pull it out.
The new saw is really good for this, as i can cut very precise, so that the new piece will fit exactly where the old one was positioned.
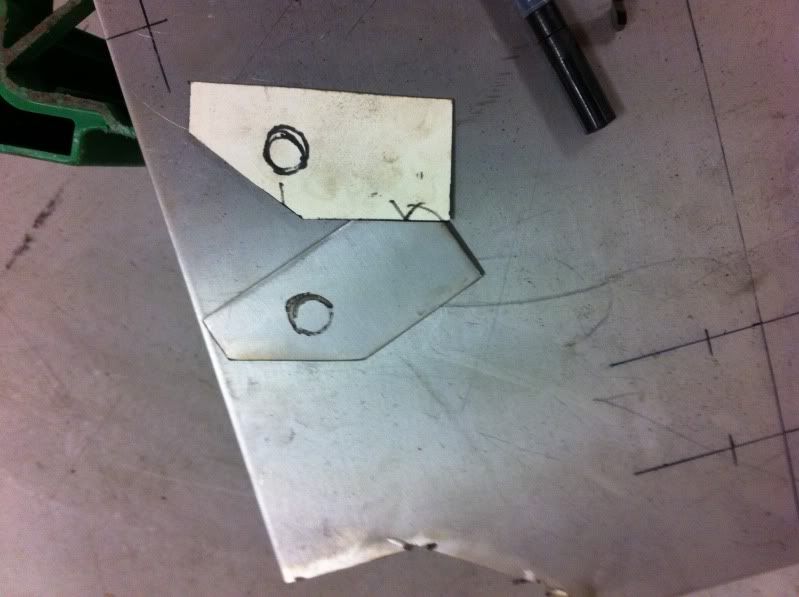
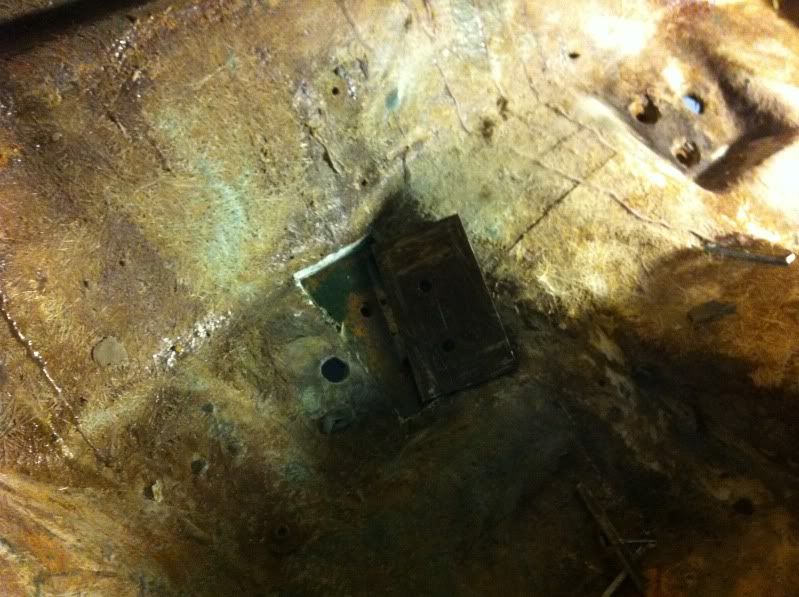
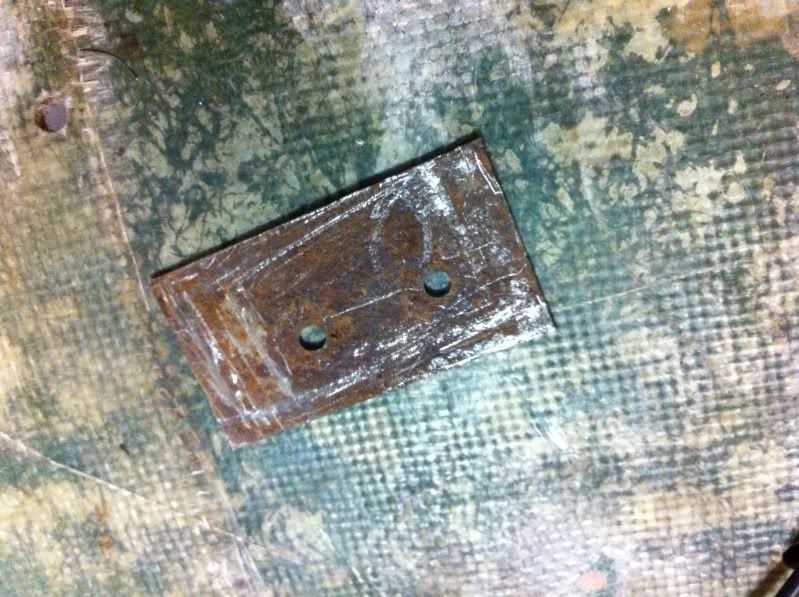
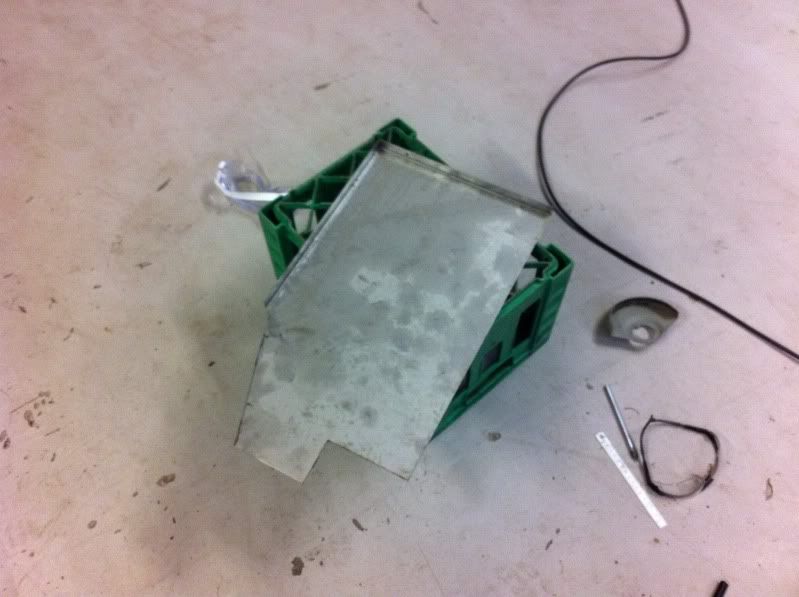
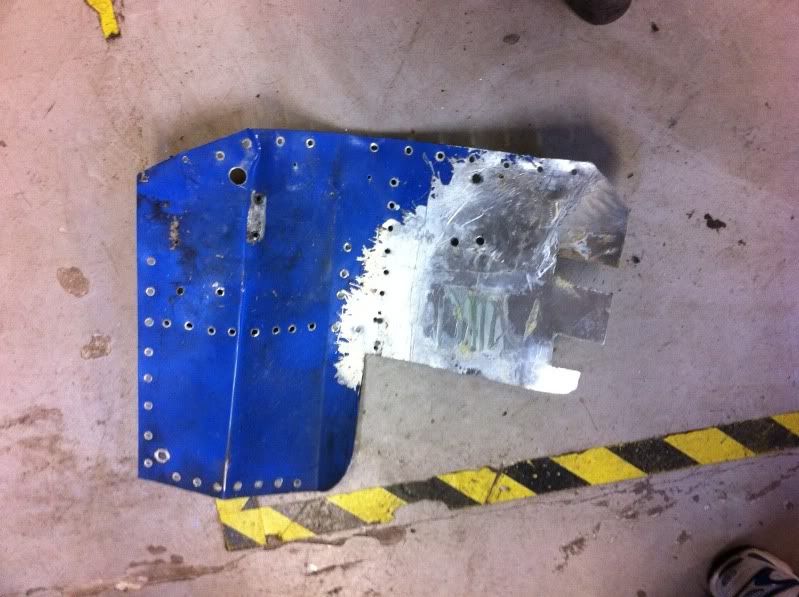
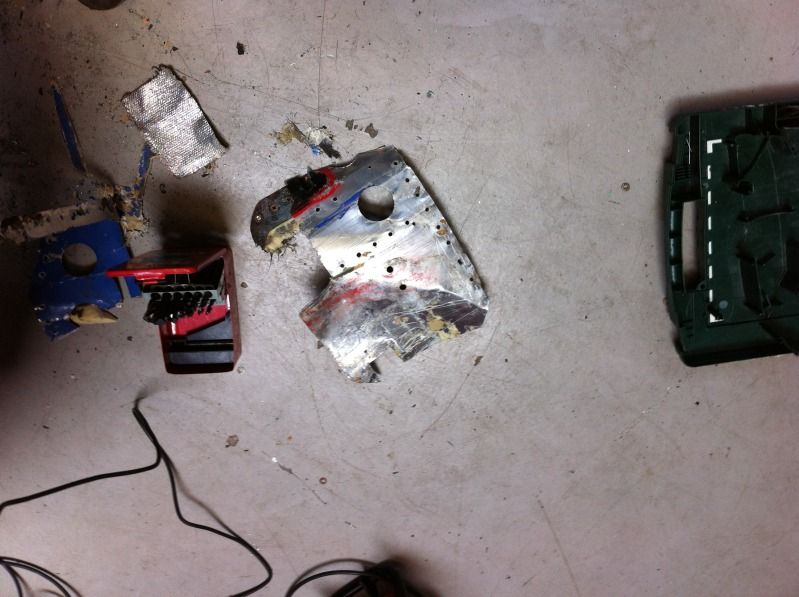
Top plate was in quite bad shape.
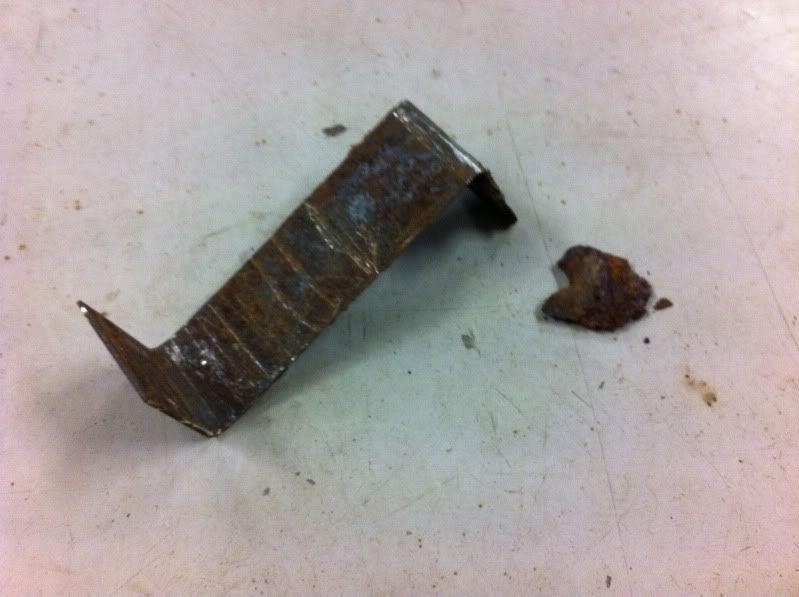
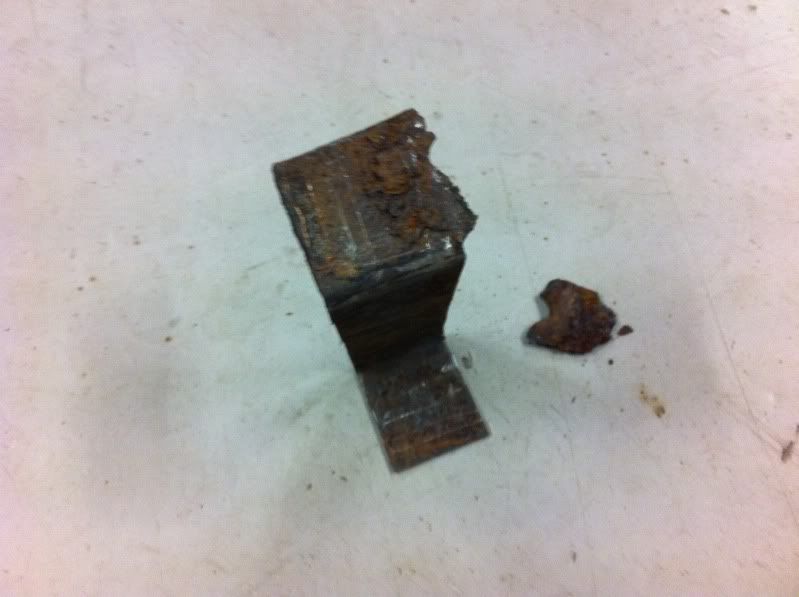
This is what it looked like underneath.
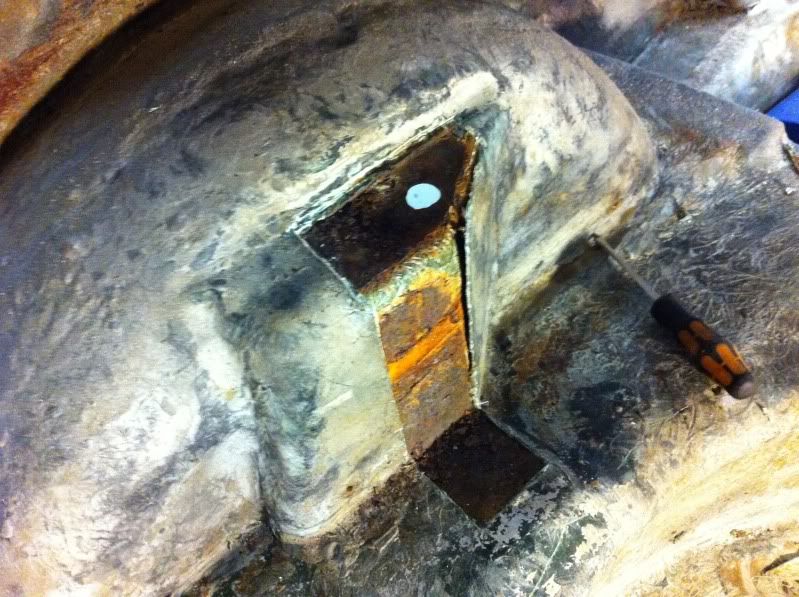
I then proceeded with making a template for the new topplate.
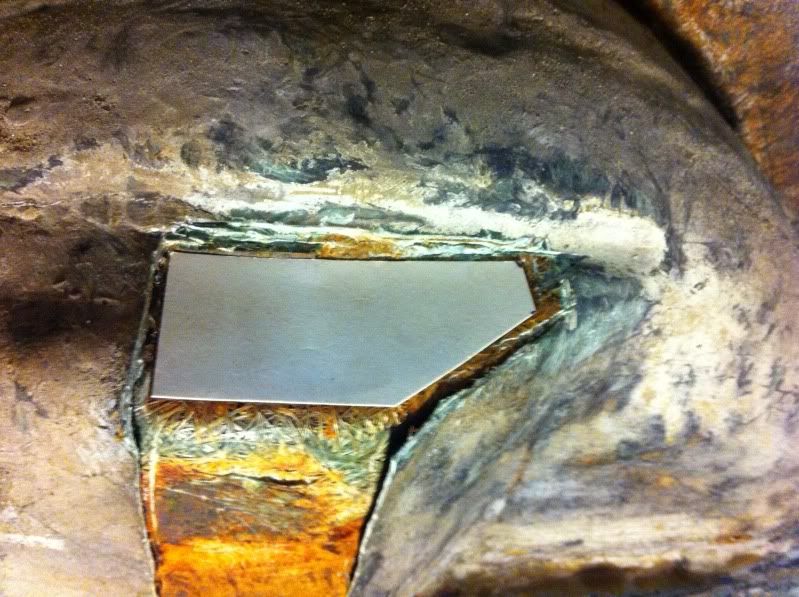
I had some stainless plate laying around, so i transfered the template to this.
The rest of the metal structure will also be made in stainless, but it need to get some from work tomorrow, as i dont have the correct thickness.
I did a quick test with my new schock absorbers, just to check that it didn't hit the inner arches.
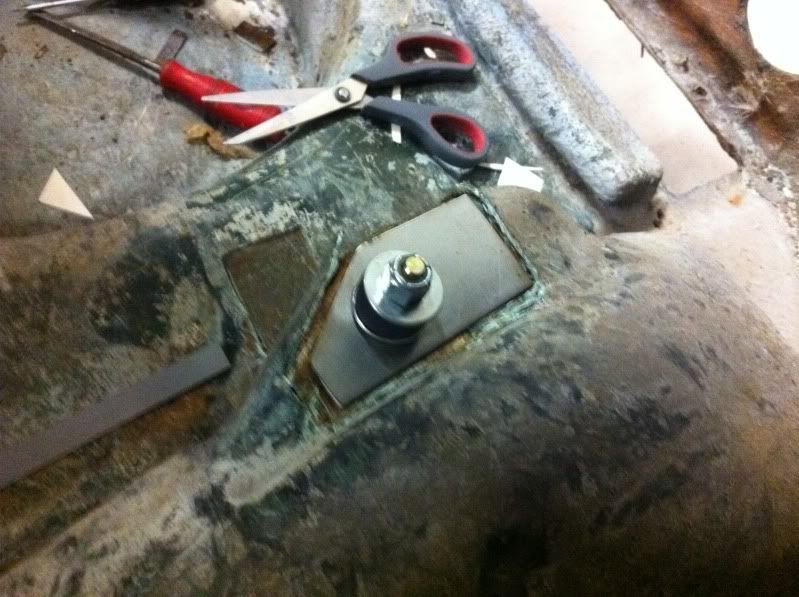
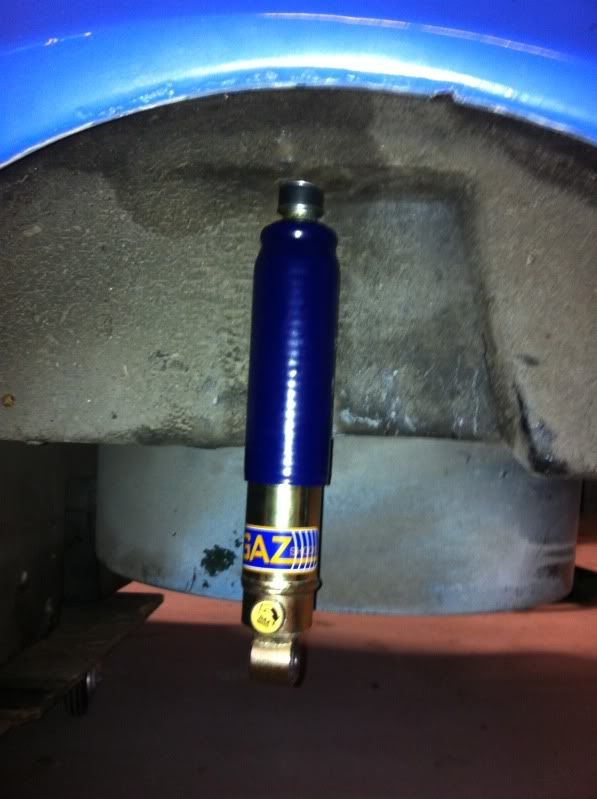
All looked to be well, but the thread that goes through the tower seemed to be just on the short side. Any experiences with this? Do i need to trim the rubber bushings on the shock?
After this i decided also to cut out the reinforcement for the steering rack. This came out without any big troubel.
Tomorrow i will fabricate new plates for both shock towers and for both steering rack mounting positions. And on thursday i have to go pick up my new rear subframe.
So this i basically all for now. More to come probably on friday.
|
Mini Marcos Mk.II 7012
Dennis Overgaard Nielsen
Denmark |
|
|
|
| |
Reply: 63 - 96 |
|
|
| dalla |
| Posted on: December 13th, 2011, 22:48:06 |
|
|
Medium Member
Location: Aarhus Denmark
Posts: 112
|
|
| Ohh yeah, allmost forgot. If anyone can advise on how best to apply new fibreglass to the towers and steering rack mounts, i would really appreciate it. |
Mini Marcos Mk.II 7012
Dennis Overgaard Nielsen
Denmark |
|
|
|
| |
Reply: 64 - 96 |
|
|
| Neil KilBane |
| Posted on: December 13th, 2011, 22:56:26 |
|
|
Maximum Member2

just a little fine tuning left to do.
Location: Newtown Forbes, Ireland
Posts: 1,420
Reputation: 0 (tot: ) |
|
| Are the washers on the bushings of the shock stepped ? |
|
|
|
|
| |
Reply: 65 - 96 |
|
|
| dalla |
| Posted on: December 13th, 2011, 23:20:20 |
|
|
Medium Member
Location: Aarhus Denmark
Posts: 112
|
|
| Yeah they are stepped. Looks like the high part of the washer should fit against the bodywork? |
Mini Marcos Mk.II 7012
Dennis Overgaard Nielsen
Denmark |
|
|
|
| |
Reply: 66 - 96 |
|
|
| dalla |
| Posted on: December 15th, 2011, 14:52:56 |
|
|
Medium Member
Location: Aarhus Denmark
Posts: 112
|
|
| Can you explain a bit further on the washer thing Neil? |
Mini Marcos Mk.II 7012
Dennis Overgaard Nielsen
Denmark |
|
|
|
| |
Reply: 67 - 96 |
|
|
| dalla |
| Posted on: December 17th, 2011, 14:36:10 |
|
|
Medium Member
Location: Aarhus Denmark
Posts: 112
|
|
Hi Guys
More progres yesterday. I went and bought some fibreglass supplies.
This is the first time ever i have tried working with fibreglass. But i have bought John Dickens fantastic book, and also have another handbook, from when i had my Super Seven and was thinking about making a hardtop.
But as this was the first time, i decided to start somewhere easy. I chose the steering rack fixing points. I made up a new stainless plate, and had a go with bonding it in. It worked out very well, and i am really pleased with the result. I does need a few more layers though.
My garage is pretty cold at the moment, and therefore i decided on using Polyester resin. Iam not sure wether i need to use epoxy when i start tackling the rear shock towers? Any experiences?
As for the shock towers, i also used yesterday for finishing the new stainless inserts for the towers. Just need to get a hold og a TIG welder to tack the together.

Hopefully i can get a permit to go to the garage tomorrow, and finish up on the steering rack mounts.
More to follow. |
Mini Marcos Mk.II 7012
Dennis Overgaard Nielsen
Denmark |
|
|
|
| |
Reply: 68 - 96 |
|
|
| dalla |
| Posted on: December 20th, 2011, 16:24:25 |
|
|
Medium Member
Location: Aarhus Denmark
Posts: 112
|
|
Hi Guys
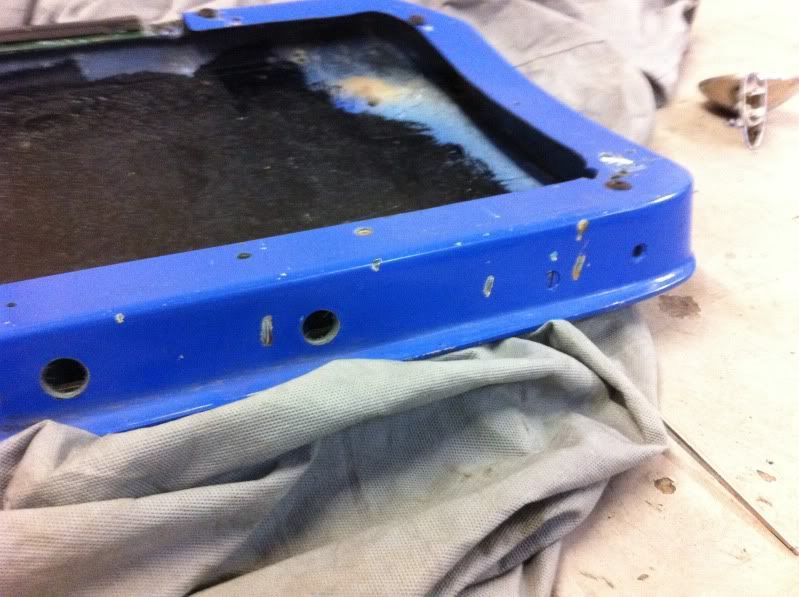
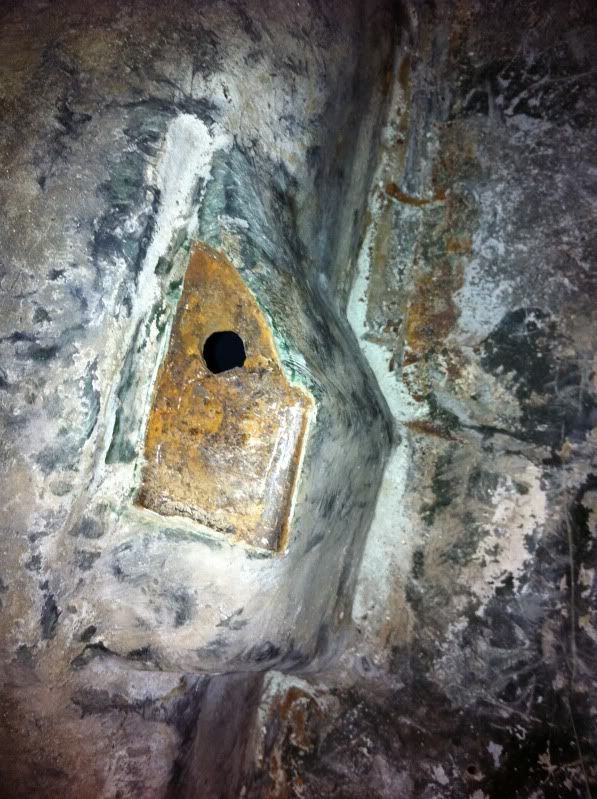
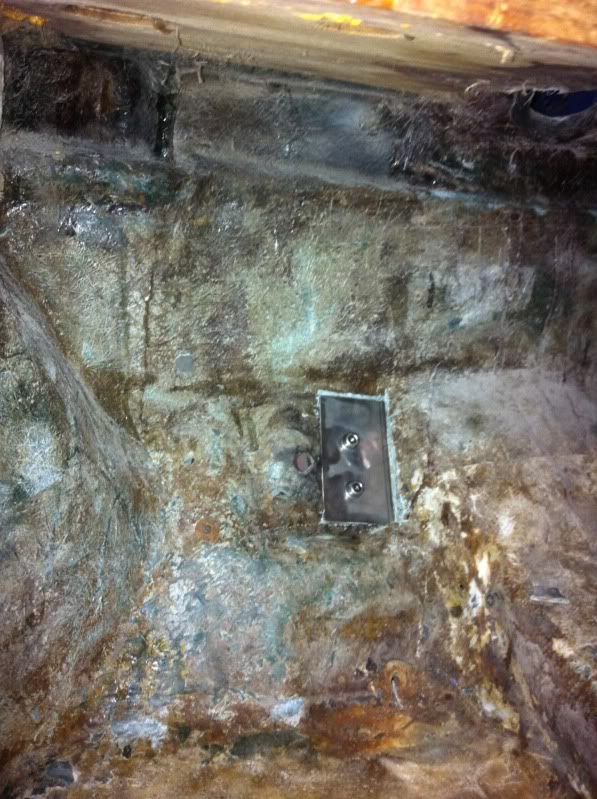
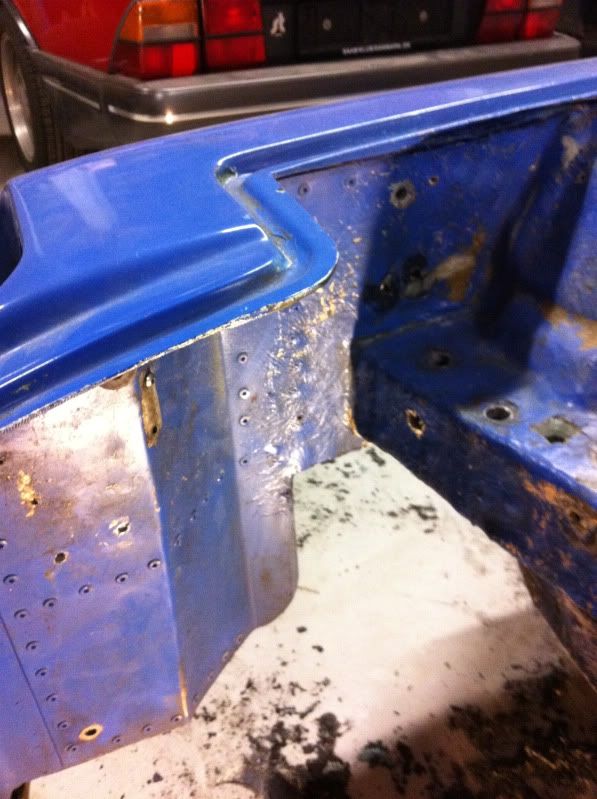
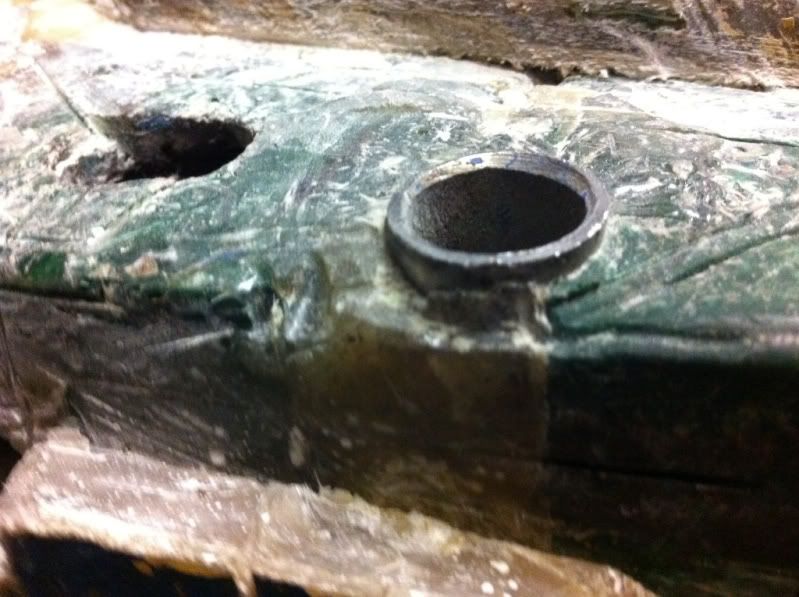
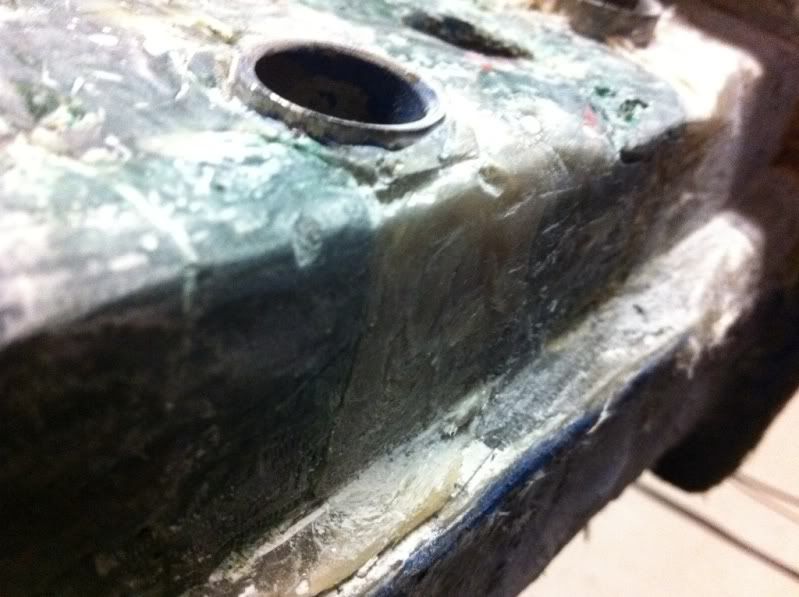
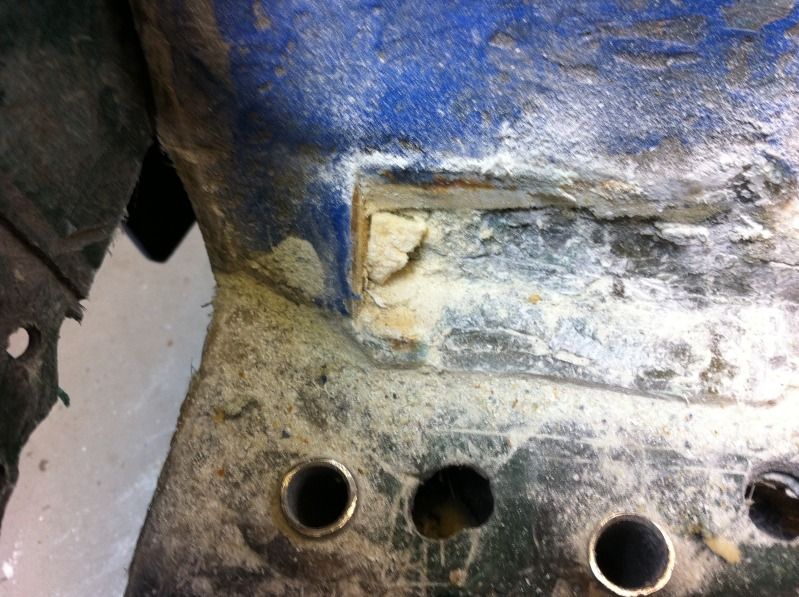
A bit more progress. I started up yesterday with repairing the other side of the steering rack mount. I also closed the RHD hole for the steering collumn, as the car will be converted to LHD. I also found that the hole was hacked totally up, and it had a bodge repair that was delaminating. All this was cut out, and closed up.
All to do here now, is to open up the top parts of the holes with a small hole saw, in order to allow the nuts to rest on the metal.
LHD side:
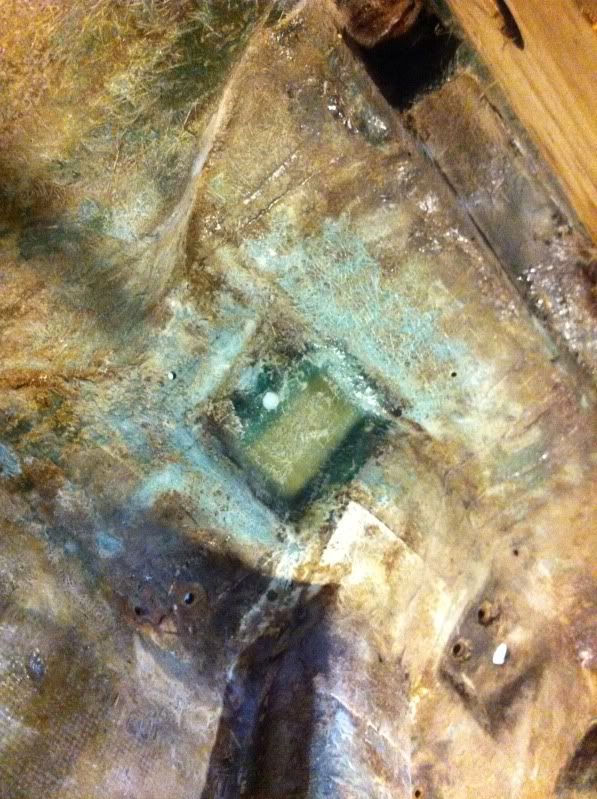
RHD side opened up:
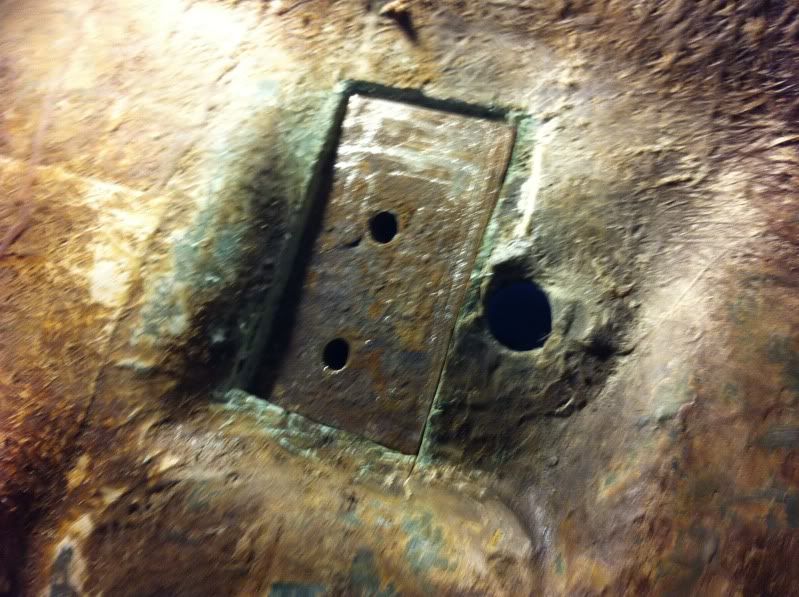
New stainless plate:
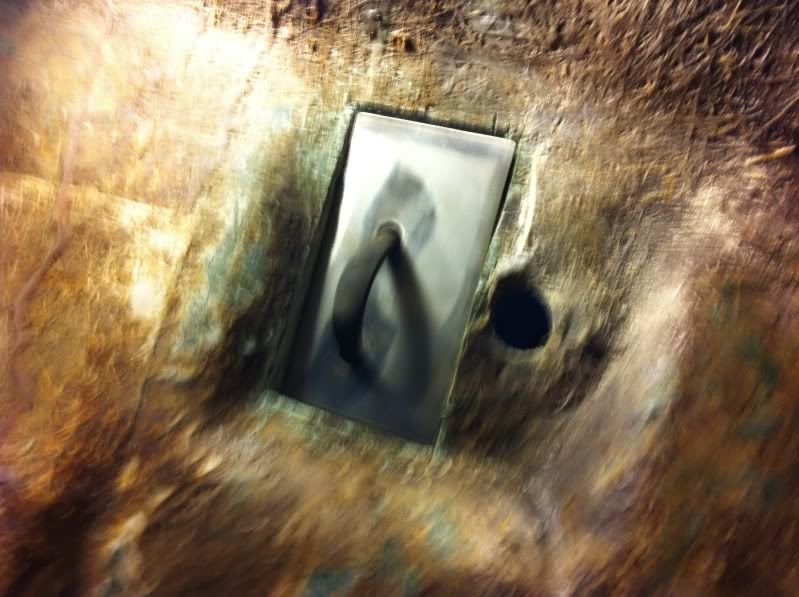
Bodge repair:
Forgot to get an after pic, but it basically looks like the LHD side.
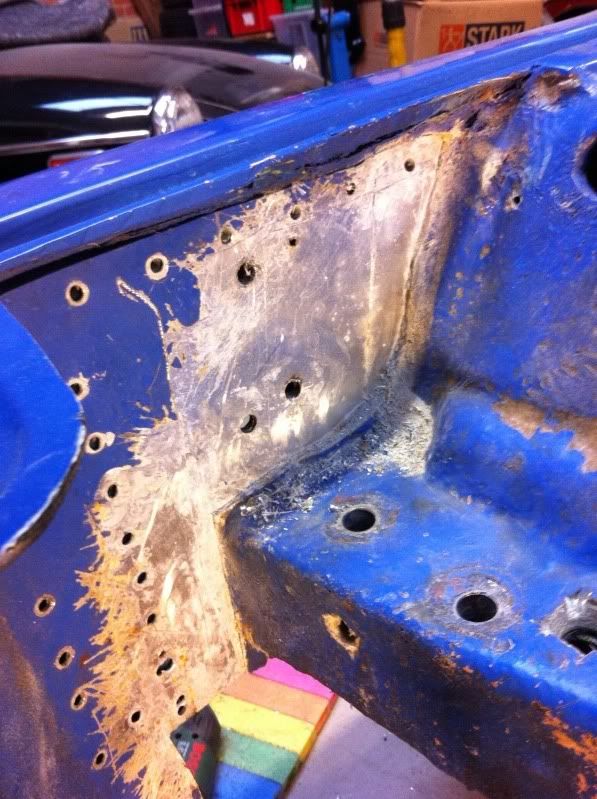
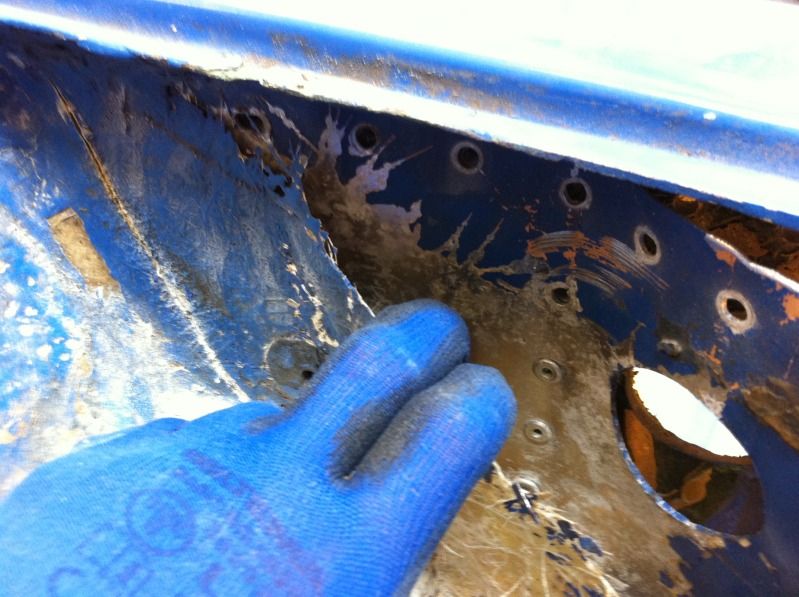
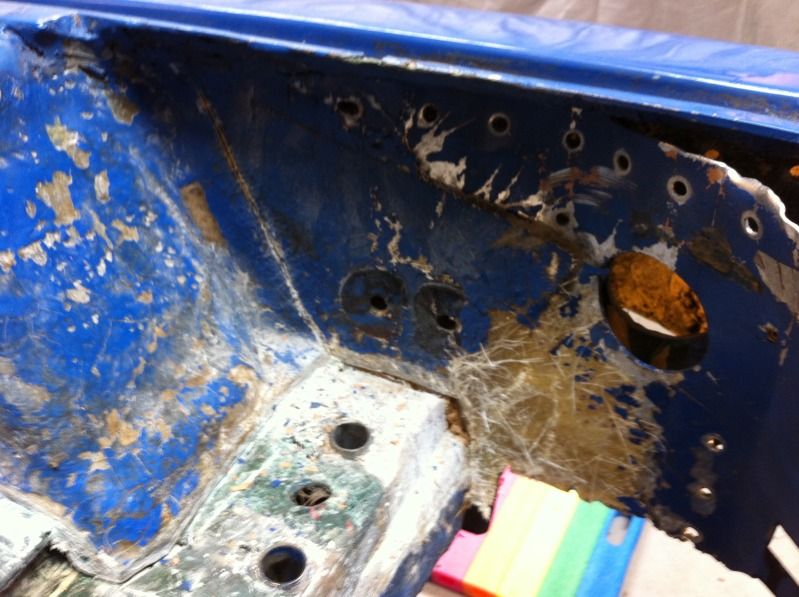
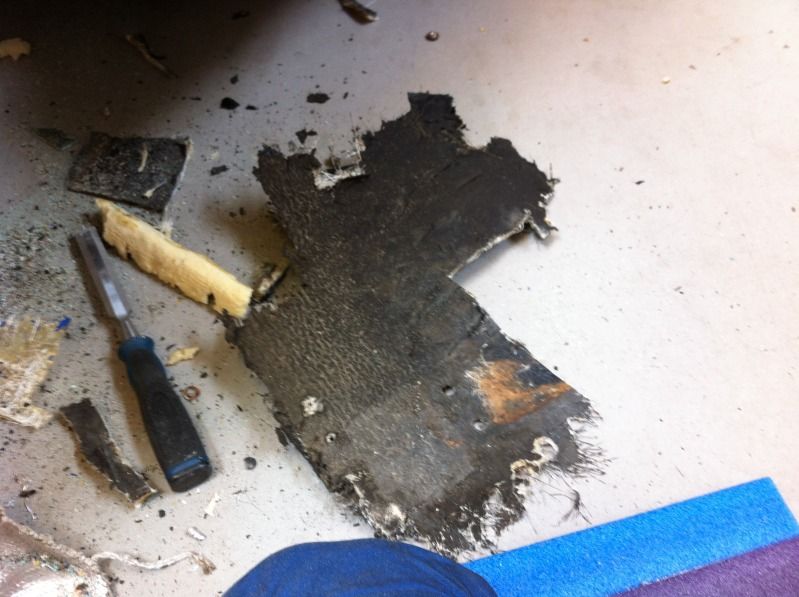
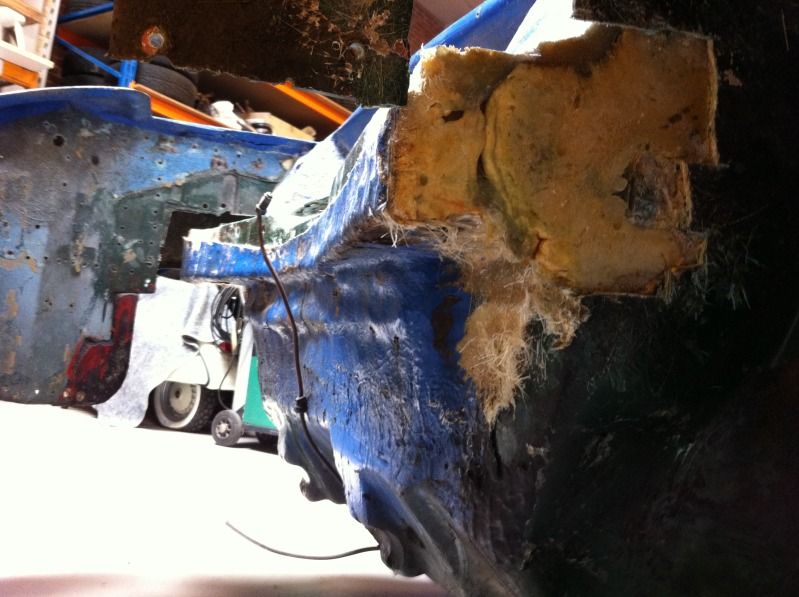
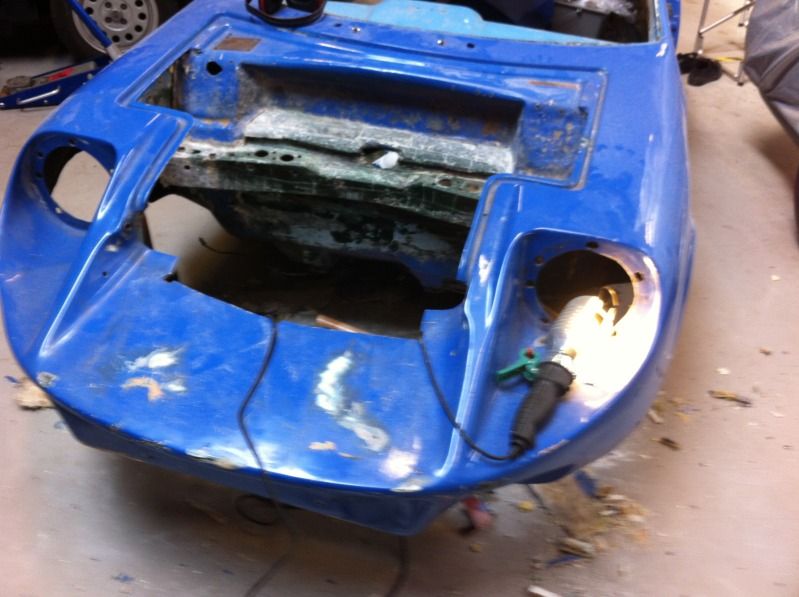
I then started to look at the front section of the car, and found something quite disturbing. First of all, all of the inner fenders and the bottom of the car was covered in under sealant. It was a pain in the *** of a job to remove it, but i got most of it off. Then i focused on an inlet for the heater, this was laminated into the inner fender (where the hole is). When i got it wrestled of, a big part of the inner fender started to delaminate.
Undersealant removed:
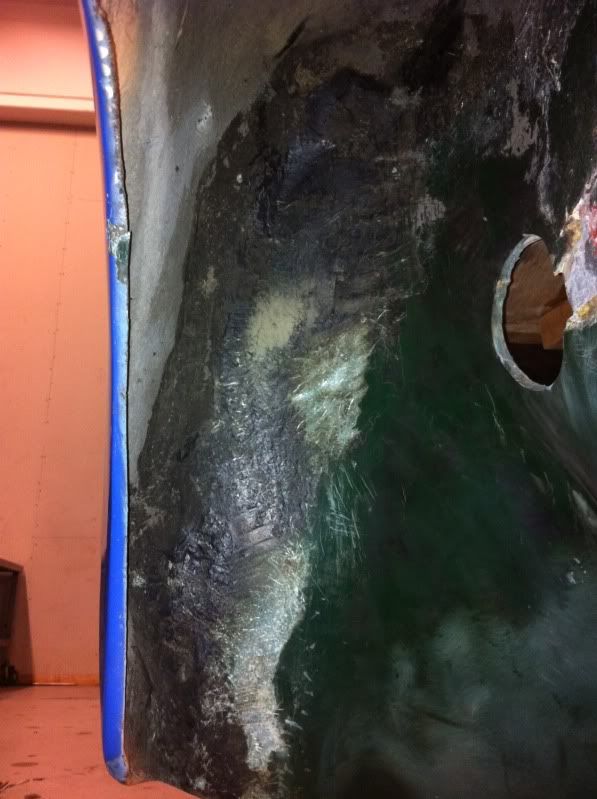
Hole in inner fender:

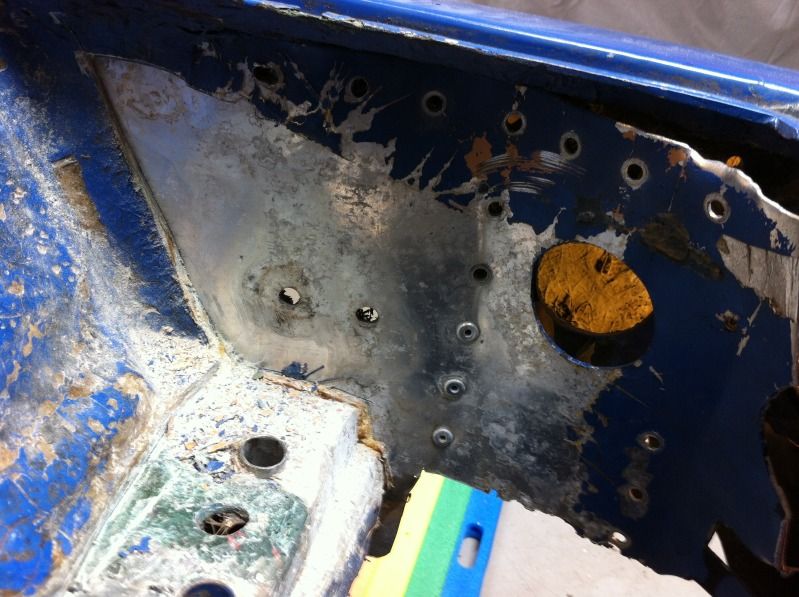
It is caused by some aluminium sheet, that has been bonded into the innerfenders.
When i chose to rip all of the delaminated fibre glass of, this was revealed:
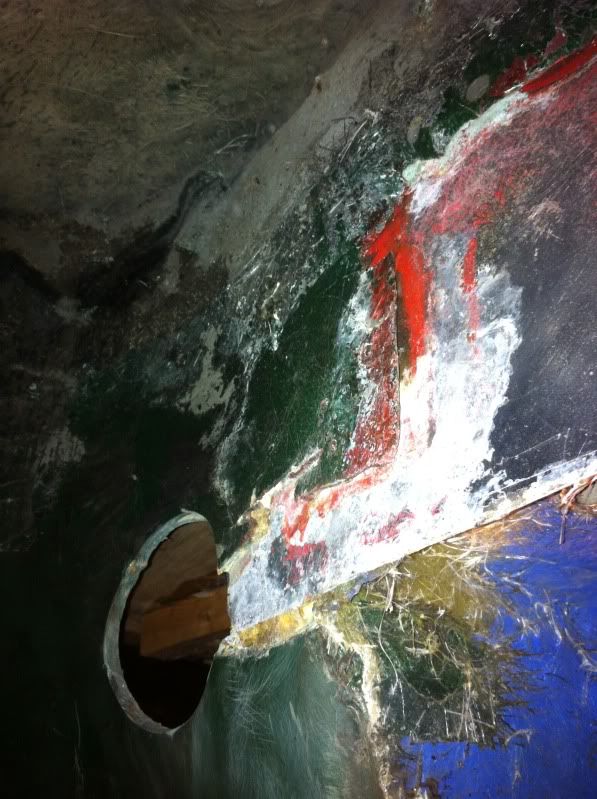
Right now iam a little worried about how critical this is.
I have a few questions about this, that i hoe you guys can help me with.
1. Is is original to have aluminium sheet laminated in here?
2. How hard would it be to remove? Have anyone tried anything similar?
3. It somehow looks like this was done, at the same time as the front cross member repair. So now i don't really trust this either. So i am back at thinking about changing to a new replacement cross member? I have a few questions about this, do these come with cut outs for the master cylinders? Do i need to order one specific for LHD or RHD?
If any of you have pictures of these areas of your engine compartments i would really appreciate it.
Finally i have realised that me working i fibre glass in my own garage is a no go. It simply creates too much dust, and as i share the place with other people, it is not ideal.
So i have contacted a local fibreglass shop, hopefully i can get the car down there, and really get cracking. I could also do with a little help. It would also be nice to really press on and get all the fibreglass work done.
Again if any of you can help with some experiences of above, it would really help me.
Kind regards
Dennis |
Mini Marcos Mk.II 7012
Dennis Overgaard Nielsen
Denmark |
Last modified December 20th, 2011, 16:25:33 by dalla |
|
|
|
| |
Reply: 69 - 96 |
|
|
| dalla |
| Posted on: December 20th, 2011, 20:38:06 |
|
|
Medium Member
Location: Aarhus Denmark
Posts: 112
|
|
| I have just ordered a full Heritage crossmember. Wish me luck. |
Mini Marcos Mk.II 7012
Dennis Overgaard Nielsen
Denmark |
|
|
|
| |
Reply: 70 - 96 |
|
|
| admin |
| Posted on: December 20th, 2011, 22:10:27 |
|
|
Administrator
Location: Maidenhead, UK
Posts: 2,380
Reputation: 1 (tot: 1) |
|
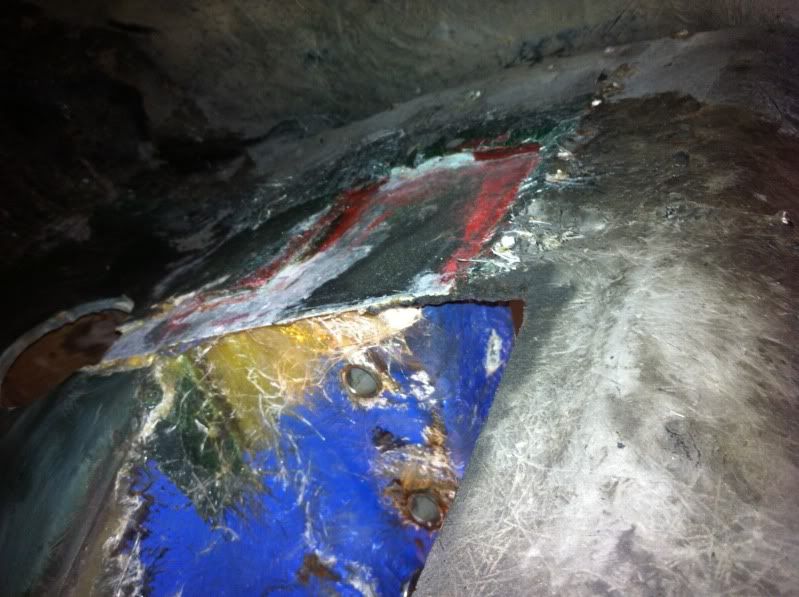
Looks like it's been patched up with bits from different cars.
The aluminium certainly isn't original, but it's roughly the same shape as the original fibreglass. On the left hand side there's a cut-out for a side-mounted radiator.
The pop rivets shouldn't be there either. They may have been put in to hold two bits of fibreglass together for bonding but they should be drilled out now.
The Mk.II/III didn't have provision for mounting the heater elbow under the wing so if you use a fresh air heater you have to make your own arrangements. |
|
|
|
| |
Reply: 71 - 96 |
|
|
| dalla |
| Posted on: December 20th, 2011, 22:45:12 |
|
|
Medium Member
Location: Aarhus Denmark
Posts: 112
|
|
Thanks Richard.
I figured it was the case that it had been patched together.
I guess i will have a go at bringing it back to all fibreglass. Would really appreciate some inputs on how best to do this. Also if some one could show me some detailed pictures of how it looks originally, it would really help me. |
Mini Marcos Mk.II 7012
Dennis Overgaard Nielsen
Denmark |
|
|
|
| |
Reply: 72 - 96 |
|
|
| admin |
| Posted on: December 21st, 2011, 15:13:51 |
|
|
Administrator
Location: Maidenhead, UK
Posts: 2,380
Reputation: 1 (tot: 1) |
|
John Dickens is the best person to advise you there (or Mike Brown, but he's not often on the forum). My approach would be to lay up some flat fibreglass panels roughly the right size on a suitable flat surface, bond them in at the top amd then lay matting over the vertical gaps to get the curved joins.
I can easily take photos of my Mk.IV shell but it's a bit different from the Mk.II/III. |
|
|
|
| |
Reply: 73 - 96 |
|
|
| dalla |
| Posted on: December 21st, 2011, 16:54:40 |
|
|
Medium Member
Location: Aarhus Denmark
Posts: 112
|
|
Thanks alot Richard. Greatly appreciated. I would like to see pictures of your car if possible. Maybe i can get some ideas from them.
Any idea of how to get a hold of John Dickens? If someone could point him in direction of this thread i would appreciate it. |
Mini Marcos Mk.II 7012
Dennis Overgaard Nielsen
Denmark |
|
|
|
| |
Reply: 74 - 96 |
|
|
| Stuart |
| Posted on: December 22nd, 2011, 09:56:08 |
|
|
Big Member
Location: Peak District
Posts: 284
Reputation: 1 (tot: 1) |
|
|
|
|
| |
Reply: 75 - 96 |
|
|
| dalla |
| Posted on: December 22nd, 2011, 10:09:32 |
|
|
Medium Member
Location: Aarhus Denmark
Posts: 112
|
|
Cheers mate. I have allready bought his book, but i better buy the other one also.
I could really do with a few pointers on this.
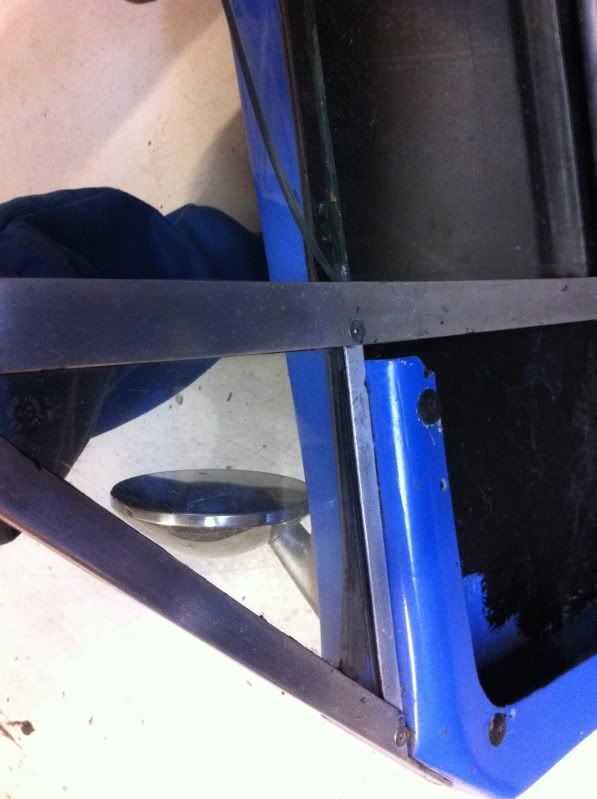
Ohh yes one more thing.
This over laminating inside the arches, is this normal, does that hold some of the bodywork in place?
|
Mini Marcos Mk.II 7012
Dennis Overgaard Nielsen
Denmark |
|
|
|
| |
Reply: 76 - 96 |
|
|
| admin |
| Posted on: December 23rd, 2011, 00:01:26 |
|
|
Administrator
Location: Maidenhead, UK
Posts: 2,380
Reputation: 1 (tot: 1) |
|
That looks fairly normal. All the outer surfaces of the shell are laminated inside the main mould. The inside panels - mainly the sills, the double-skinned area behind the doors and the inner wings are made separately (as is the dashboard) and bonded in later. The inner wings are fitted gelcoat side out so you get this bonding of mat onto gelcoat. It doesn't always stick very well especially if the release agent hasn't been thoroughly removed.
I'll get some pics of my shell tomorrow if it's fine.
I expect JD will show up on here over the holiday!
Thinking about it a bit more, I'd be tempted to grab that bit of fibreglass where it's splitting off and pull it because it looks like a repair rather than original fabrication. It may be properly bonded in or it may come out in one piece. There shouldn't be any exposed matting that hasn't been properly soaked in resin. |
Last modified December 23rd, 2011, 23:59:26 by admin |
|
|
|
| |
Reply: 77 - 96 |
|
|
| dalla |
| Posted on: December 23rd, 2011, 10:20:40 |
|
|
Medium Member
Location: Aarhus Denmark
Posts: 112
|
|
Thanks alot Richard. I have allready talked to John Dickens, it was very helpfull.
It is perfect if i could see some pictures of your arches.
Thanks alot and merry christmas
Kind regards
Dennis |
Mini Marcos Mk.II 7012
Dennis Overgaard Nielsen
Denmark |
|
|
|
| |
Reply: 78 - 96 |
|
|
| admin |
Posted on: December 23rd, 2011, 17:40:34
 Attachment: iw1.jpeg - 36.10 KB (5089 views) Attachment: iw1.jpeg - 36.10 KB (5089 views) |
|
|
Administrator
Location: Maidenhead, UK
Posts: 2,380
Reputation: 1 (tot: 1) |
|
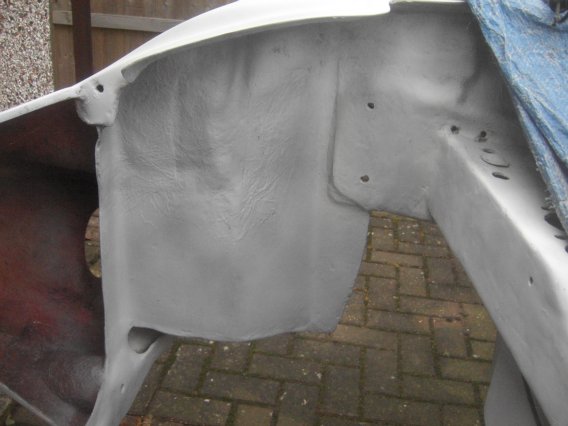
| This is the offside inner wing on the Mk.IV. |
 |
|
|
|
| |
Reply: 79 - 96 |
|
|
| admin |
Posted on: December 23rd, 2011, 17:42:37
Attachment: iw3.jpeg - 42.98 KB (5087 views) |
|
|
Administrator
Location: Maidenhead, UK
Posts: 2,380
Reputation: 1 (tot: 1) |
|
| This is looking up from underneath. The hole on the bottom left is for the heater elbow. |
 |
Last modified December 23rd, 2011, 17:51:04 by admin |
|
|
|
| |
Reply: 80 - 96 |
|
|
| admin |
Posted on: December 23rd, 2011, 17:46:39
Attachment: iw4.jpeg - 48.90 KB (5101 views) |
|
|
Administrator
Location: Maidenhead, UK
Posts: 2,380
Reputation: 1 (tot: 1) |
|
| Another view inside the wheel arch. |
 |
|
|
|
| |
Reply: 81 - 96 |
|
|
| admin |
Posted on: December 23rd, 2011, 17:49:15
Attachment: iw5.jpeg - 40.08 KB (5086 views) |
|
|
Administrator
Location: Maidenhead, UK
Posts: 2,380
Reputation: 1 (tot: 1) |
|
| This is the nearside. I've filled in the top bit of the radiator cut-out for additional rigidity. The nose has been modified. |
 |
|
|
|
| |
Reply: 82 - 96 |
|
|
| dalla |
| Posted on: December 24th, 2011, 13:37:58 |
|
|
Medium Member
Location: Aarhus Denmark
Posts: 112
|
|
Thanks alot mate. I allready got quite a few good ideas of how to go on with this.
Iam going to remove the aluminium sheets, and use them for templates for new GRP inner arches.
Thanks again, and merry christmas to all of you. |
Mini Marcos Mk.II 7012
Dennis Overgaard Nielsen
Denmark |
|
|
|
| |
Reply: 83 - 96 |
|
|
| dalla |
| Posted on: December 29th, 2011, 19:51:37 |
|
|
Medium Member
Location: Aarhus Denmark
Posts: 112
|
|
Hi Guys
First of all hope that all of you had a great christmas.
This was my christmas present.

I love it, and it makes me want to work even harder on the car.
Today i made qute good progress. Even though i planned to fit some silicone cooling hoses on my Lotus, i could not resist working on the Marcos instead.
I started with tackeling the alumium arches. Got the rigth side completely removed.
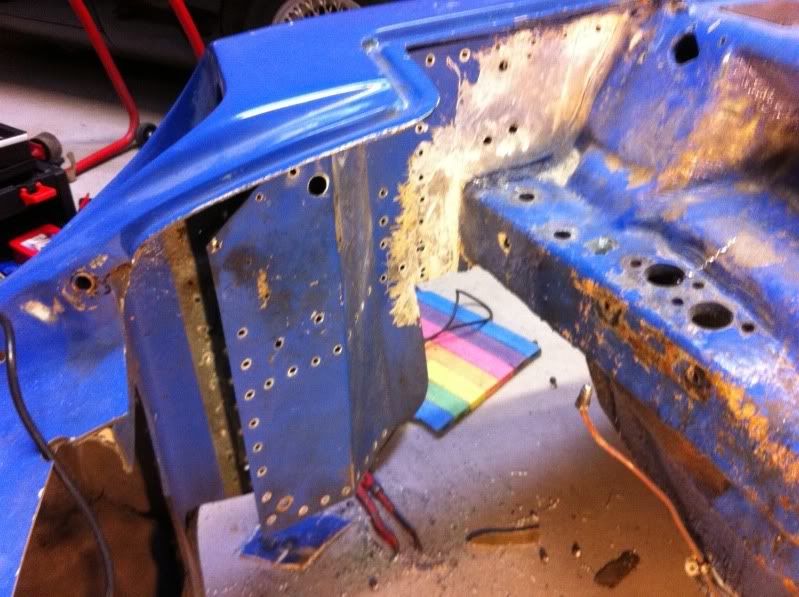
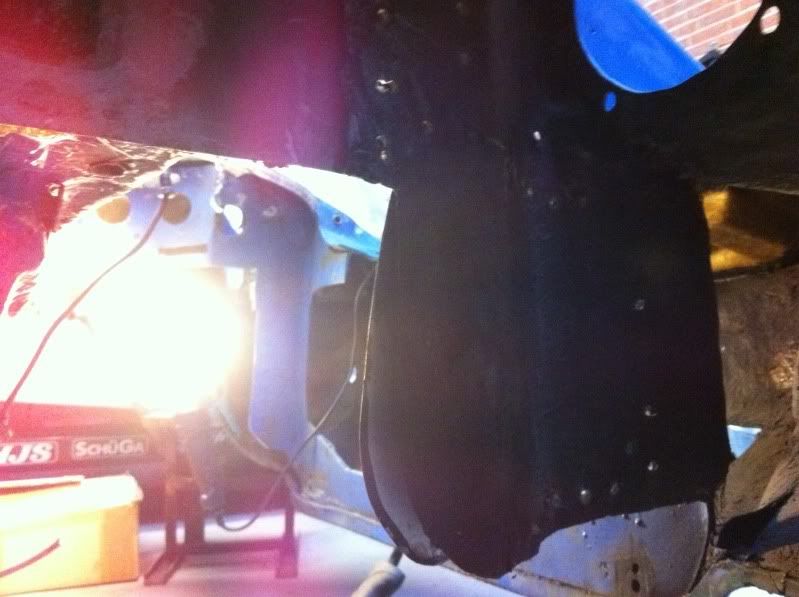
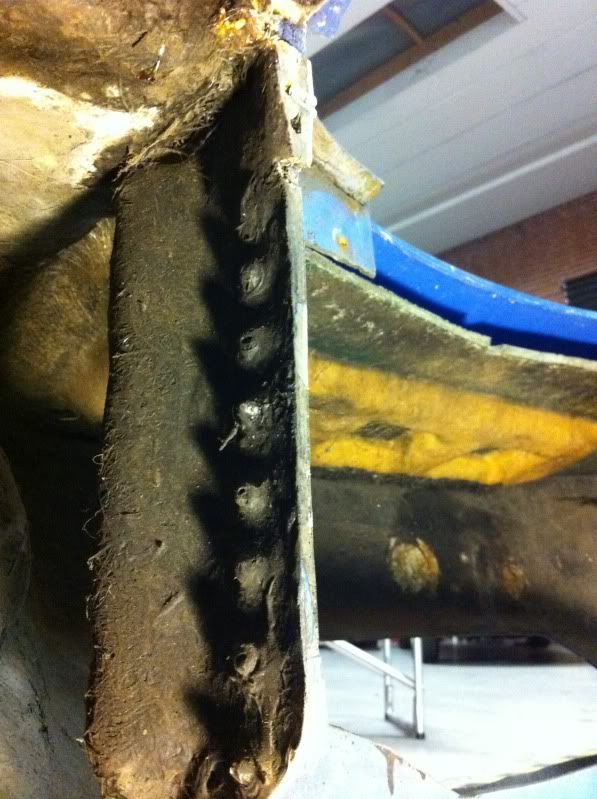
After drilling out all the rivets, i could carefully cut out the laminated areas inside the arches, and out it came.
After this, i found a pleasant surprise. There is quite a lot of fibreglass left in the arches. So it looks like i can build on to this.
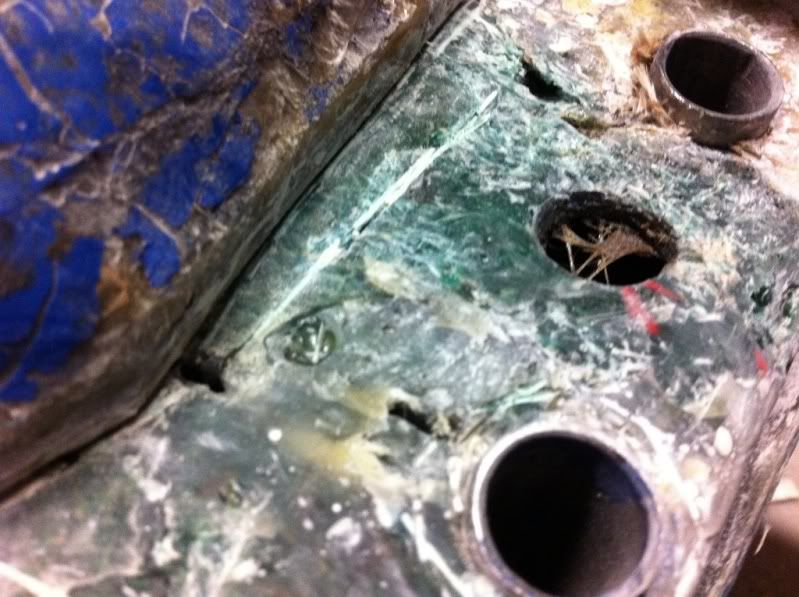
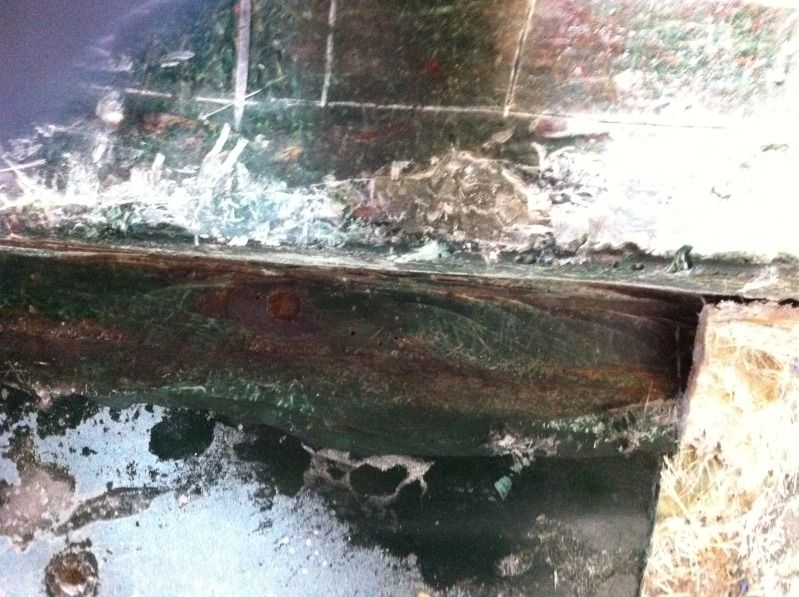
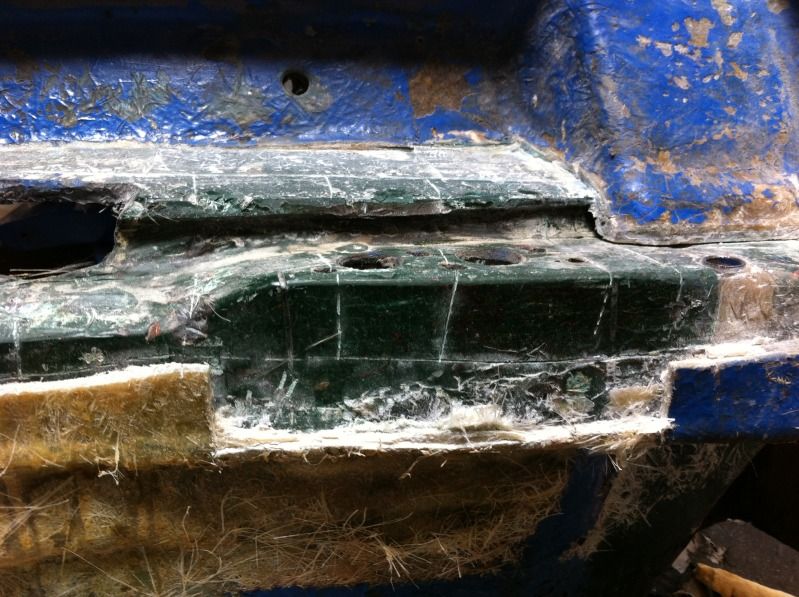
This is how it looked after the aluminium was removed. This is looking from inside the arch onto the side of the cross member.
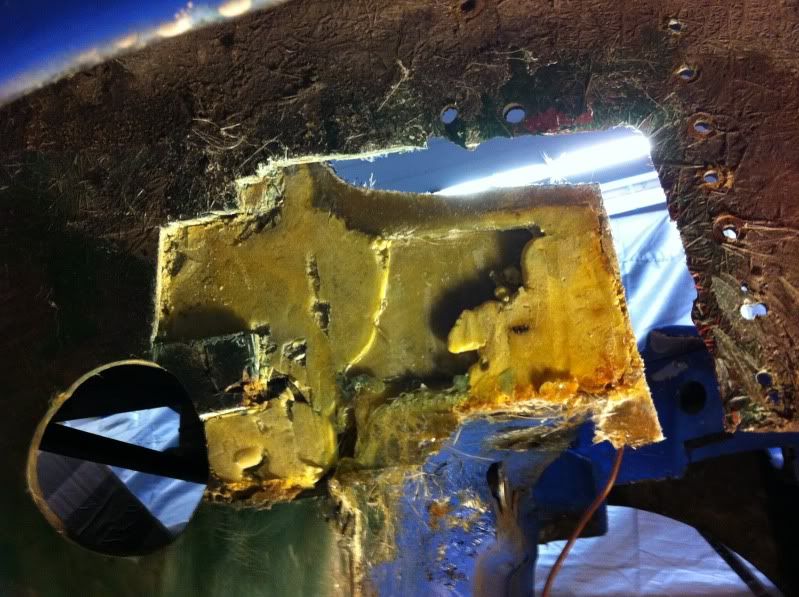
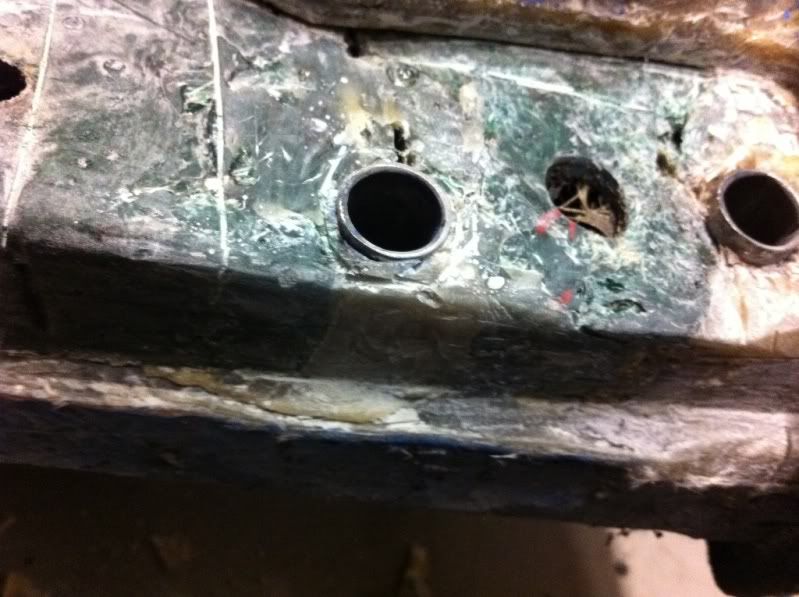
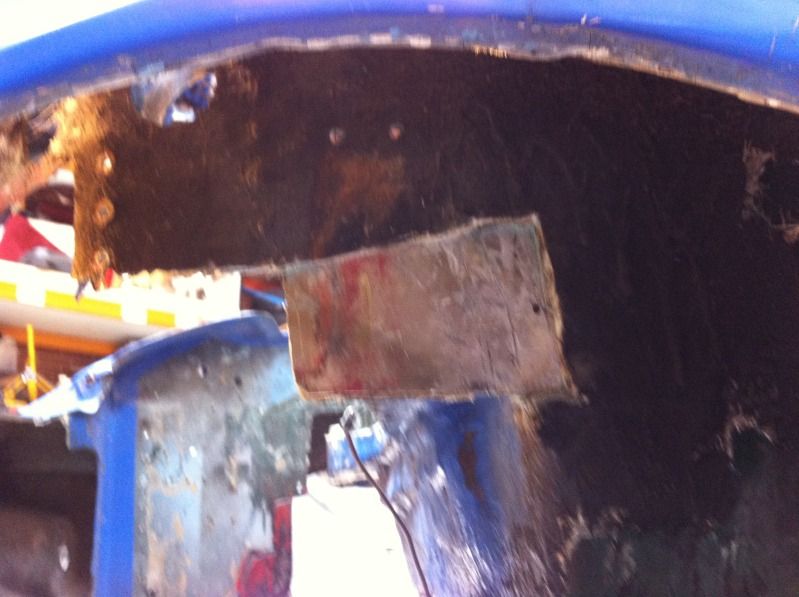
I have allready recieved my new BMH crossmember. And good thing i ordered one, because when i started looking at the subframe mounting points, i discovered that there wasn't any metal at all, where the cross member was supposed to be. Only thing is two steel pipes laminated/glued into a lot of fibreglass.
This is what i found when i started to cut.
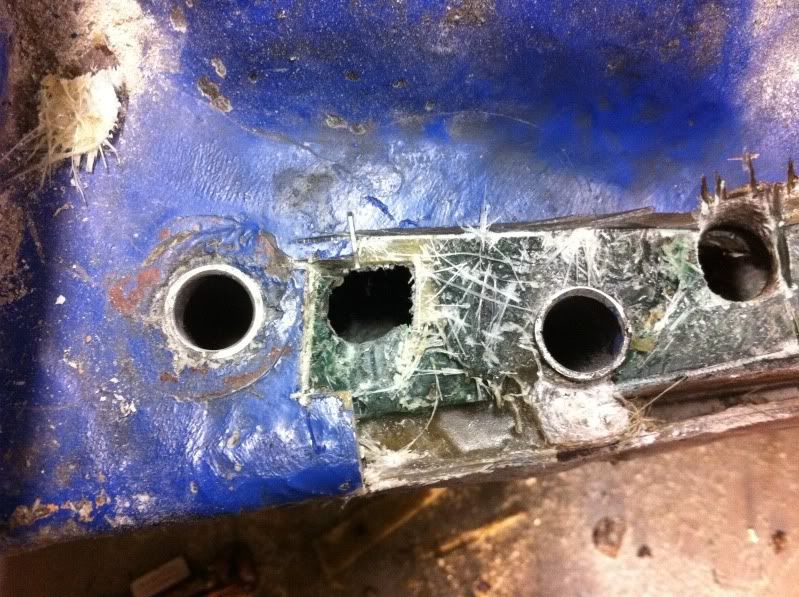
The positive thing is, that i think, that with some careful cutting, i can possibly expose most of the original bulkhead underneath. That is the green GRP you can see underneath. I think this will be helpful when i have to laminate the new crossmember in.
But before this, there will be a lot of cutting to do.
That was all for now, i hope all of you have a great New Years party tomorrow. |
Mini Marcos Mk.II 7012
Dennis Overgaard Nielsen
Denmark |
|
|
|
| |
Reply: 84 - 96 |
|
|
| Neil KilBane |
| Posted on: December 29th, 2011, 21:20:11 |
|
|
Maximum Member2
just a little fine tuning left to do.
Location: Newtown Forbes, Ireland
Posts: 1,420
Reputation: 0 (tot: ) |
|
“ |
Quoted from dalla, posted December 29th, 2011, 19:51:37 at here |
” |
|
|
They really are a very good model |
|
|
|
|
| |
Reply: 85 - 96 |
|
|
| dalla |
| Posted on: February 23rd, 2012, 17:41:11 |
|
|
Medium Member
Location: Aarhus Denmark
Posts: 112
|
|
Hi Guys
Here is a short update. I have been super busy lately, and have got very little done to the MM. I have been in Japan for most of January, and now i am in Croatia. Work is taking way too much of my time. 
But between this and trying to get my Lotus ready for summer, i did manage a little on the MM.
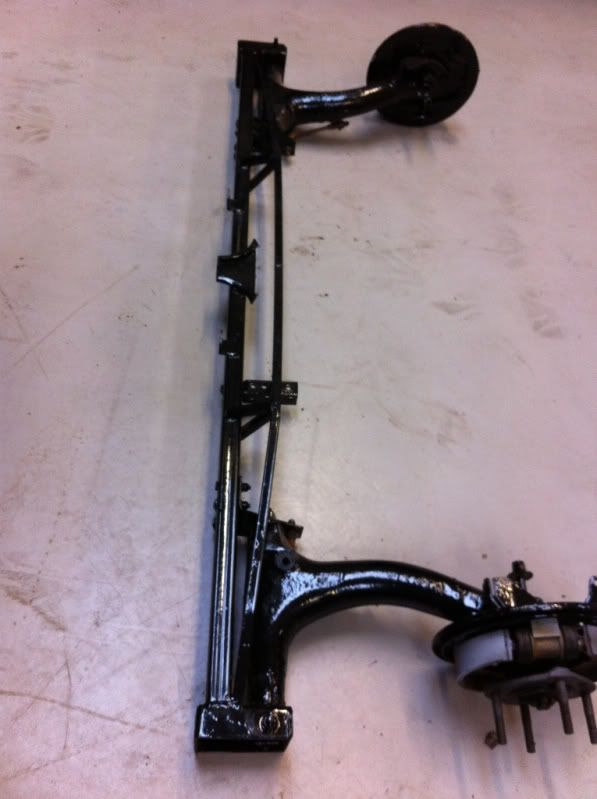
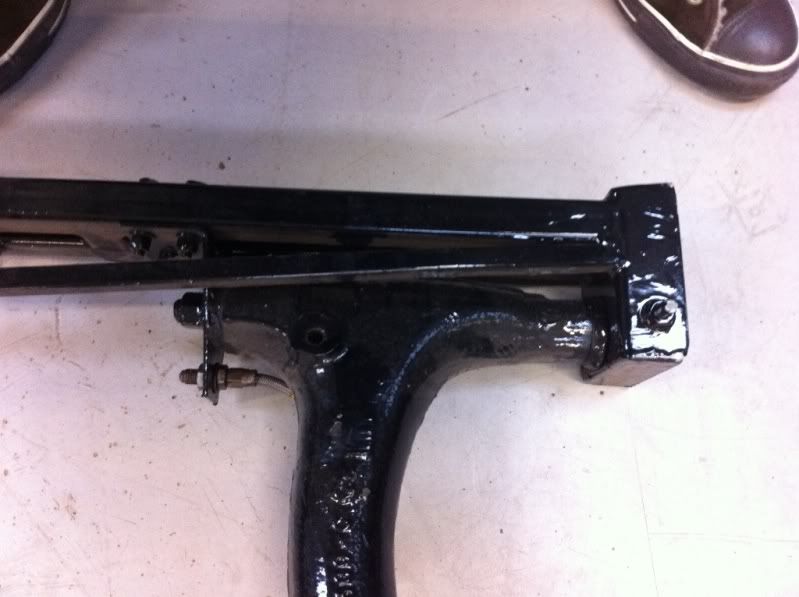
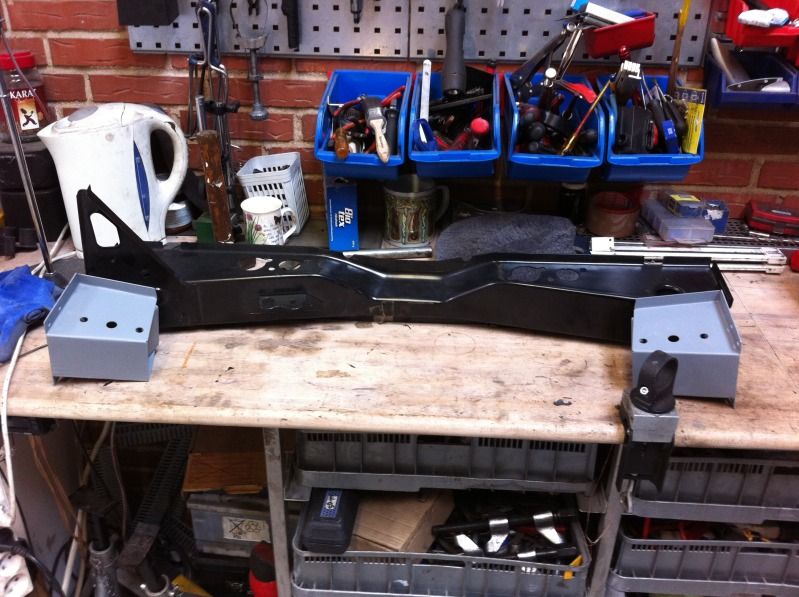
First of i stared at the special Lightweight rear subframe that came with the car.
Looks like i can use the rear trailing arms for my new genuine subframe. Pleased with that.
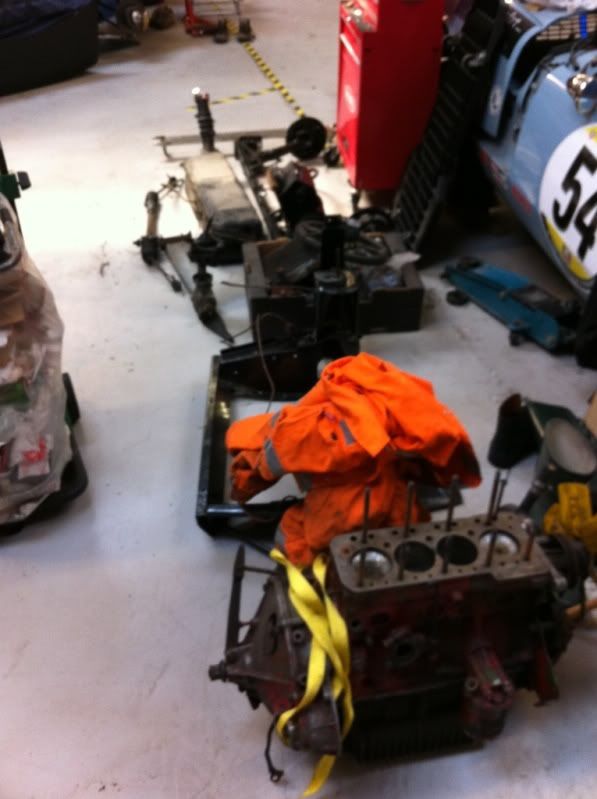
Then btw, i have also been spending a lot of time moving around in our garage, which i share with a few other guys. The plan is for me to get some more space. Maybe even for a car more.
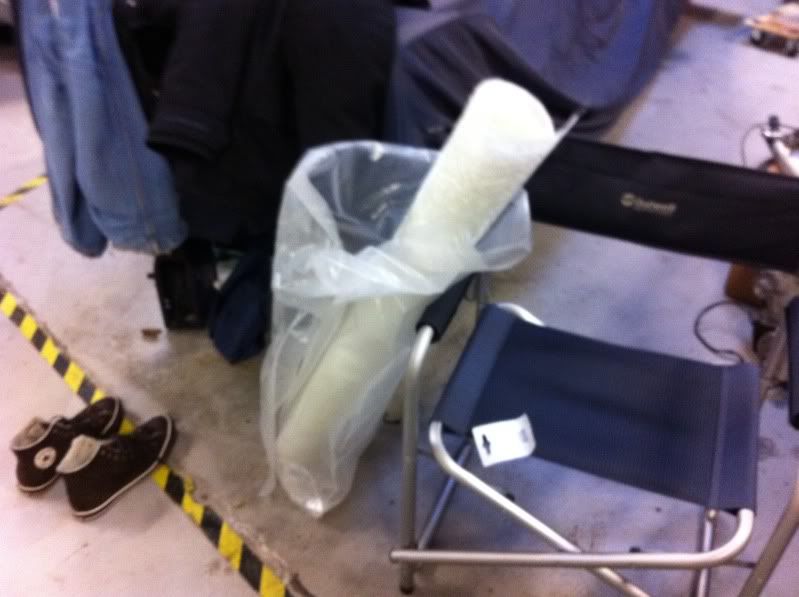
This is how my old space looks:

And the new one:
The MGB in the background, is not mine and will be moved eventually.
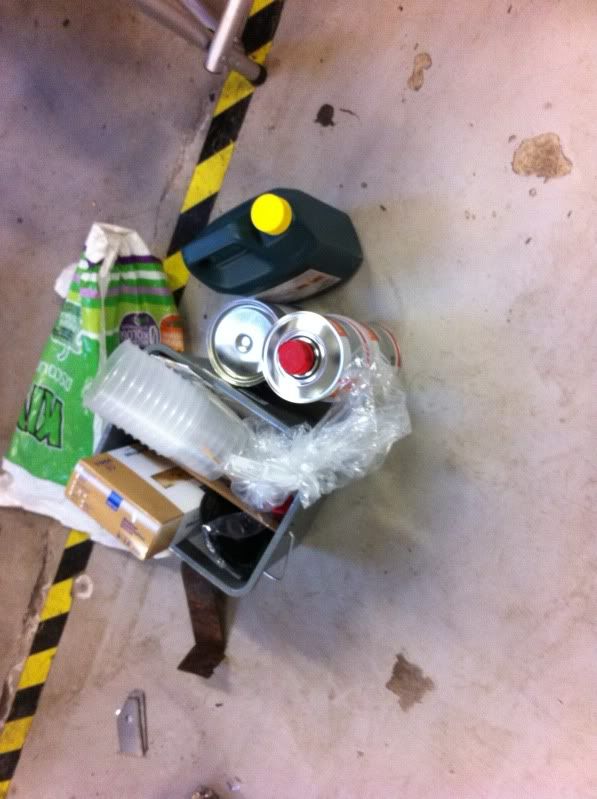
Some of all the old crap from the car also had to be moved:
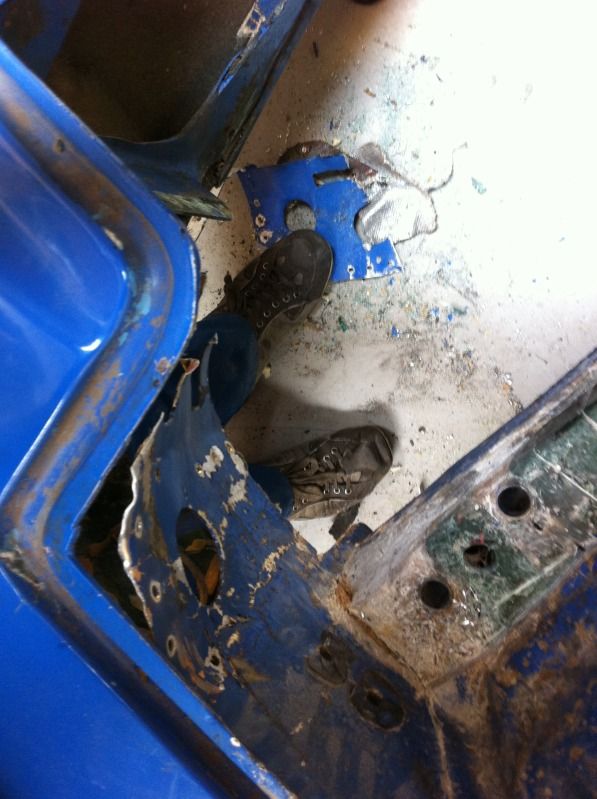
Then i actually started cutting some more. The bulkhead now looks like this:
Most of the top part is removed. Dreading to be doing the bottom.
I also need to get the LH inner arch removed. But it is going in the right direction fibreglass wise.
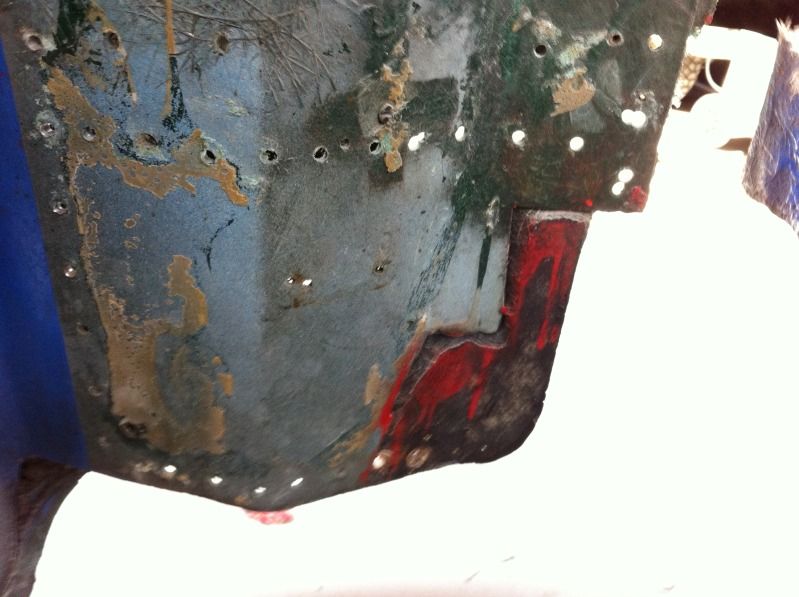
I found this on the LH side of the bulk head.
It looks like the pipes for the subframe bolts have just been "glued" in, and there is some severe cracking to be found.
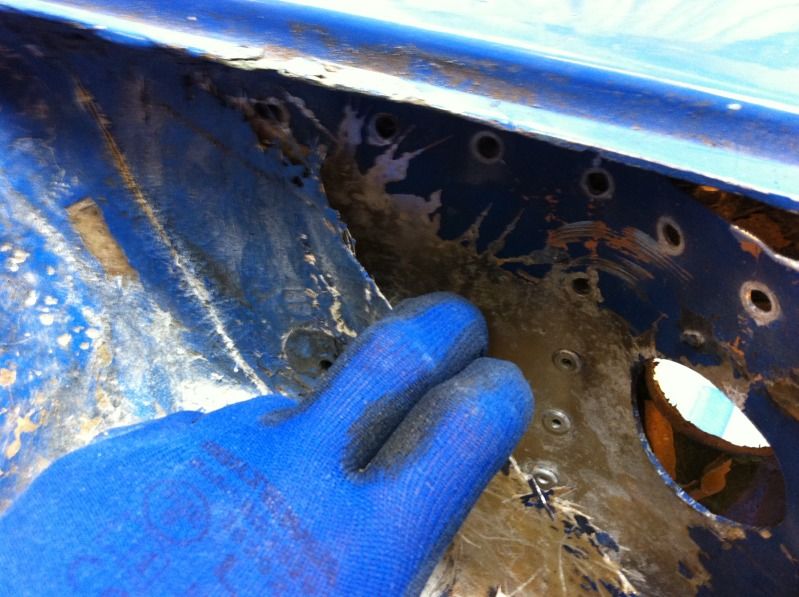
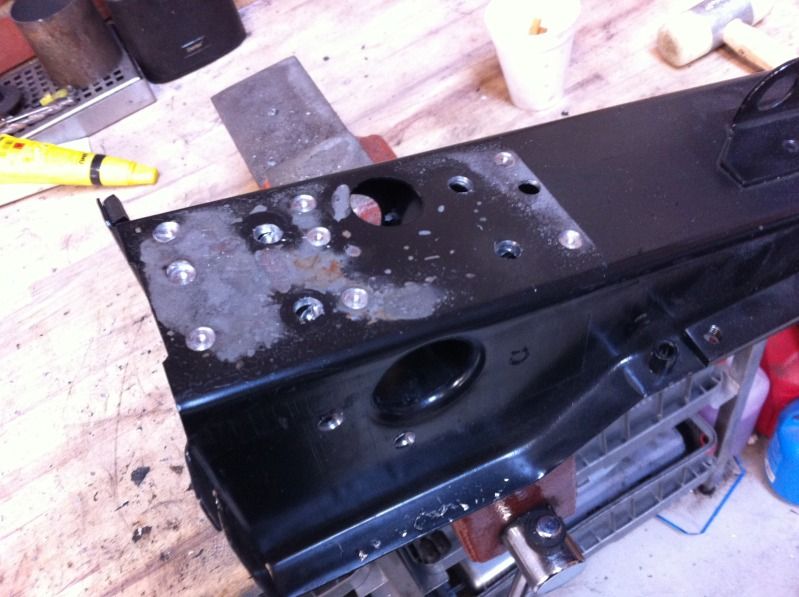
I then started removing the front plate on my new Heritage parts crossmember. Spot weld drills are a god send.
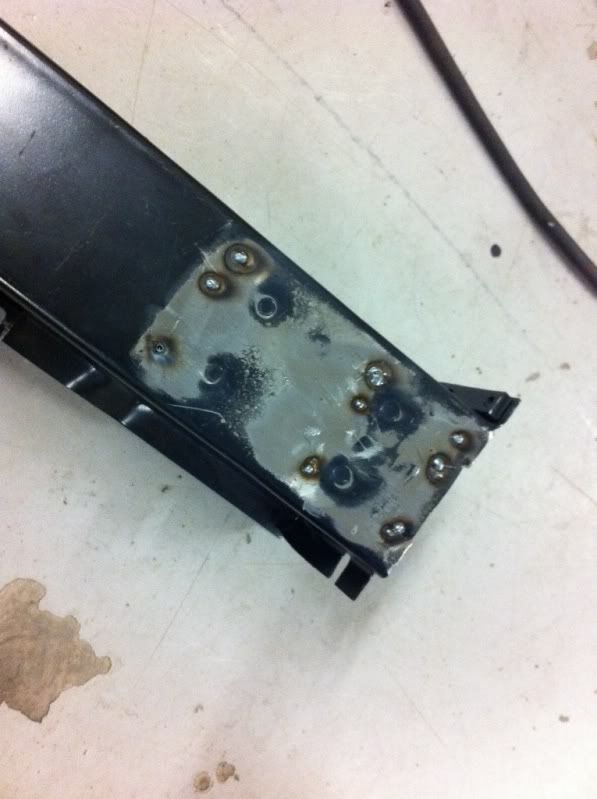
Right now iam thinking about what to do with this. The crossmember is the new type with only a single bolt in each side, and my front subframe is the old 2 bolt type. Iam leaning towards biting the bullet and buying a new single bolt subframe, as this will make this repair much easier, and probably also more precise. Haven't decided yet thoug, as that will not be totally original correct.
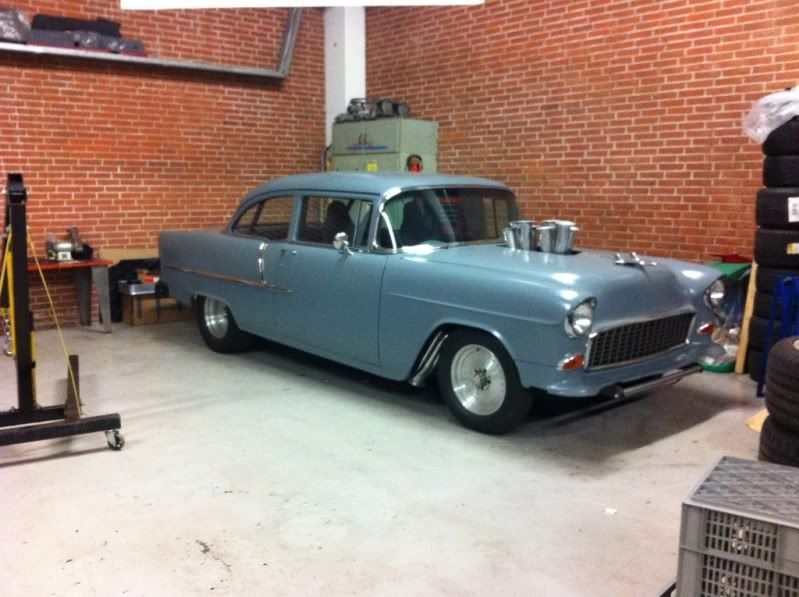
Anyways i will end with this pic. One of the guys from the garage finally got his 55 Chevy of the axle stands. Looks pretty mean?
 |
Mini Marcos Mk.II 7012
Dennis Overgaard Nielsen
Denmark |
|
|
|
| |
Reply: 86 - 96 |
|
|
| dalla |
| Posted on: May 30th, 2012, 04:41:12 |
|
|
Medium Member
Location: Aarhus Denmark
Posts: 112
|
|
Hi guys.
Ohh dear, it is almost 3 months since i updated this thread. Very little have happned on the Marcos since. I have been very busy at work, and what little time i have had left, have been used on getting my Lotus ready for summer.
But i have just ordered my FIA cage from RORY today. Should be here in 4-5 weeks.
I also looks like i have found a page, who makes the front bulkhead crossmember for the twinbolt subframe. They are called M-machine.co.uk, I am just waiting for an reply from them. Any experiences trading with them?
So iam sorry, no pics this time. I am currently working in Japan (again), but as soon as i get home, i have to crack on with the MM (there are a few small jobs on the Lotus first though). Will post pics then. |
Mini Marcos Mk.II 7012
Dennis Overgaard Nielsen
Denmark |
|
|
|
| |
Reply: 87 - 96 |
|
|
| Neil Barr |
| Posted on: June 2nd, 2012, 08:35:31 |
|
|
Baby Member

Posts: 30
|
|
Hi Dennis Ive just seen your thread; Im at a similar stage to you with the MM- interesting to see yours. Totally dismantled and Ive jsut replaced the front cross member etc; Richard kindly let me cut one out and gave me the sub frame to match, single bolt combination. but the SF didnt fit the MM so had to cut off the rear tails from the old SF and weld onto the new to make it fit. Also there was a need (?- well copying the old one)- to fabricate new end plates for the beam and weld onto the beam end which are glassed in to the wings. I had to bolt in the SF and bolt the beam on to position it , after initial glassing took the SF out and carried on with the beam now all done.
Dont know if Ive got the heart to rip apart the rear towers as well now, Ive had this thing for three and a half years and need to see an end in sight soonish !!! |
|
|
|
| |
Reply: 88 - 96 |
|
|
| dalla |
| Posted on: June 3rd, 2012, 00:11:20 |
|
|
Medium Member
Location: Aarhus Denmark
Posts: 112
|
|
Hi Neil
Thank you very much for your reply. Very interesting to hear from you.
I have now come a little further in my quest. I called M-Machine and ordered 2 twin bolt repair sections.
The plan is to weld these into the heritage crossmember.
Then i had been thinking of a similar approach to yours. One question though. On the back side of the crossmember, did you use some fibreglass putty or something to make it settle?
If you have any pictures, it would love to see them.
Also i allready cut out the rear towers, and made new stainless inserts. It was really a breeze to do, so i wouldn't hold back. I can only strongly recommend you to get an oscilating saw, like a fein cutter or the bosch that i have. Recently i used it for cutting out the floor of an old Lancia, it is really a versatile tool. You can cut the towers very precise with this.
If you have any pics, my mail is honda_st50_dax@hotmail.com
Kind regards
Dennis |
Mini Marcos Mk.II 7012
Dennis Overgaard Nielsen
Denmark |
|
|
|
| |
Reply: 89 - 96 |
|
|
| Neil Barr |
| Posted on: June 22nd, 2012, 21:06:37 |
|
|
Baby Member
Posts: 30
|
|
Hi Dennis well the section from the Mini is essentially a 'C' section open at the back so you have to glass it in on both sides front and rear. Issue at the back is getting the fibreglass to hold so you have to let the resin go off abit bef6re applying the mat to improve adhesion. Not sure what you mean about settle.
As a result of looking at your thread have looked at the rear towers on mine and they appear ok no sign of rust or swelling so am going to rebuilt straight on.
I think on the front you should try and obtain a Mini cross beam; I imagine that this item was incorporated into the original shells from general production; Richard Porter is a great source of knowledge - cheers, Neil |
|
|
|
| |
Reply: 90 - 96 |
|
|
| dalla |
| Posted on: June 27th, 2012, 07:33:08 |
|
|
Medium Member
Location: Aarhus Denmark
Posts: 112
|
|
Hi Guys
Had some really good progress yesterday. May first point of focus was the LHD aluminium inner arch.
I got it almost off, but it turned out that there was more rivets underneath more fibreglass.
It was a pain getting this aluminium out, who ever repaired this shell, really made a mess of it.
In the process the whole inner wing delaminated, but ohh well new ones will be made anyways.
Allmost there:
Finally out:
Then i focused on getting the cross member structure totally exposed, this also involved a lot of delaminating, hacking and sawing. But got there in the end.
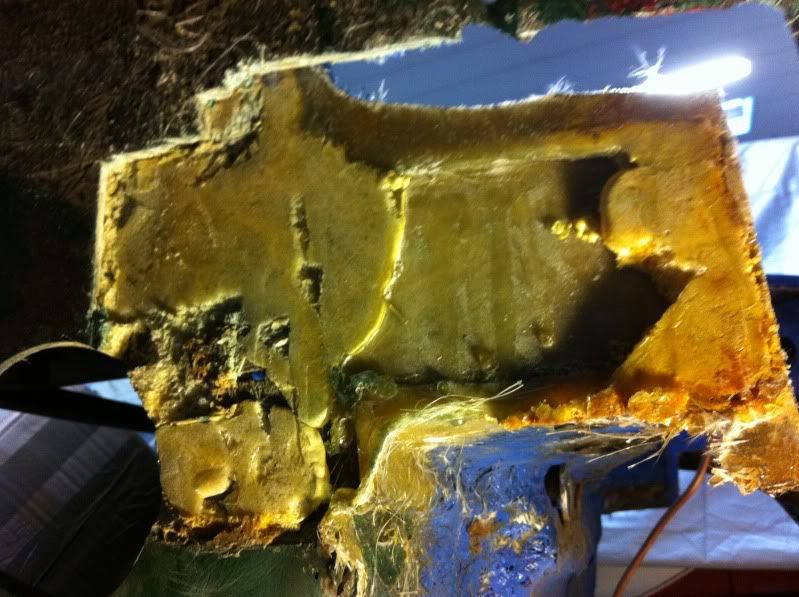
Iam doubting a little if it is original to have styrene foam in here though:
Anyone who knows?
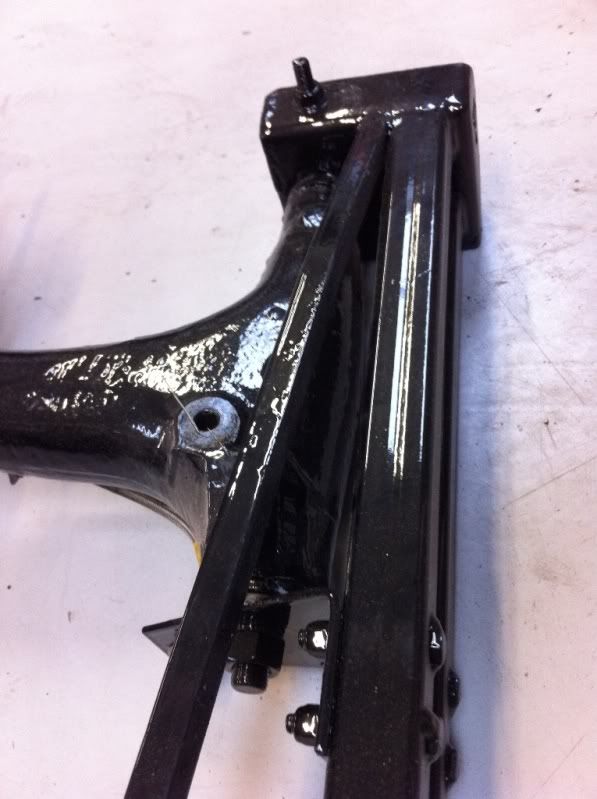
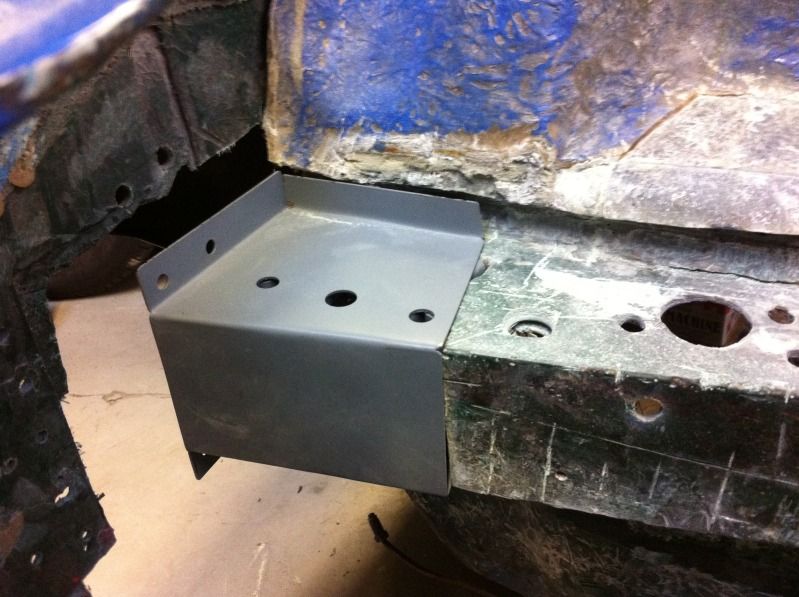
Next up was the beam. Some good progress here, as i have been able to find the correct twin bolt beam ends. A tip for other people who wants to do this. M-machine.co.uk are able to manufacture these items. My plan is to weld them onto the newer style cross member.

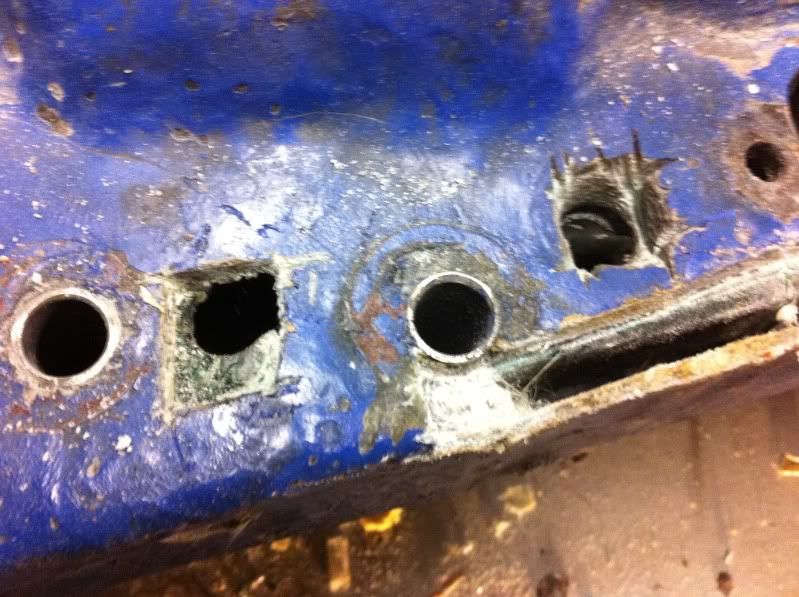
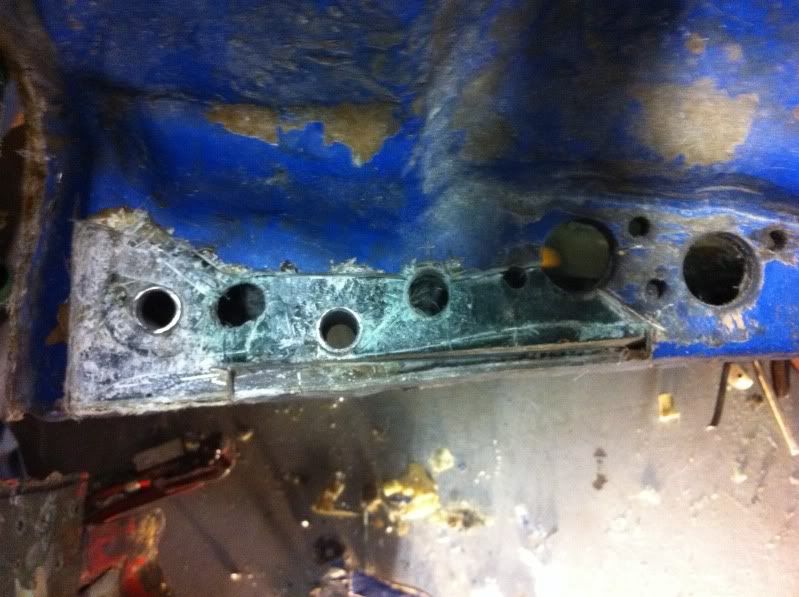
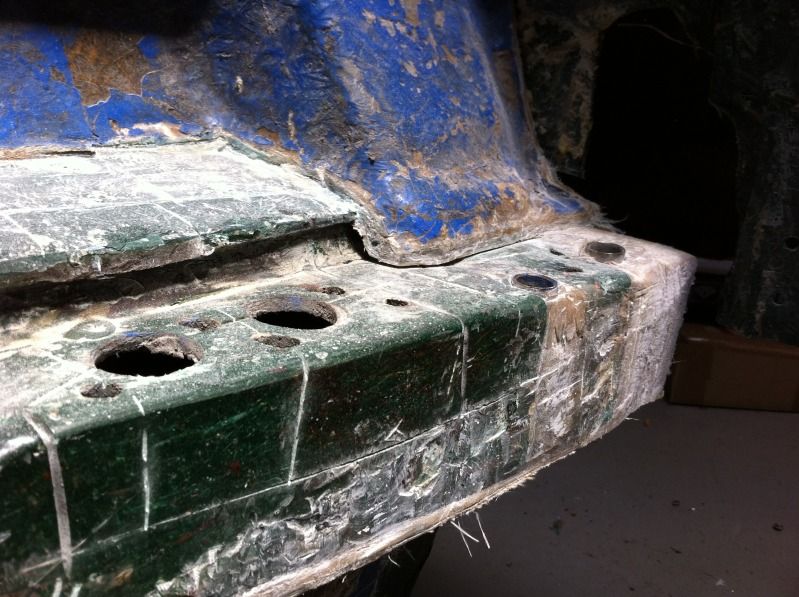
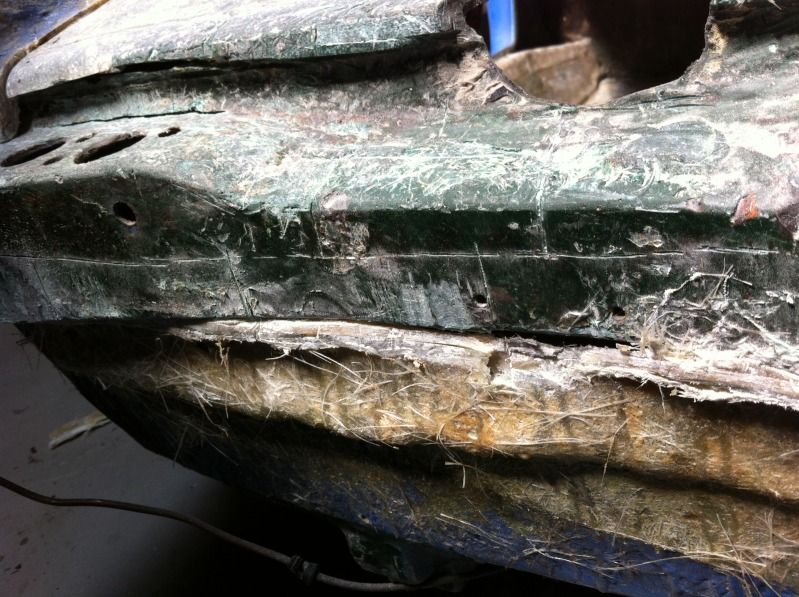
Then i focused on removing the galvanised pipes that had been glued into the bulkhead.
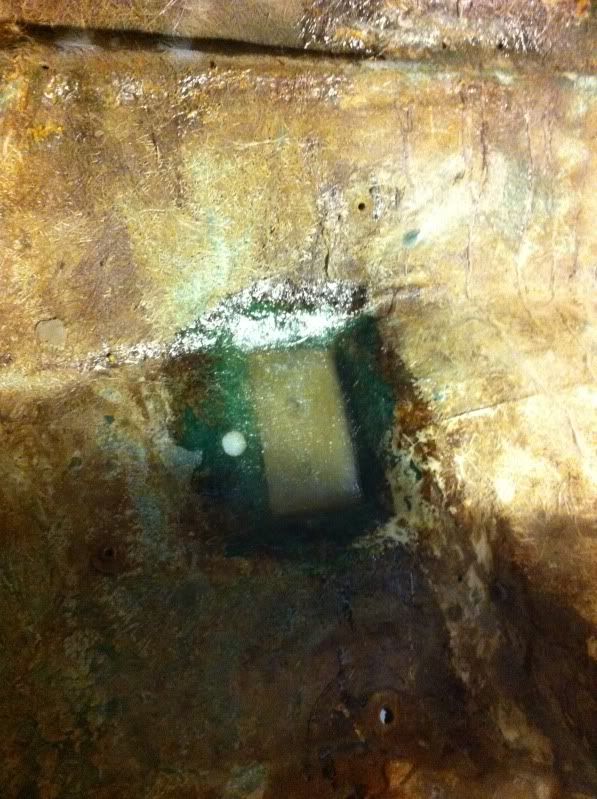
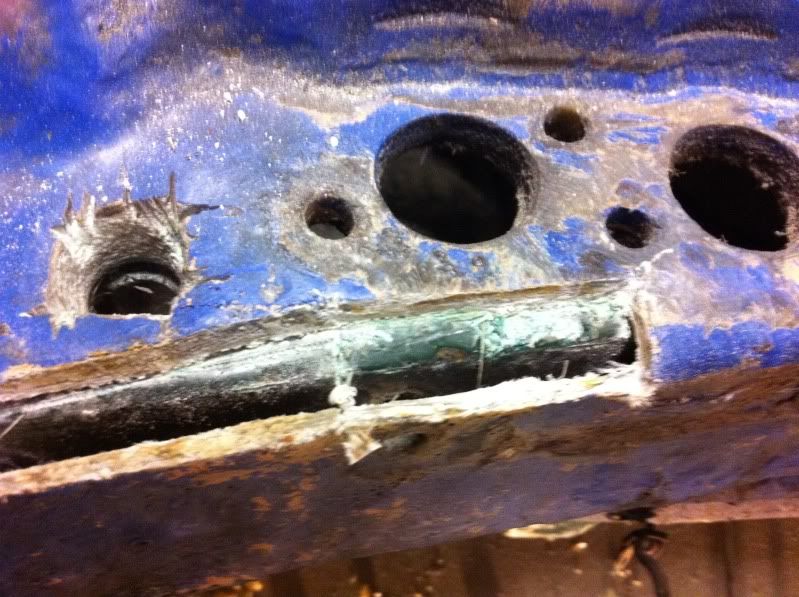
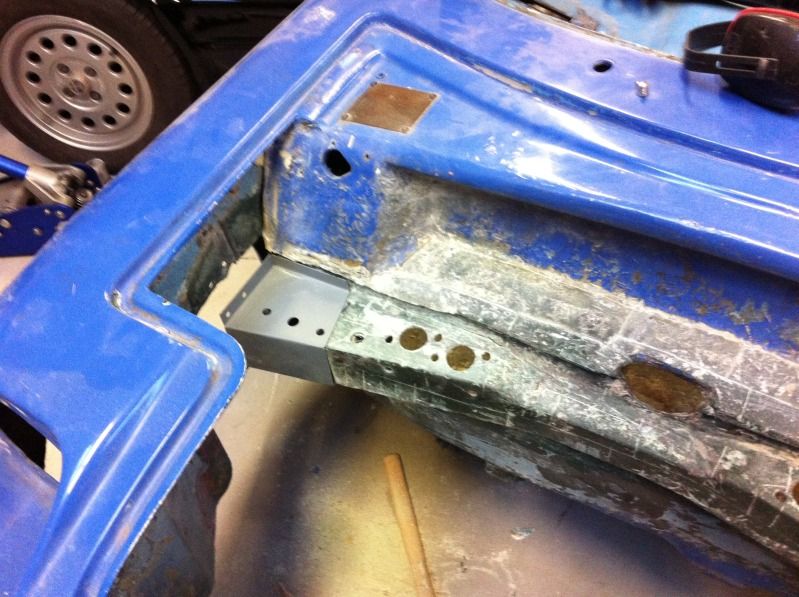
When i did this, the whole corner broke of, and this revealed something interesting.
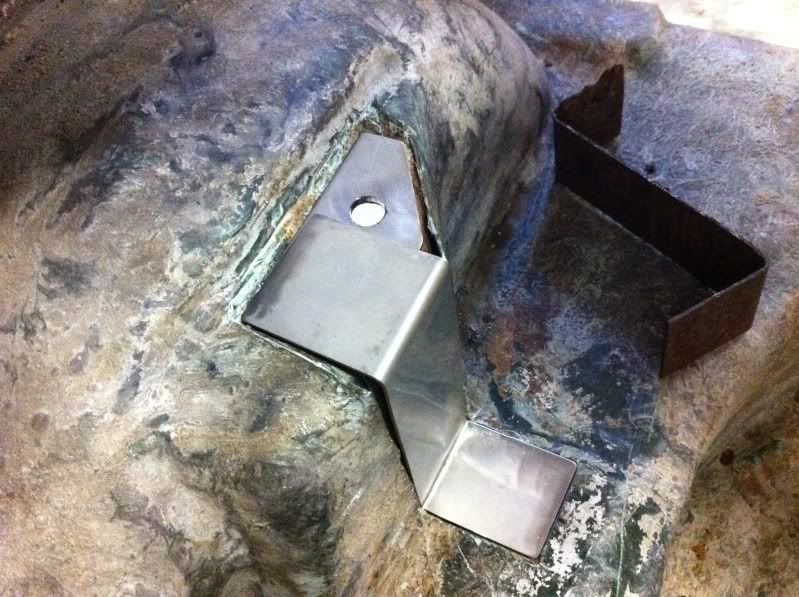
If you look at the twin bolt end pieces, they have some plate on the back forming an angle. Happily this angle corresponds with the end of the GRP bulk head, after the corner broke off.

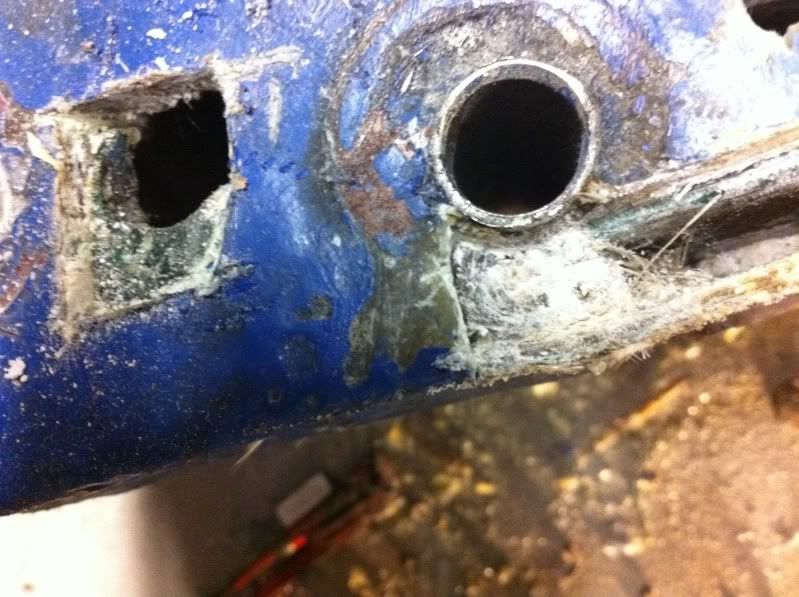
And upon further investigation, i could see a groove into the bulkhead. This had been almost closed with Resin, but i was able to open it up. This groove corresponds to the other plate on the crossmember end.
Did some test fit, it looks like the center piece of the crossmember will fit.
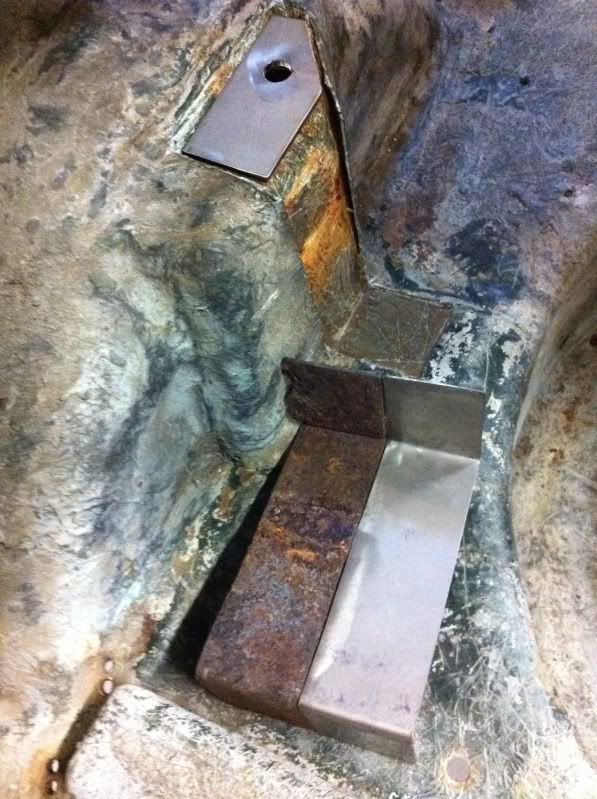
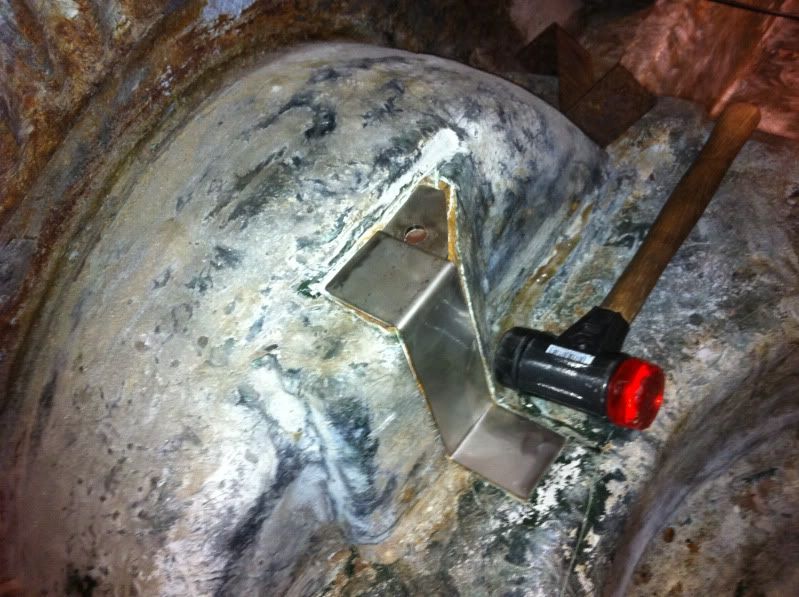
And i just could not go home, before i had tried on the end piece. It is allmost in position, and i am sure i can get it to fit 100%. This is really an important checkpoint for my project. I am very pleased.
This was todays harvest of GRP crap.

I have a dashboard and the roll cage on the way, so not so long before the GRP repair work can start. |
Mini Marcos Mk.II 7012
Dennis Overgaard Nielsen
Denmark |
Last modified June 27th, 2012, 07:56:29 by dalla |
|
|
|
| |
Reply: 91 - 96 |
|
|
| David_Farmer |
| Posted on: January 3rd, 2013, 12:45:58 |
|
|
Minimum Member

Location: Staines
Posts: 89
|
|
Happy New Year Dennis. Are the 2 holes top & bottom of the end piece for the shock bracket to attach to?
Regards Dave |
|
|
|
| |
Reply: 92 - 96 |
|
|
| Henrik and Joergen |
Posted on: July 20th, 2015, 22:42:39
Attachment: pc290033.jpg - 144.96 KB (5032 views) |
|
|
Minimum Member

Henrik and Joergen
Location: Denmark
Posts: 82
|
|
Henrik and I aquired 7012 from Dennis in 2013.
Job prevented work on 7012 for Dennis and he finally sold it to us. Work is still going on now as you can see in photos wich continues where Dennis ended work!
|
7012 owners Henrik and Joergen |
 |
|
|
|
| |
Reply: 93 - 96 |
|
|
| Henrik and Joergen |
Posted on: July 20th, 2015, 22:43:18
Attachment: pa080103.jpg - 137.21 KB (5034 views) |
|
|
Minimum Member
Henrik and Joergen
Location: Denmark
Posts: 82
|
|
| and |
7012 owners Henrik and Joergen |
 |
|
|
|
| |
Reply: 94 - 96 |
|
|
| Henrik and Joergen |
Posted on: July 20th, 2015, 22:43:48
Attachment: p5150177.jpg - 140.42 KB (5039 views) |
|
|
Minimum Member
Henrik and Joergen
Location: Denmark
Posts: 82
|
|
| and |
7012 owners Henrik and Joergen |
 |
|
|
|
| |
Reply: 95 - 96 |
|
|
| Henrik and Joergen |
Posted on: July 20th, 2015, 22:45:06
Attachment: p2180001.jpg - 141.76 KB (5039 views) |
|
|
Minimum Member
Henrik and Joergen
Location: Denmark
Posts: 82
|
|
| and from underside. |
7012 owners Henrik and Joergen |
 |
|
|
|
| |
Reply: 96 - 96 |
|
|
|


 Mini Marcos Forum > General Boards > Mini Marcos > 7012 Project thread


 Logged