 |
Pages: « ... 27, 28, 29, 30, 31, 32, 33, 34, 35, 36, 37, 38, 39, 40 » : All |
   |
|
 Author Author |
 Right - join Part A to Part B etc, etc, etc (currently 14,498 views) Right - join Part A to Part B etc, etc, etc (currently 14,498 views) |
| Neil KilBane |
| Posted on: October 15th, 2021, 15:15:06 |
  |
|
Maximum Member2


just a little fine tuning left to do.
Location: Newtown Forbes, Ireland
Posts: 1,420
Reputation: 0 (tot: ) |
|
Original screws are 8/32" x 1/2"UNC. I'm afraid I can't remember if I retapped them to metric though.
I used Dirko Sealant.
Screw - Washer - sealant - O-ring - sealant - Sender Unit - sealant - gasket - sealant - tank.
The Hex Head just allows you to use an allen key rather than a screwdriver , an angle grinder can shorten it easily idf needs be. |
|
|
|
|
 |
Reply: 540 - 599 |
|
 |
| Graham Bichard |
| Posted on: October 17th, 2021, 09:04:54 |
|
|
Maximum Member2

Posts: 751
|
|
Thanks Neil.
Washers and screws now received, sealant ordered (Hylomar Hylotyte though) so I'll look to have a crack at this next weekend.
I need to update my 'to do' board in the garage:
- Lambda,
- Radiator/fan,
- Throttle cable
- Speedo cable
I'm sure there's something else I've forgotten (this is why I write things down!) |
|
|
|
| |
Reply: 541 - 599 |
|
|
| Graham Bichard |
| Posted on: October 24th, 2021, 15:14:58 |
|
|
Maximum Member2
Posts: 751
|
|
Well - that was a palaver!
This is the stuff I've used:
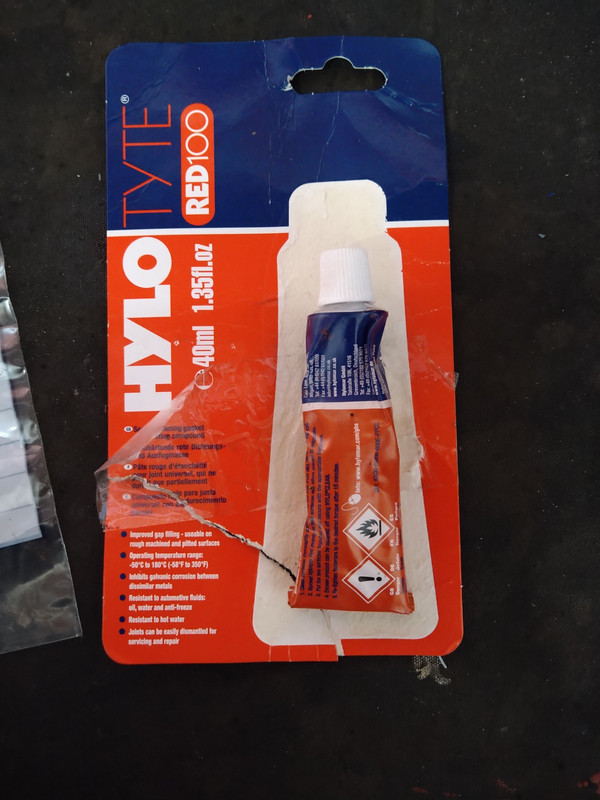
I cleaned off the RTV sealant used prior to the rolling road session as best I could before putting a skim of this stuff around the edges. I replaced the cross head screws (one at a time) with the hex head screws and the washers bought from Minispares and sourced some tiny o-rings from a local motor factor. But trying to get the screws back in to the holes when all they wantewd to do was stick to my nitrile gloves was interesting.
Given the space above/around the rear subframe and the spare wheel well, I could fit a socket in place with a screwdriver attachment but couldn't hold the screwdriver as you normally would, in the palm of your hand and had to try and tighten the screws up using my finger tips on the screwdriver (if that makes sense). So with that lack of feeling I hope a) I've done these up tight enough and b) perversely, haven't done them up so tight that I've stretched/started to strip the threads!
I put a coat of the sealant over the screw heads once tightened:
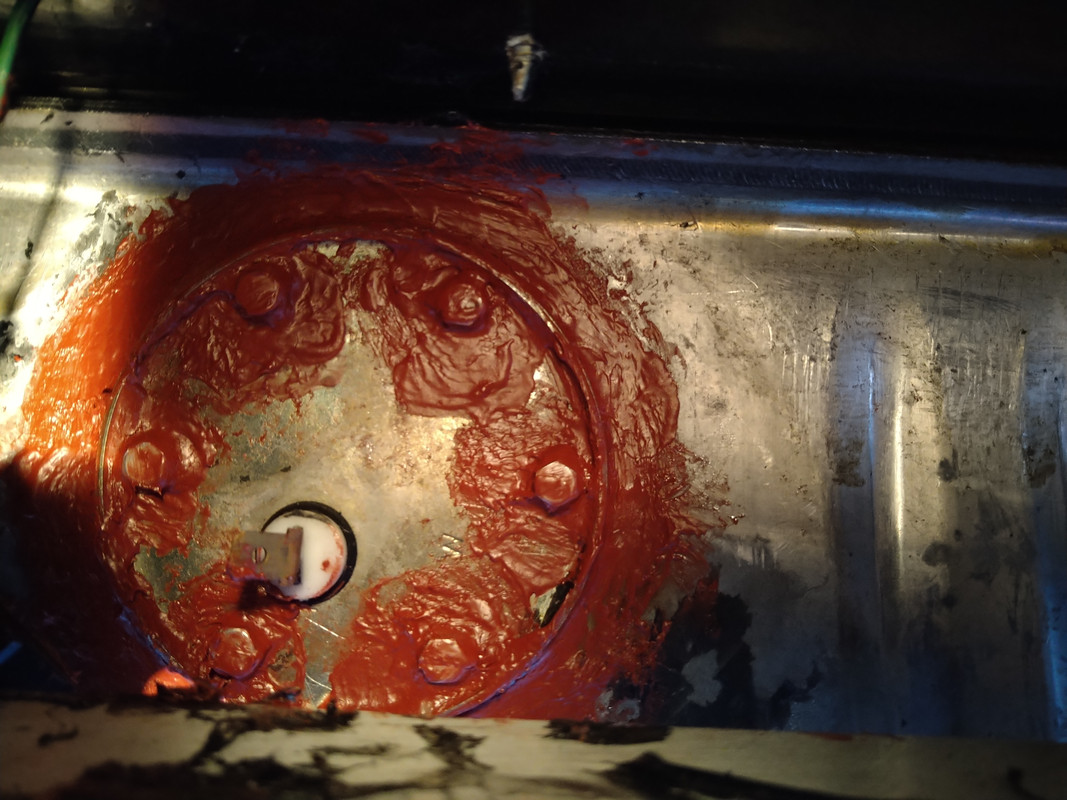
I did this yesterday and checking it this afternoon, the sealant has set 'tacky', as it's meant to do. But I'm wondering if I should now cover this with a coat of RTV =- what do we think?
I'm away for a few days through this week so won't put petrol in until end of next week/next weekend (so that I'm around if it does leak and I can syphon any petrol out if it does) but I'm getting a little anxious about this - if it doesn't seal I'll have to take the tank out, and I really don't fancy doing that.
ETA - When I took the crosshead screws out there was a flat washer underneath. I don't remember these being part of the kit, and they do look like the small washers I have so think I may have put these in as good engineering practise, to spread the load. But if I have fitted these it does beg the question as to whether I'm going to be able to get a seal. |
Last modified October 24th, 2021, 15:18:20 by Graham Bichard |
|
|
|
| |
Reply: 542 - 599 |
|
|
| Graham Bichard |
| Posted on: October 31st, 2021, 16:25:10 |
|
|
Maximum Member2
Posts: 751
|
|
It doesn't leak! At least it doesn't appear to with half a tank of fuel in it.
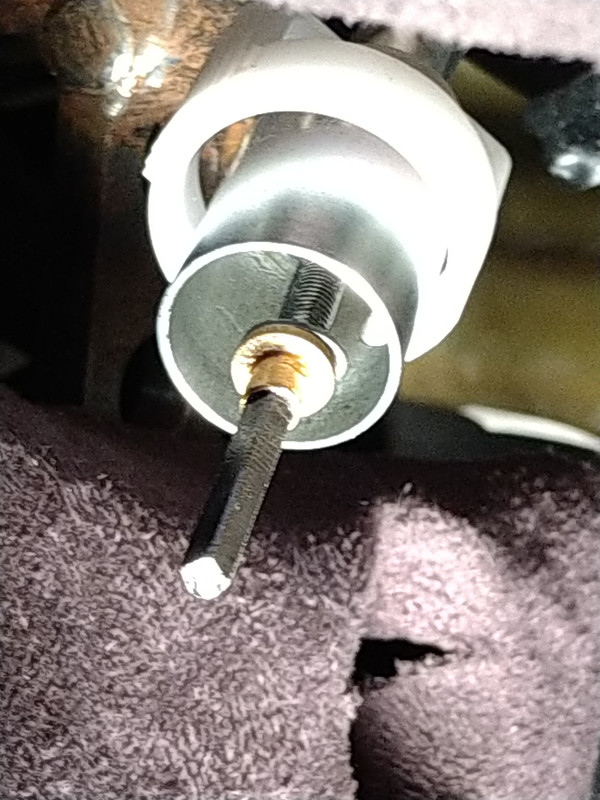
In other news - the speedo cable turns but when connected to the speedo head, it doesn't drive the speedo needle. This could mean the speedo head is U/S, or that the piece of the cable which engages into it isn't long enough. Does anyone know if it's possible to withdraw the inner from the outer, leaving the outer in place and then safely reinsert an inner?
If this is possible I'll have a longer inner made. Or is there a test I can do on the head unit itself?
As part of checking the tank, I ran the car up to temperature. While only idling, the fan cut in with the needle recording about 3/4 (mid way between mid point and red line), cooling as it should, stopping again when the gauge was at the mid point |
|
|
|
| |
Reply: 543 - 599 |
|
|
| Graham Bichard |
| Posted on: November 6th, 2021, 12:38:00 |
|
|
Maximum Member2
Posts: 751
|
|
So what dimension should the inner drive cable be, from the nipple to the end, in order to drive the speedo head. Any ideas?
 |
|
|
|
| |
Reply: 544 - 599 |
|
|
| Graham Bichard |
| Posted on: November 27th, 2021, 10:48:03 |
|
|
Maximum Member2
Posts: 751
|
|
Can anyone tell me if Andy Wright (Club Spares) has an email address I can use to contact him on? There is a mobile phone number but no email address in the club magazine.
I've got a couple of questions regarding the Spal electric cooling fans the club sells but don't want to bother him on the phone (he can reply to an email as and when he has time).
Cheers. |
|
|
|
| |
Reply: 545 - 599 |
|
|
| Neil KilBane |
| Posted on: November 27th, 2021, 22:28:56 |
|
|
Maximum Member2
just a little fine tuning left to do.
Location: Newtown Forbes, Ireland
Posts: 1,420
Reputation: 0 (tot: ) |
|
| I'm running the Club rad and two Spal fans if you need any info |
|
Last modified November 27th, 2021, 22:29:24 by Neil KilBane |
|
|
|
| |
Reply: 546 - 599 |
|
|
| Graham Bichard |
| Posted on: November 28th, 2021, 18:24:03 |
|
|
Maximum Member2
Posts: 751
|
|
Thanks Neil.
In the club mag, the fan looks to have a connector on the end of the power cable. Do you have a close up of this? Or know the specification of the connector? I will need to link this in to the loom obviously and would need to supply a suitable female connector for this.
I've measured the fan I currently have and it is 'around' 9" as it is. This being the case it might be worth me considering a two fan set up. Are the club supplied SPAL fans (when supplied in pairs) wired such that they connect together? (Electrics are not my thing I'm afraid)
Is the fan a blow through or suck through arrangement? (I'm aware that some fans can have the fan turned over to the orientation you require - are these like that?)
Cheers. |
|
|
|
| |
Reply: 547 - 599 |
|
|
| Neil KilBane |
| Posted on: November 28th, 2021, 21:58:59 |
|
|
Maximum Member2
just a little fine tuning left to do.
Location: Newtown Forbes, Ireland
Posts: 1,420
Reputation: 0 (tot: ) |
|

Old pic of the fans as they were sent to me. as you can see the connector are just twin wire terminals with polarised spade connection. I replaced these with another single block connector but they are wired individually and programmed to come on at different temperatures
My set up has the fans on the inside so are suck through .
You'll also need a blanking bung with M22x1.5 thread. You can put your temp sensor here but I have mine in the hose to the top of the engine.
I had to make up spacer nuts to mount the fans to the rad, but I think the club supply correct nuts now,
|
|
|
|
|
| |
Reply: 548 - 599 |
|
|
| Craig Smith |
| Posted on: November 30th, 2021, 17:01:09 |
|
|
Big Member


Location: Bury
Posts: 256
|
|
Hi Graham,
I supply the Rads / Fans to club members.
Feel free to email me - editor@ as in the magazine. |
|
|
|
| |
Reply: 549 - 599 |
|
|
| Graham Bichard |
| Posted on: December 1st, 2021, 08:50:24 |
|
|
Maximum Member2
Posts: 751
|
|
Neil, the connector in the photo looks similar to what I currently have fitted (great if it is - just plug and play) but are you saying that you wired both fans into the one connector?
Was it a specific connector i.e. two separate inputs with a common output? Or simply fitting both fan wires into a single input/output connector? I take it both fans now come on at the same time (for more rapid cooling).
(Sorry if this is a simple question - electrics really aren't my thing!)
Craig - I might be in contact regarding these but it might have to wait a little.
I went to start the car yesterday - it hasn't been started for almost two weeks, and not since I changed the lambda sensor, and while there was a couple of coughs it wouldn't catch.
The battery has been on a Halfords smart charger (effectively a winter trickle charge), and I ended up fitting jump leads too, to no avail.
I've had the battery on charge overnight so I'll hopefully try again today (I'll fit the jump leads straight away to try and give it an extra kick).
I'll also pull a plug and have a look at the colour of it - I should've done this before now perhaps, to see that the cars running leaner than it was. And if I can't get the car started perhaps try and refit the old lambda (that being the only part that's physically changed since it last ran).
Any other suggestions that might help get it running welcome (I remember my Dad warming the plugs in the oven years ago. Not sure if this was to dry them after flooding, or to assist in getting the car started).
ETA - I was in the middle of sorting the speedo cable and throttle cable reworks when I decided to start the car, trying to progress the build. Two steps forward, one step back.... |
Last modified December 1st, 2021, 09:04:43 by Graham Bichard |
|
|
|
| |
Reply: 550 - 599 |
|
|
| Graham Bichard |
| Posted on: December 1st, 2021, 13:00:42 |
|
|
Maximum Member2
Posts: 751
|
|
Plugs were dirty/wet:

At least they wiped clean okay.
Not sure if this is from the attempts to start yesterday, or something else.
Worth trying a new set, do you think? |
|
|
|
| |
Reply: 551 - 599 |
|
|
| Graham Bichard |
| Posted on: December 2nd, 2021, 11:26:21 |
|
|
Maximum Member2
Posts: 751
|
|
I was planning to go out into the garage this morning, but after taking the dog out for a walk have decided it's far too cold.
It's a lovely morning, but bitterly cold:
 |
|
|
|
| |
Reply: 552 - 599 |
|
|
| Neil KilBane |
| Posted on: December 2nd, 2021, 14:03:09 |
|
|
Maximum Member2
just a little fine tuning left to do.
Location: Newtown Forbes, Ireland
Posts: 1,420
Reputation: 0 (tot: ) |
|
My fans are indipendant of each other, they are both controlled through a Davies Craig temperature gauge/fan controller and relay set up that allows me to set the cut in temp of each individually. From memory one is set to turn on at 82deg and the second at 90deg. There is also a manual over-ride to turn them both on if needs be.
I have used two waterproof connectors canabalised from some wrecks in a local scrap yard.
Here is a link to the installation instructions with the wiring diagram, I have it set up as on page 3.
https://daviescraig.com.au/med.....2950022-May-2020.pdf

|
|
Last modified December 2nd, 2021, 14:19:42 by Neil KilBane |
|
|
|
| |
Reply: 553 - 599 |
|
|
| Graham Bichard |
| Posted on: December 3rd, 2021, 11:33:41 |
|
|
Maximum Member2
Posts: 751
|
|
Just tried to start the car. It wanted to start, but didn't!
A new set of plugs the first step I think, followed by the lambda sensor
Thanks for the link Neil. I'll have a look at that once I've sorted this first problem out |
|
|
|
| |
Reply: 554 - 599 |
|
|
Pages: « ... 27, 28, 29, 30, 31, 32, 33, 34, 35, 36, 37, 38, 39, 40 » : All |
|
|


 Mini Marcos Forum > General Boards > Mini Marcos > Right - join Part A to Part B etc, etc, etc
 Logged