 |
Pages: « ... 15, 16, 17, 18, 19, 20, 21, 22, 23, 24, 25, 26, 27, 28, 29, 30, 31, 32, 33, 34, 35 ... » : All |
   |
|
 Author Author |
 Right - join Part A to Part B etc, etc, etc (currently 14,508 views) Right - join Part A to Part B etc, etc, etc (currently 14,508 views) |
| Stuart |
| Posted on: September 5th, 2015, 19:13:32 |
  |
|
Big Member


Location: Peak District
Posts: 284
Reputation: 1 (tot: 1) |
|
| A tip on the drilling, blunt drills don't dig in so quickly and chip, it makes sense when you think about. |
|
|
|
 |
Reply: 360 - 599 |
|
 |
| Graham Bichard |
| Posted on: September 20th, 2015, 17:41:38 |
|
|
Maximum Member2


Posts: 751
|
|
Engine bits back on Friday, so block painted. One more coat and it'll be ready to build. Unfortunately the photos I've taken have disappeared from my phone.
While the paints been drying I've checked the running clearance on the crank - 1.5thou across all three journals. That's slightly below the 1.7thou minimum the Haynes states but the crank was in good nick when t was pulled only requiring a polish.
I'll be able to gap the rings while the final coat of paint is drying - 10thou for a road engine.
One thing I have struggled to get is the crush washer for the oil temperature sensor for the MPi engine (same size as for the pressure relief valve I think, which I also need).
Building at last  |
|
|
|
| |
Reply: 361 - 599 |
|
|
| Graham Bichard |
| Posted on: September 26th, 2015, 15:57:02 |
|
|
Maximum Member2
Posts: 751
|
|
|
|
|
| |
Reply: 362 - 599 |
|
|
| Graham Bichard |
| Posted on: September 26th, 2015, 16:02:44 |
|
|
Maximum Member2
Posts: 751
|
|
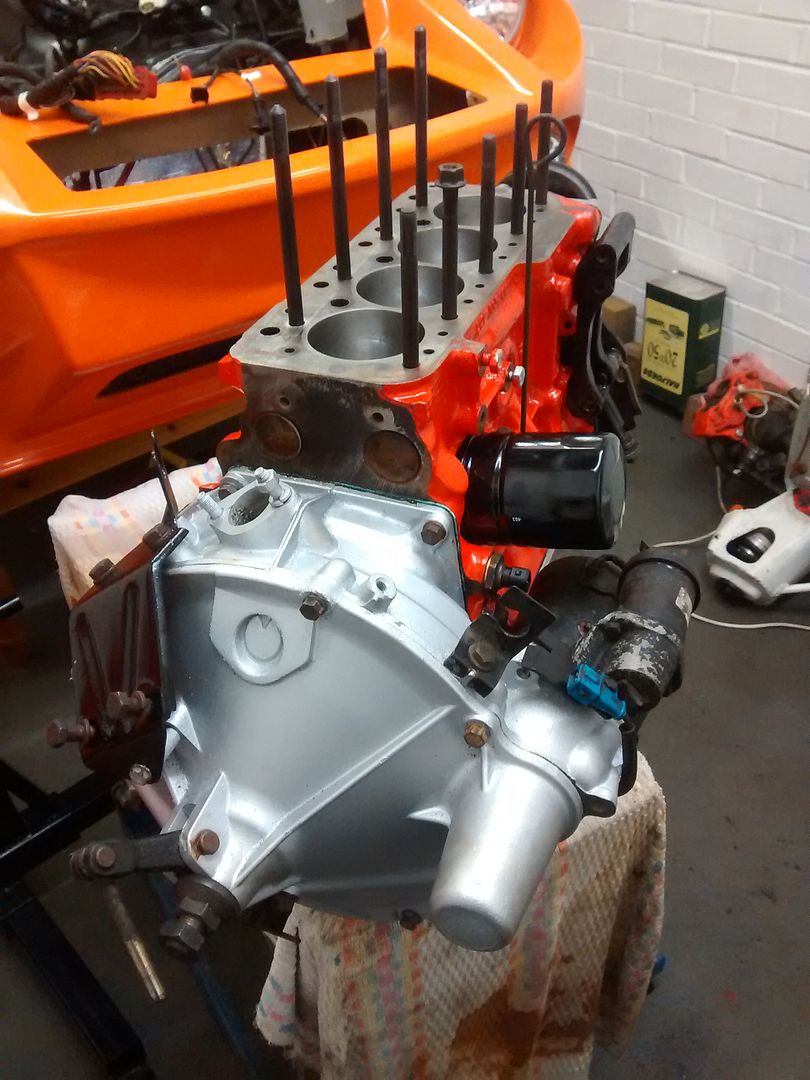
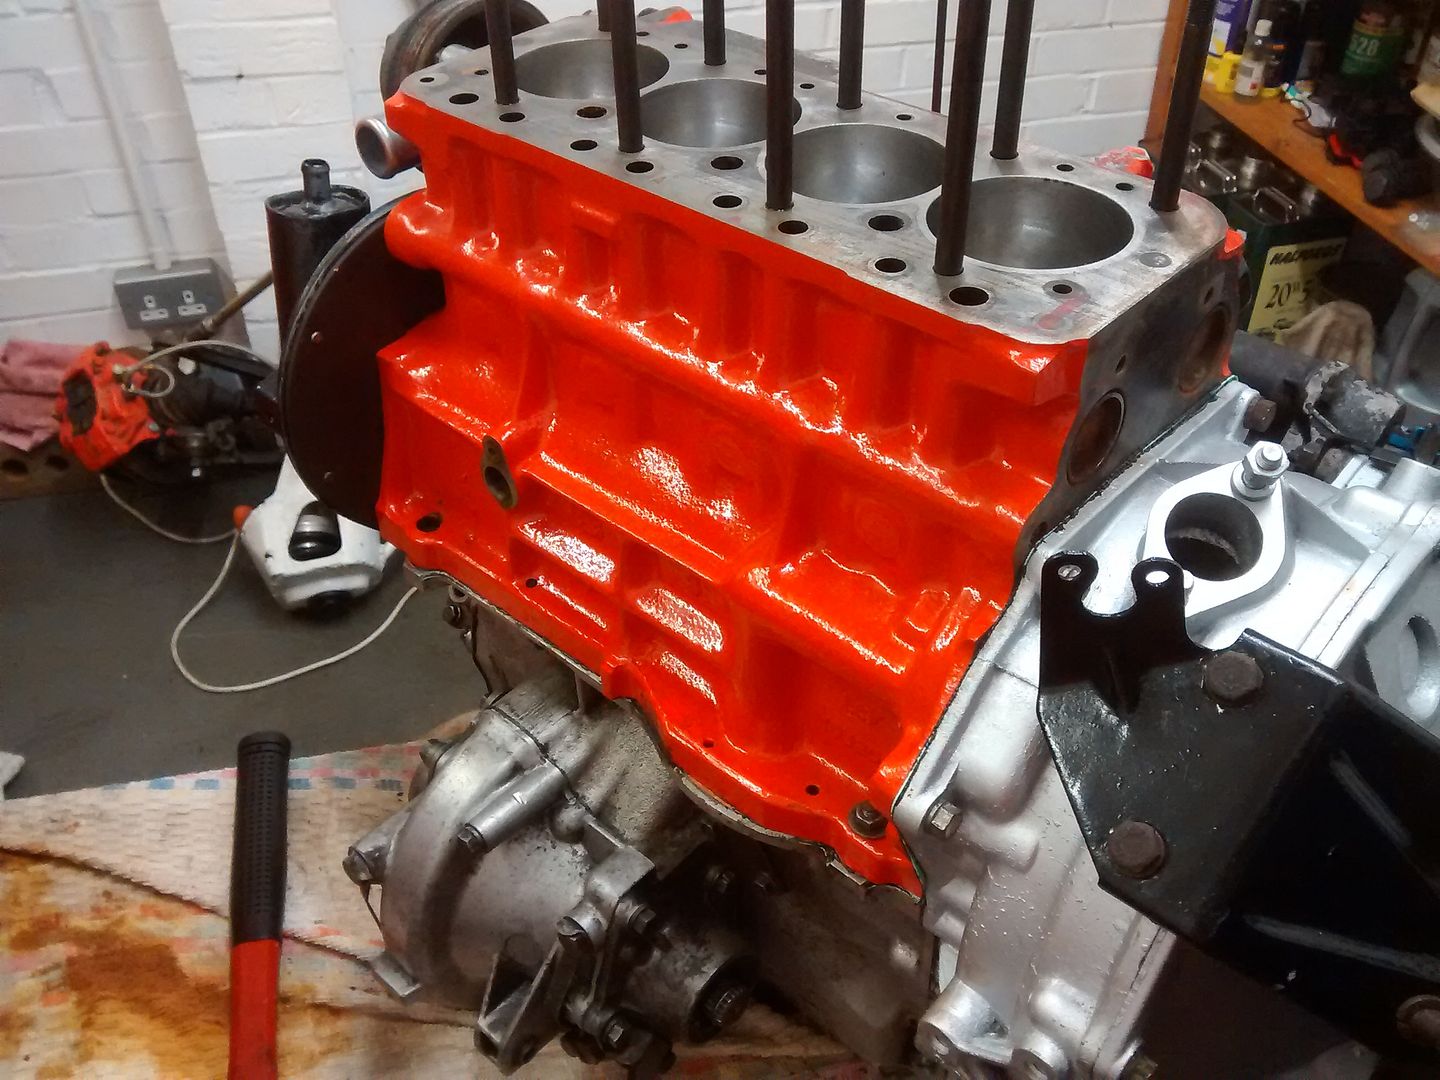
Crank in:
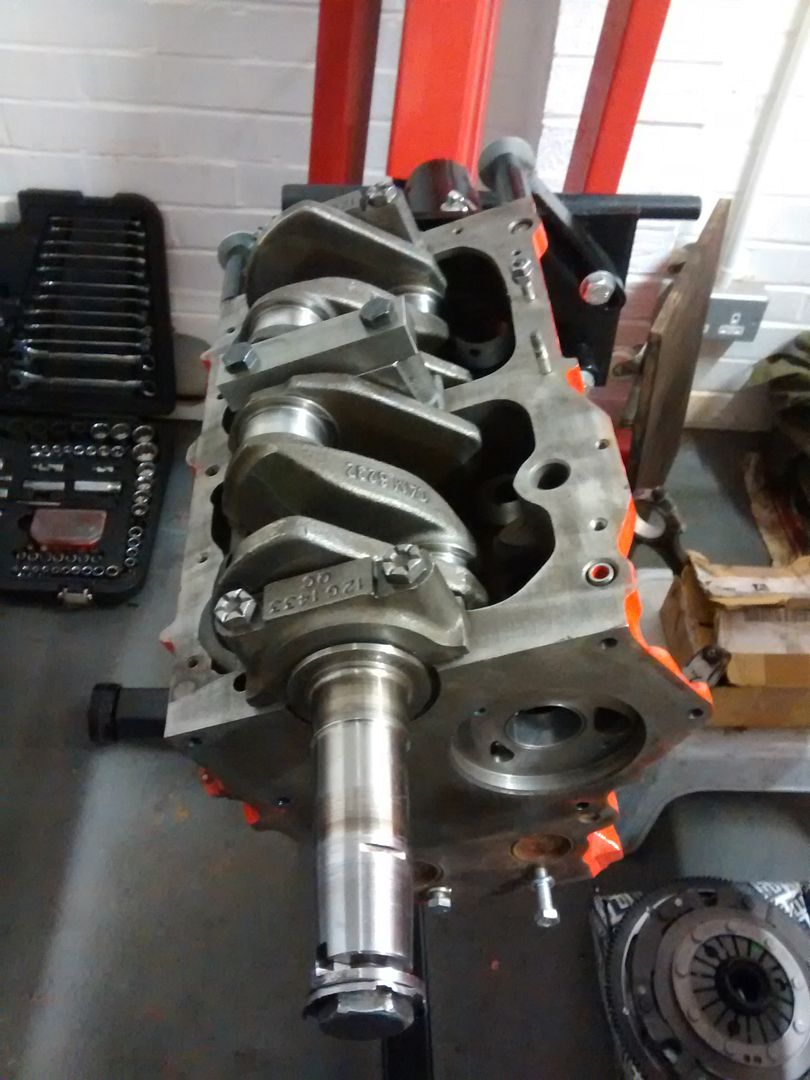
Then realised I hadn't measured the crank end float:
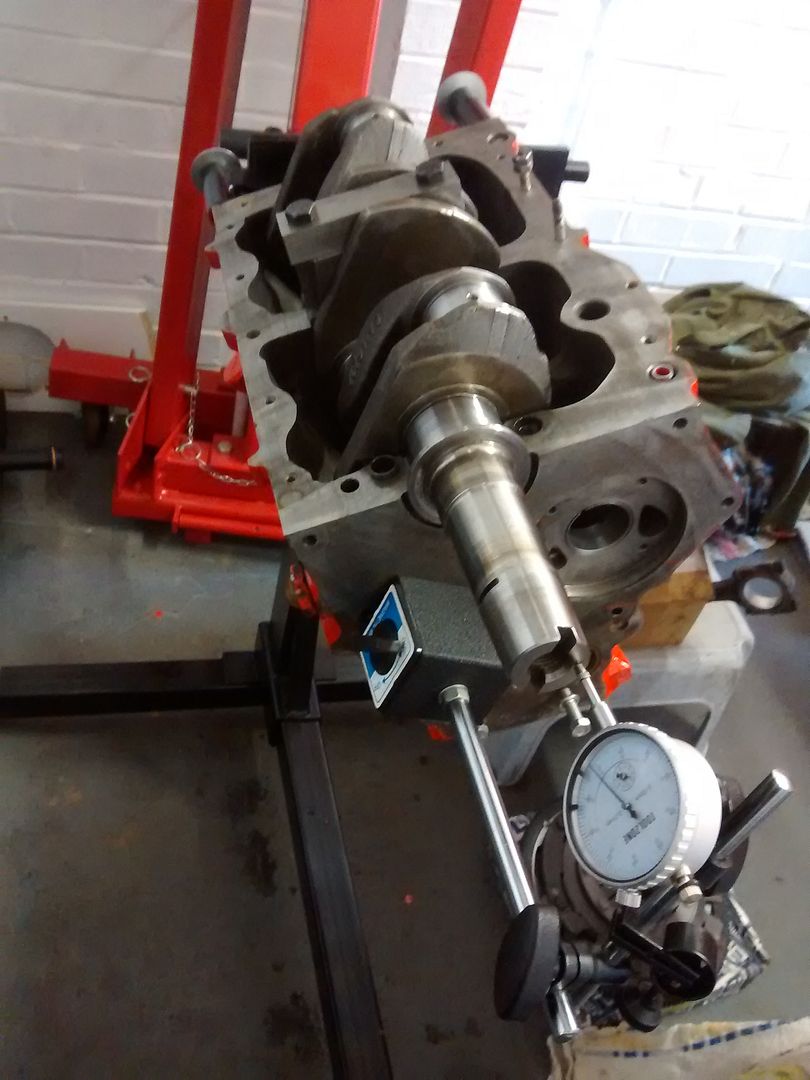
Here's where the problems started - no end float! Not a bit.
I've used emery boards and emery cloth to clean up the rear face of the thrust washer and they are slipping in easier, but I'm running out of skin (and the will to live!).
Somehow I've ended up with 2 sets of thrust washers - one set measured 2.4mm, the other 2.35mm (using a vernier). I reckon I'm down to about 2.3mm now (starting to go cross-eyed looking at the vernier)
I must admit I've only done the 'non-tab' pair so far, these being what felt the tightest. I thought some movement might show up before I did anything with the tabbed pair.
Is it a case of just having to carry on with the emery cloth?
I should add - if you look at the circle where the oil pump sits you'll see the feed/return has been modified to aid oil flow. Also the large feed hole (that has been modified to a tear drop shape) has been enlarged. I wondered about these as a modification when I built the mini engine last year after seeing what an oil pump looked like, and when reading a mini mag in WH Smiths a little while ago Keith Calver described these very mods. He also mentioned about 'through' drilling the crank (as opposed to cross drilling) - I would've had this done but the machine shop couldn't offer this service for some reason. With the mini engine running hot this past summer (oil temp) at least if the Marcos runs warm I'll have done something to improve the rate at which the oil circulates. |
Last modified September 26th, 2015, 16:10:27 by Graham Bichard |
|
|
|
| |
Reply: 363 - 599 |
|
|
| Graham Bichard |
| Posted on: October 1st, 2015, 19:03:23 |
|
|
Maximum Member2
Posts: 751
|
|
Received one set of thinned down thrust washers in the post. Fitted these tonight and recorded 0.035mm end float (slightly less than 1.5 thou).
Will this be enough? |
|
|
|
| |
Reply: 364 - 599 |
|
|
| Graham Bichard |
| Posted on: November 14th, 2015, 19:58:10 |
|
|
Maximum Member2
Posts: 751
|
|
Well, we're still progressing..... slowly!

I need to finish the gearbox first:
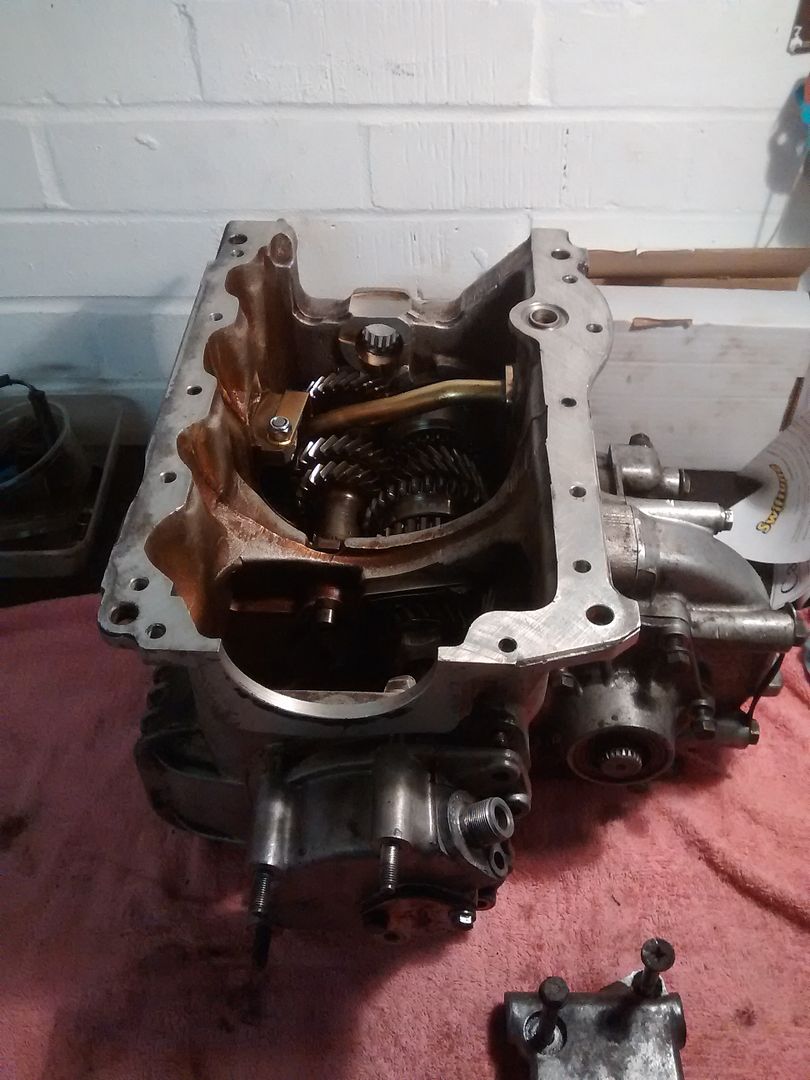
Sod's law - fitted the diff today and now need 4 thou worth of shims. And all I've got is 3 x 10 thou and 1 x 1 thou shim. And looking on line you can't get anything less than a 6 thou shim  . .
I must admit when I was measuring the gap between the diff housing and the cap it felt as if the cap wasn't flat - by this I mean if I push on the top of the pot cap, I could nip the 4 thou feeler. If I push the bottom it could slip.
Am I meansuring it correctly? |
|
|
|
| |
Reply: 365 - 599 |
|
|
| Graham Bichard |
| Posted on: December 19th, 2015, 19:16:01 |
|
|
Maximum Member2
Posts: 751
|
|

Now need to work out the CR and get the head skimmed. |
|
|
|
| |
Reply: 366 - 599 |
|
|
| Graham Bichard |
| Posted on: December 20th, 2015, 17:12:47 |
|
|
Maximum Member2
Posts: 751
|
|
So, the next step is to work out the compression ratio for the head I've got. Which is what I've been working out this afternoon.
Working with the 22cc that I measured the head at this is my reckoning:
Ring land volume = 0.78cc
Piston dish = 6.5cc
Head gasket = 4.2cc
Combustion chamber = 22cc
Volume per cylinder = 335.5cc (1342/4)
Using the formula from Vizards book V+C/C (V=volume, C=Total combustion volume):
335.5+33.48/33.48 = 11.02
Hmm - I was aiming for 10.5:1
Now I could rework the chambers a little, or I could leave it as it is given that:
The ring land is probably a little conservative (figure relates to a 1275 engine);
Two of the chambers measured 22.1cc;
But
Two of the cylinders have piston that just protrude the block.
Now when I did the head for the mini, I got my calcs wrong (for how much to skim the head by).
That ended up somewhere around 11.2 or 11.5:1. Running the car on Super plus unleaded I did 40k miles before it cracked a piston.
What do you think - leave it or make the chambers a bit bigger?
(Chamber size for 10.5:1 is around 23.84cc)
|
|
|
|
| |
Reply: 367 - 599 |
|
|
| Graham Bichard |
| Posted on: January 3rd, 2016, 20:51:49 |
|
|
Maximum Member2
Posts: 751
|
|
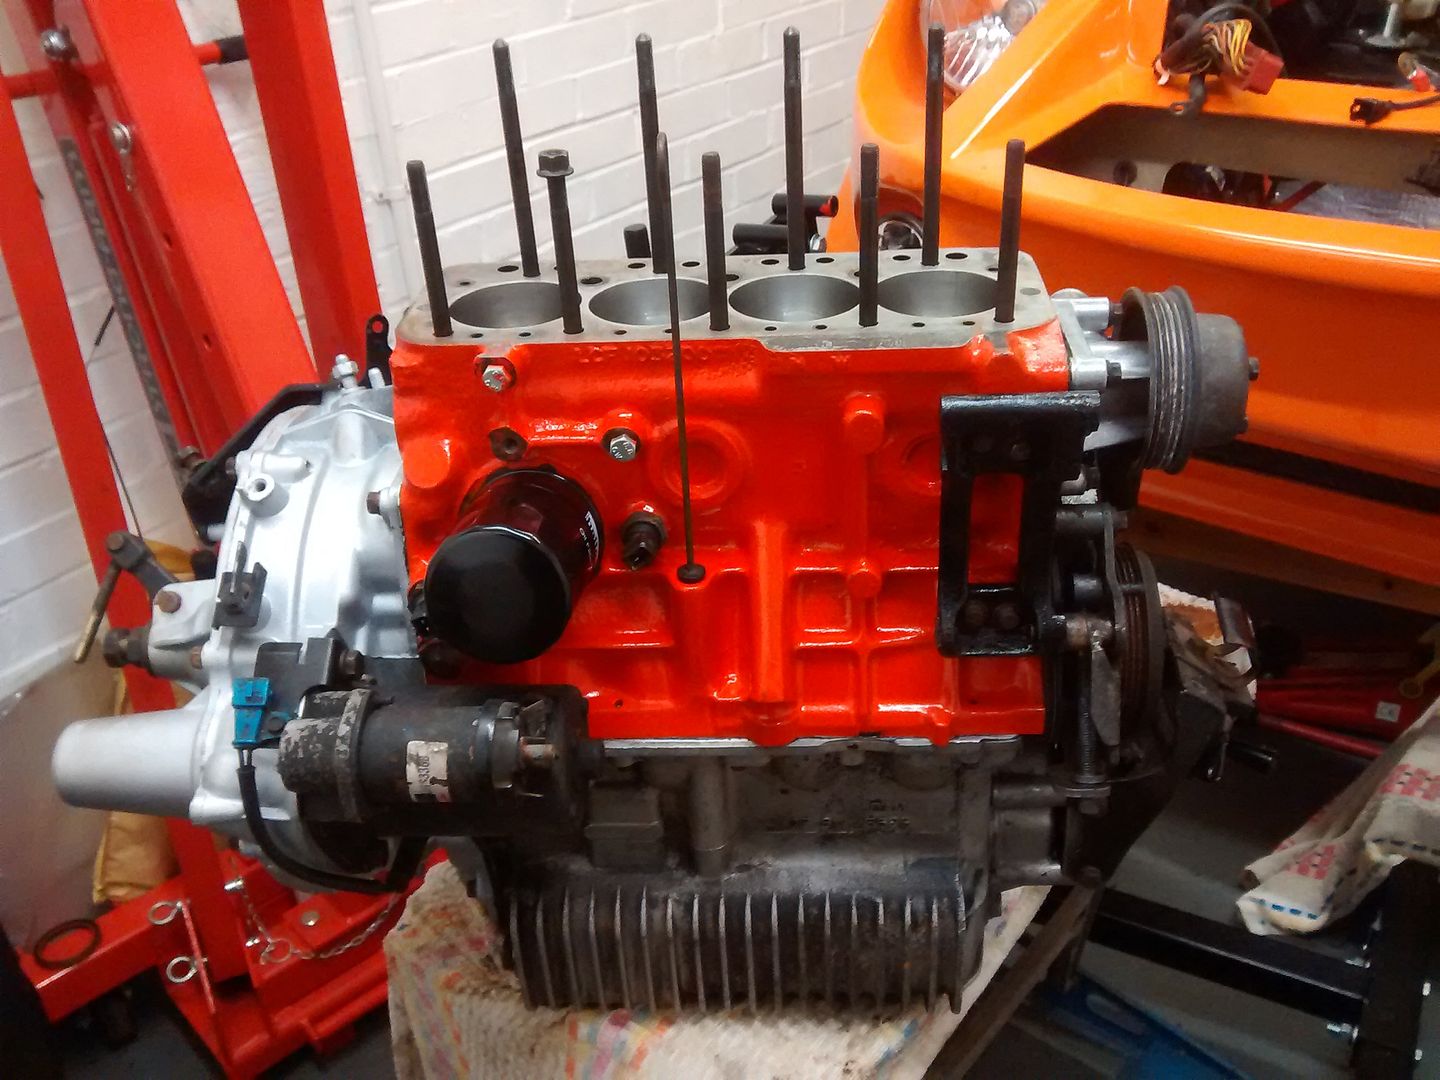
Well - what do we think?
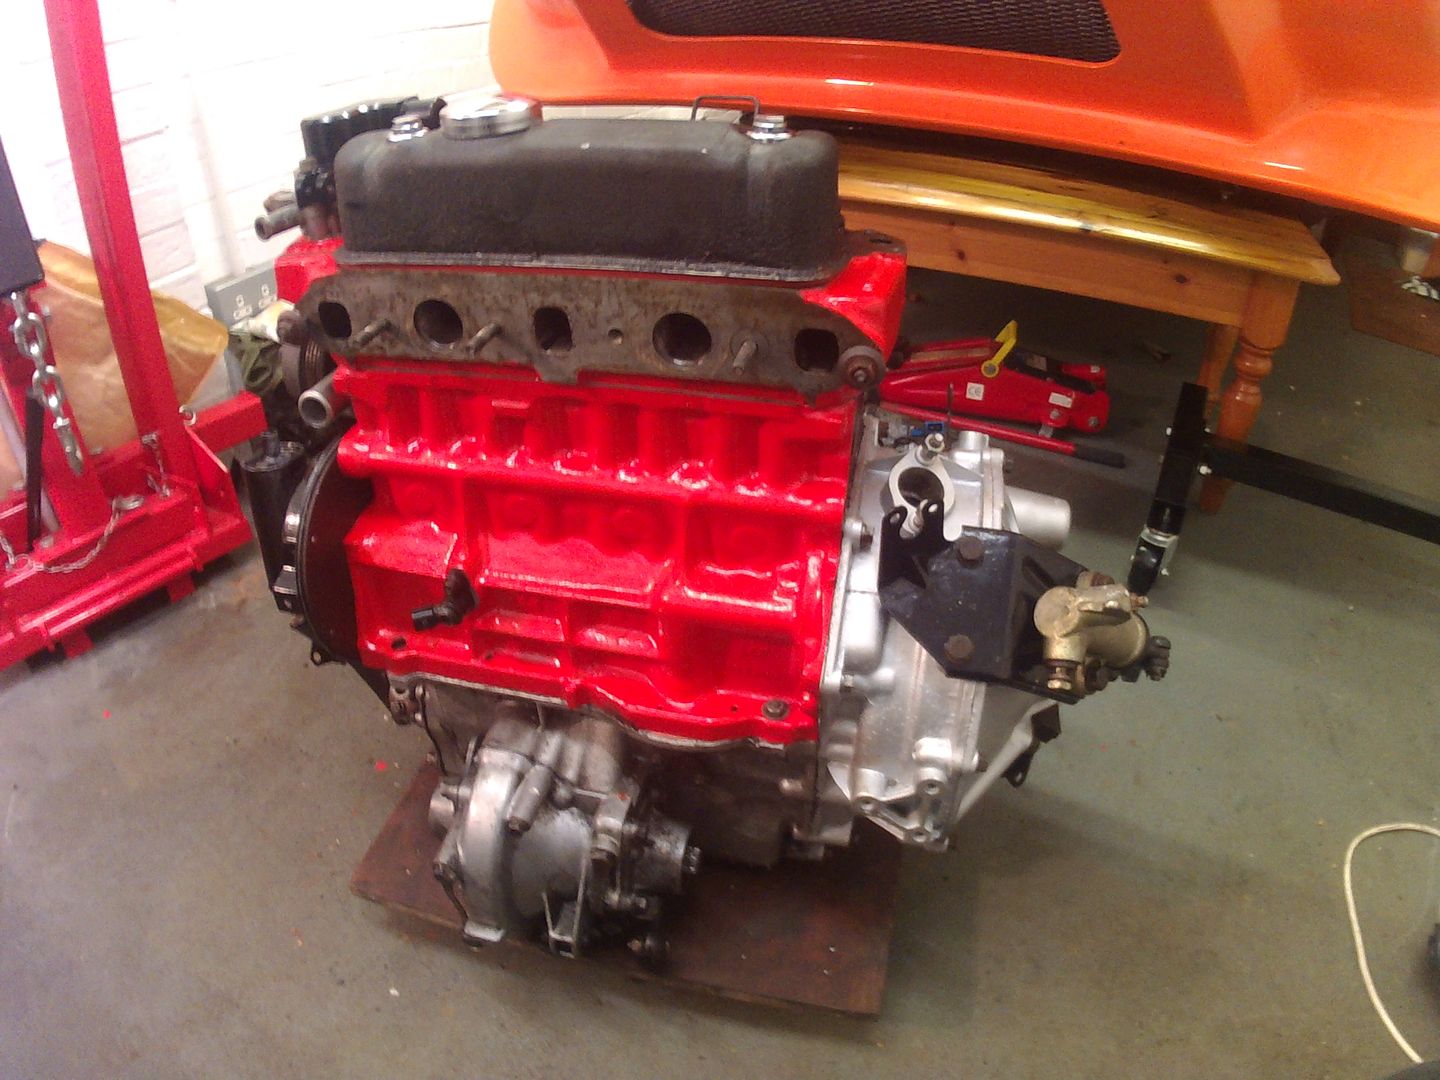
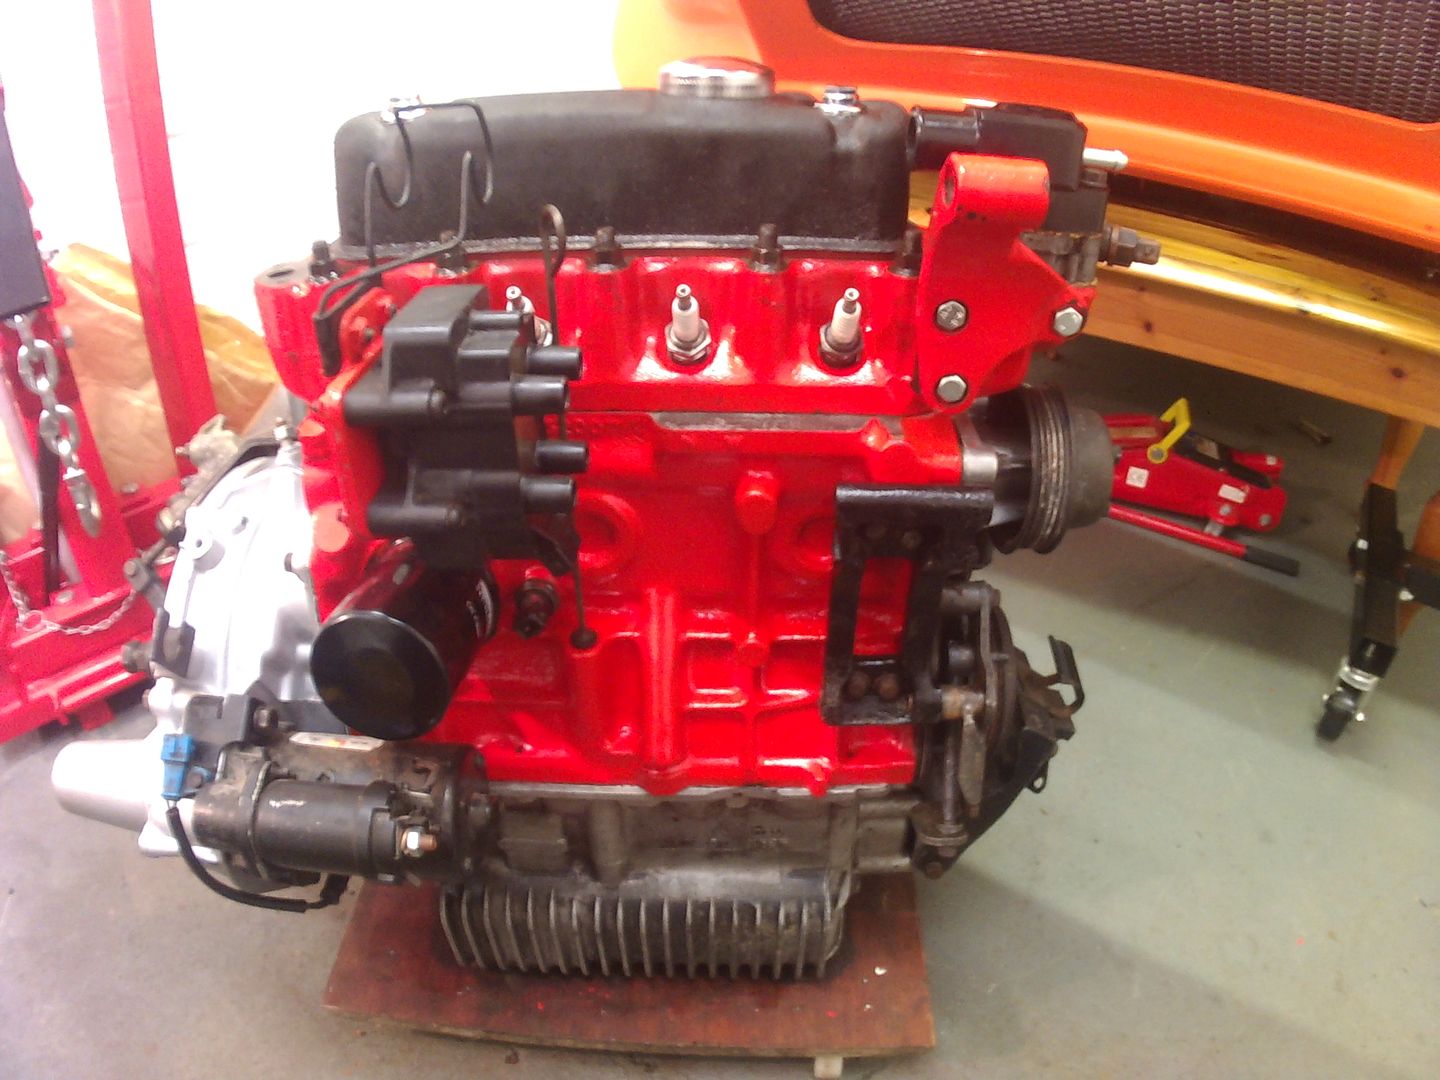
1342cc, big (inlet) valve head, 1.5 roller rockers, SW5i cam, lightened steel flywheel, centre main strap and balanced bottom end, Stainless LCB and 52mm TB to be fitted when in the car.
Should give me 90+ bhp if I've put it together properly.
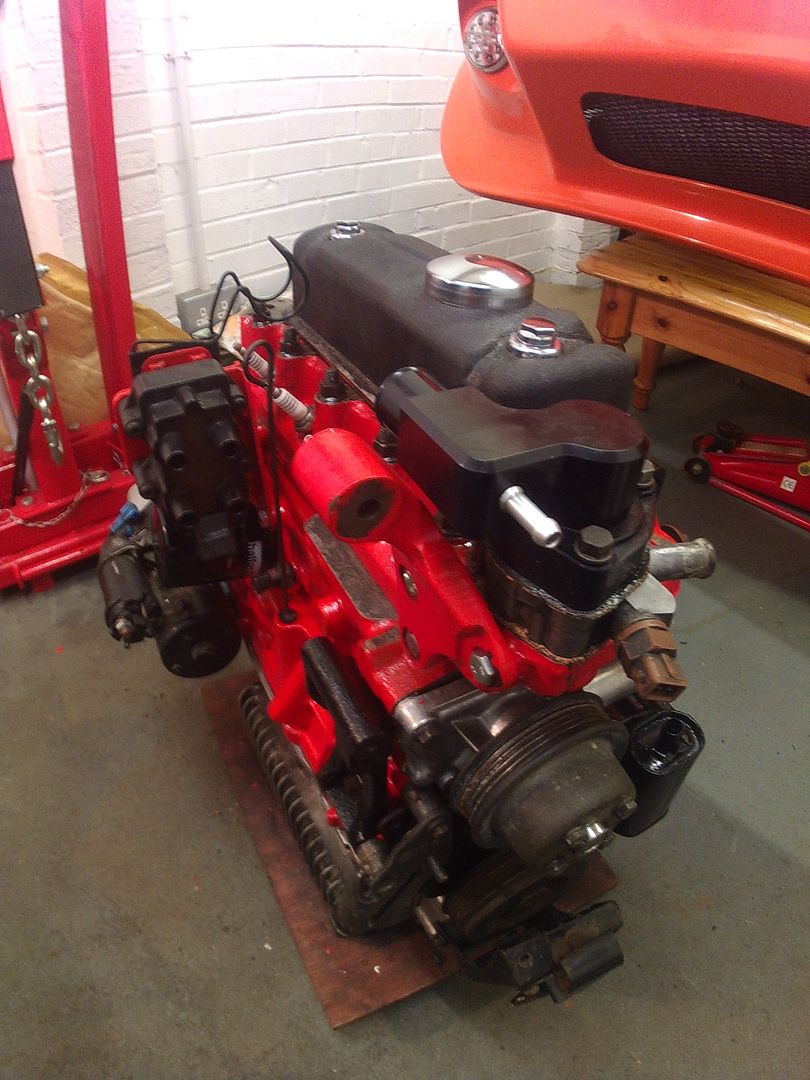
If the lightweight aerodynamic bodywork allows it to pull 6300rpm in top (2.7 diff) that's 130mph give or take (if I can get enough fuel through the injectors!).
ETA - You'll notice a different rocker cover fitted. The Metro item doesn't clear the roller rockers. |
Last modified January 3rd, 2016, 20:53:06 by Graham Bichard |
|
|
|
| |
Reply: 368 - 599 |
|
|
| Graham Bichard |
| Posted on: March 6th, 2016, 17:54:56 |
|
|
Maximum Member2
Posts: 751
|
|
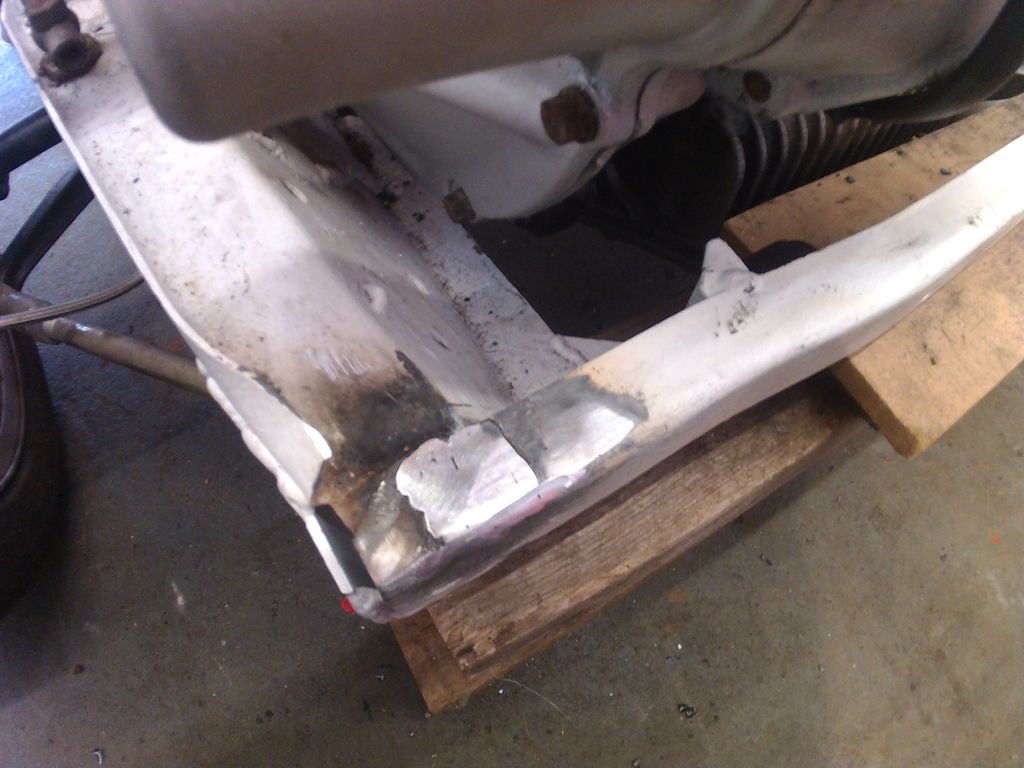
Okay - so progress has been slow of late. Why?
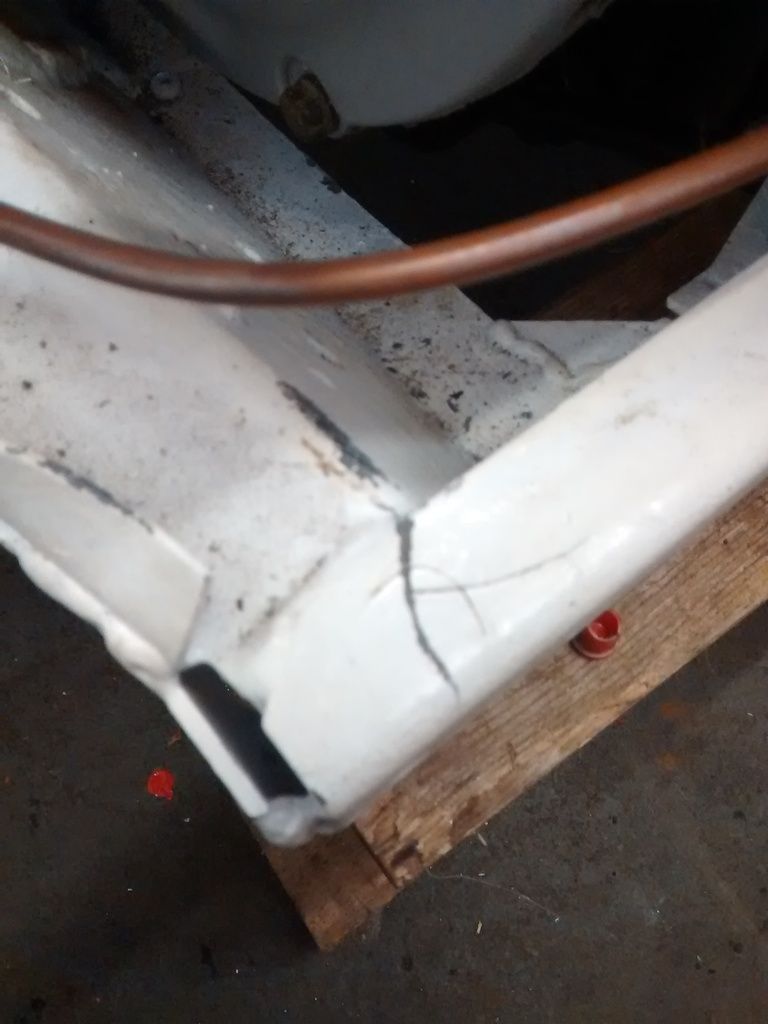
A crack in the front subframe 1" long.
I've been looking for a mobile welder for the last three weeks or more and was all but at the point of buying a little MIG, but at the last minute managed to get a guy who's coming tomorrow to weld it up.
I can only think this has occurred as I've been picking it up, moving it around the garage (it must weigh ~40+ kgs).
Hopefully after this is done I'll be able to get the shell lifted back on. |
|
|
|
| |
Reply: 369 - 599 |
|
|
| Graham Bichard |
| Posted on: March 6th, 2016, 17:58:08 |
|
|
Maximum Member2
Posts: 751
|
|
Another thing I'm now paranoid about - my hubs.
On another thread there's reference to the metro brake system leading to wayward handling and excessive bump steer.
I've got the metro four piston, vented disc set up but how do I identify if the hubs are metro or mini?

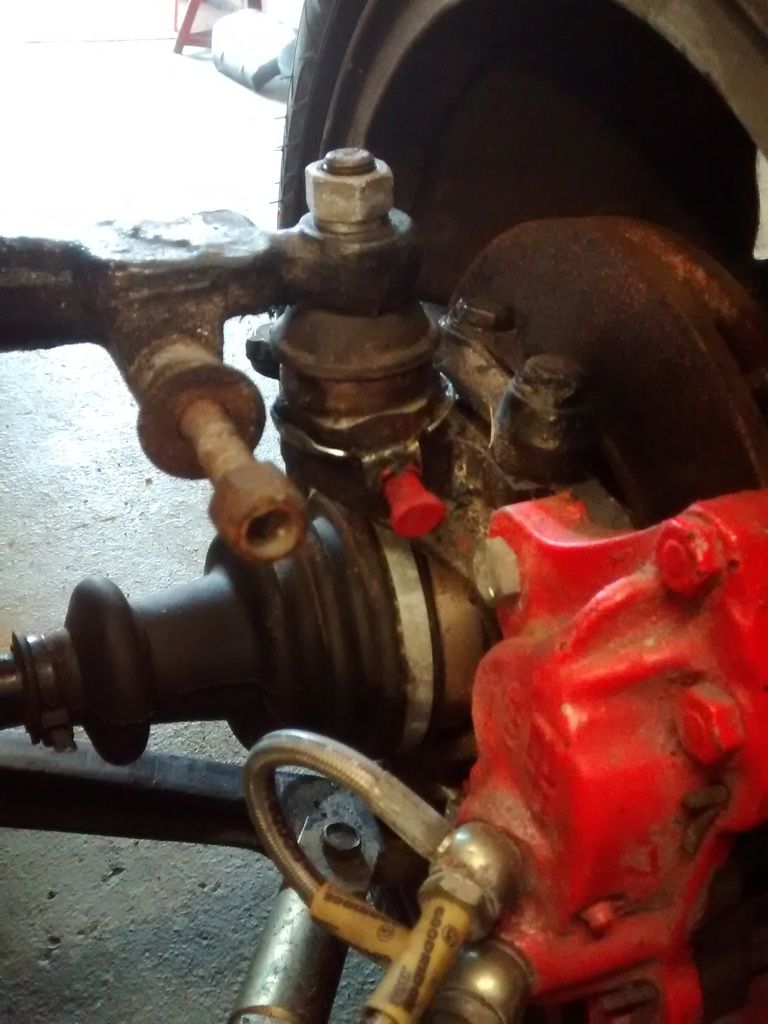
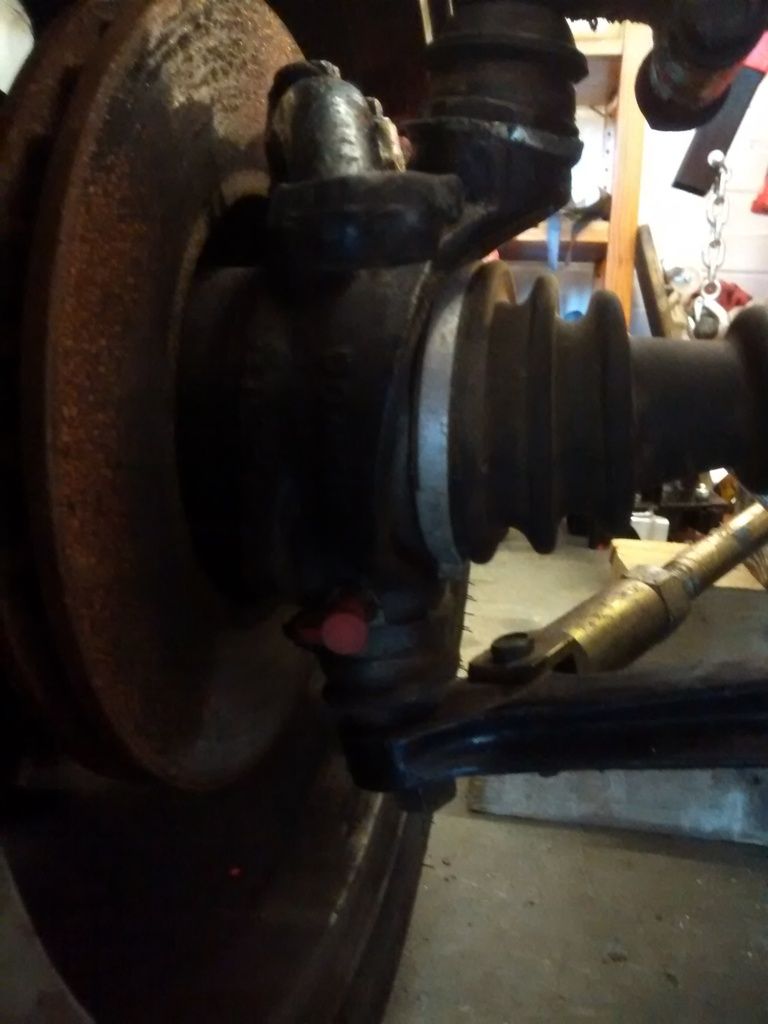
I thought the metro hubs did away with the grease nipples - if this is correct I have nipples! (Therefore mini?) |
Last modified March 6th, 2016, 18:00:59 by Graham Bichard |
|
|
|
| |
Reply: 370 - 599 |
|
|
| Pete Crudgington |
| Posted on: March 6th, 2016, 22:22:35 |
|
|
Big Member
Location: Bath
Posts: 254
Reputation: 0 (tot: ) |
|
| These are mini uprights, the metro ones have ball joints that screw into the uprights as sealed units rather than the adjustable mini style ones. |
|
|
|
| |
Reply: 371 - 599 |
|
|
| Neil KilBane |
| Posted on: March 6th, 2016, 23:50:03 |
|
|
Maximum Member2

just a little fine tuning left to do.
Location: Newtown Forbes, Ireland
Posts: 1,420
Reputation: 0 (tot: ) |
|
I think you have two right callipers !!!
Also you'll never get good brakes unless you sort out the bleed nipples. |
|
|
|
|
| |
Reply: 372 - 599 |
|
|
| jimnaylor |
| Posted on: March 9th, 2016, 20:43:40 |
|
|
Big Member

Location: Bedfordshire
Posts: 222
|
|
Those callipers certainly look like they need a lot of TLC, getting stuck bleed nipples out is one hell of a job unless they come straight out with an easy out, which they normally don't. I also agree with Neil they look like 2 RH callipers.
If you do need to change them, I'd also think about going back to a solid disc rather than vented. Because the marcos is so light, on anything less than a full race car, where you are breaking heavily every few seconds, vented discs are over kill and tend to take too long to get up to efficient brake temperature giving poor initial braking. Solid discs are a lot lighter too and reducing unsprung weight is always a benefit. |
|
|
|
| |
Reply: 373 - 599 |
|
|
| Graham Bichard |
| Posted on: March 20th, 2016, 17:01:56 |
|
|
Maximum Member2
Posts: 751
|
|
Sorry for the delay in getting back to you, but thanks for clearing up the hub issue.
Basically what's there then, is the Mini Turbo set up (apart from the two RH callipers)?
Once the front subframe is back in the car the plan was/is to set about the front end (wheel bearings, ball joints etc). These callipers would have made a good 'return' pair
Point noted about the vented disc set up Jim. I might look at the minisport four pot set up then (and start saving the pennies). anybody got any experience with them?
Thank to my missus asking around I managed to get a mobile welder to repair the (very annoying) crack in the front subframe:
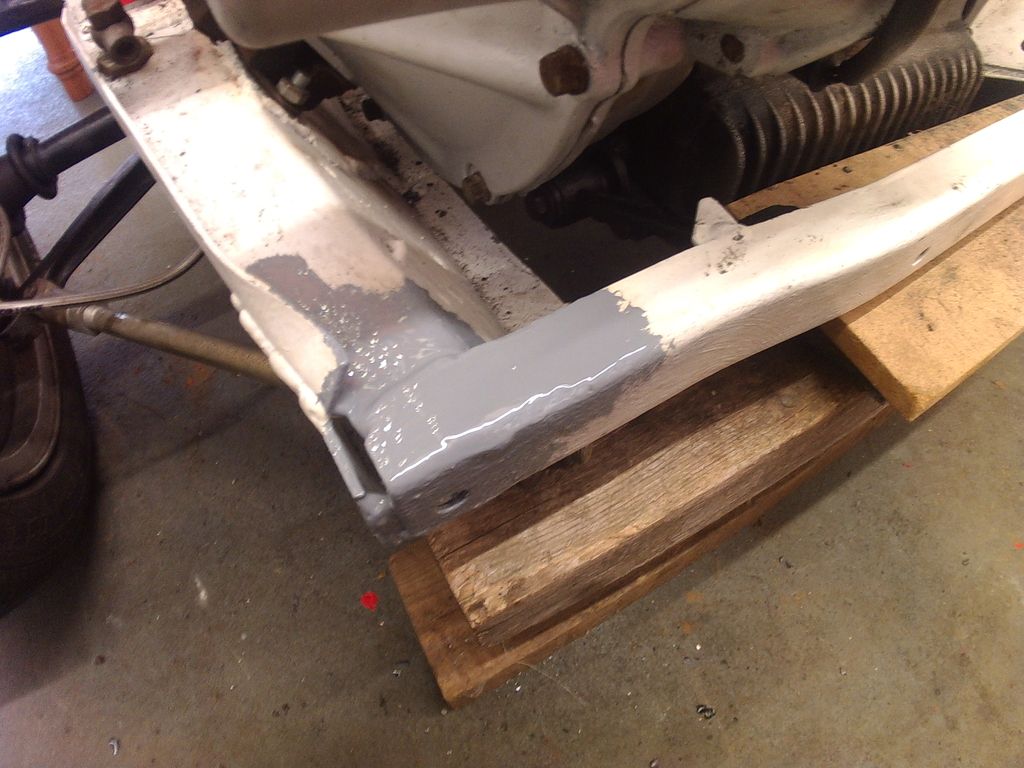
And I've managed to line the shell up with the chocked subframe/engine.
Now all I need is time and some muscle to help me lift the shell in place.
Hmm... Don't think it'll be ready for the LM Classic this year (a target I've had for the past few years). What the next 'line in the sand' I can miss?
 |
|
|
|
| |
Reply: 374 - 599 |
|
|
Pages: « ... 15, 16, 17, 18, 19, 20, 21, 22, 23, 24, 25, 26, 27, 28, 29, 30, 31, 32, 33, 34, 35 ... » : All |
|
|


 Mini Marcos Forum > General Boards > Mini Marcos > Right - join Part A to Part B etc, etc, etc
 Logged


